Brought to you by: https://www.chiefexpertsacademy.com/
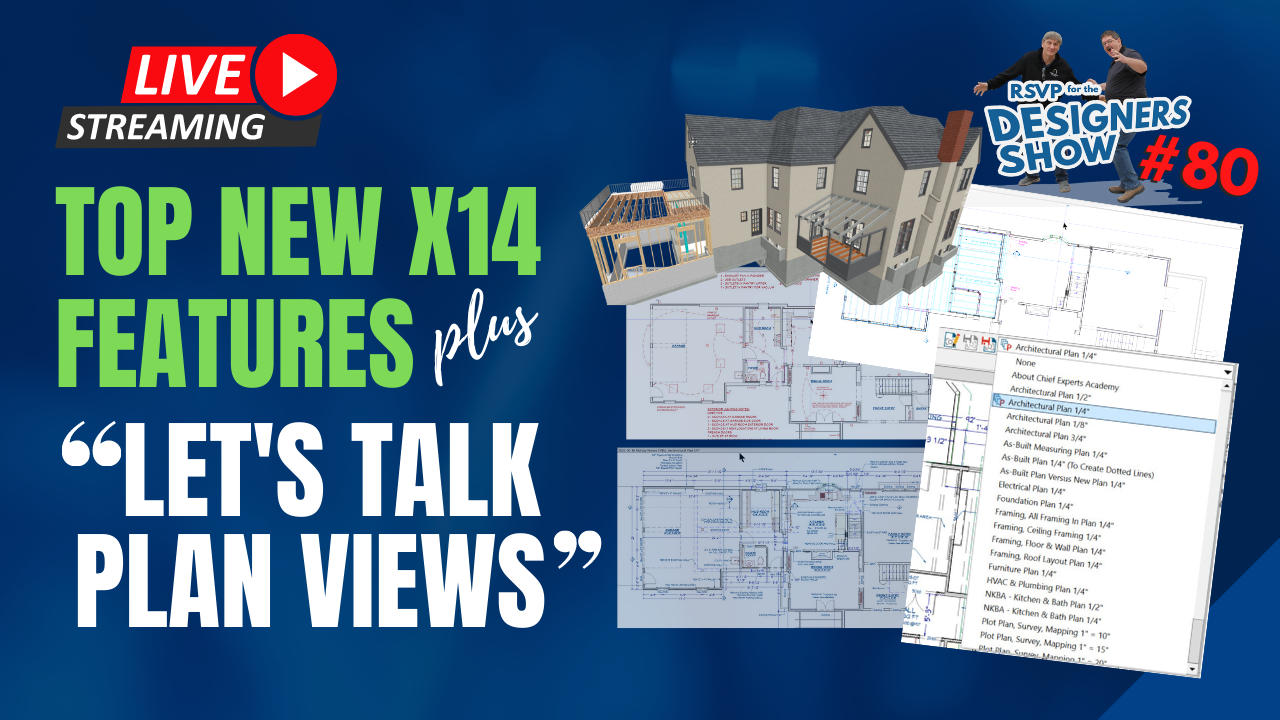
X14 has some great new features. In this session, we'll explore some of the best productivity additions as we see them.
We'll also take some time to demystify "Plan Views." This feature in Chief confuses a lot of users.
But. once you understand what "Plan Views" are and how to use them, you'll wonder how you got by without them.
Introduction 00:01
Top New X14 Features:
Predictive Feedback: Point to Point Move 04:15
CAD Block Layer Defaults 06:40
Library Painter Scoping 10:19
Copy, Paste & Explode Bay Windows 13:35
Resize Cabinet Hardware 15:36
Many Dimension Setting and Changes 17:19
Add Arrows to Text Items 22:21
Transparency in Vector View 24:26
Copy & Paste Elevation Cameras 27:02
More Camera View Options in Plan Reference 27:50
More Layout Page Linking Options 32:37
Let's Talk Plan Views:
Layout Labels 38:08
How to Think About Plan Views 40:45
Layer Sets 44:25
Default Sets 47:20
Paste & Hold View Ports 54:25
Saved Plan Views 56:44
Source Files 59:36
Linked Call Outs 1:00:20
Using Standard Defaults 1:02:14
Dan's Upcoming Classes in Virginia 1:04:13
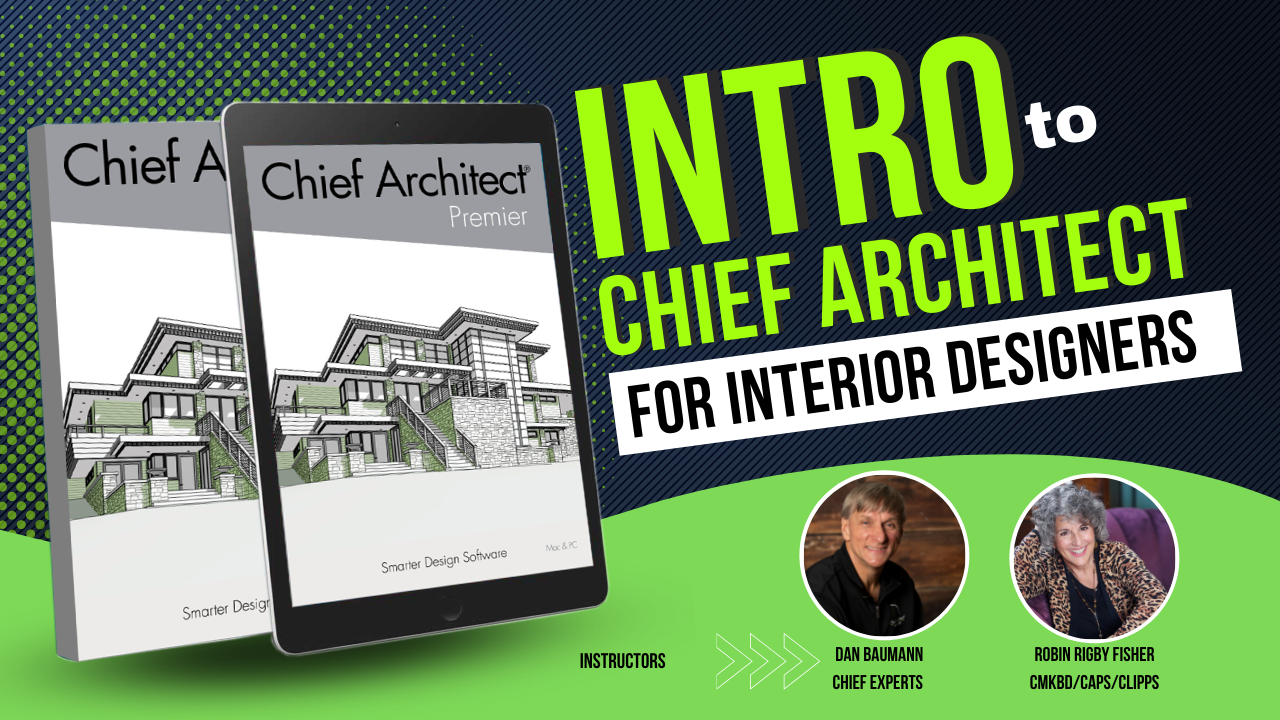
Intro to Chief Architect for Interior Designers
This course if perfect for interior designers who are new to Chief Architect.
Spend less time learning Chief Architect and Take Your Interior Design Skills to the Next Level.
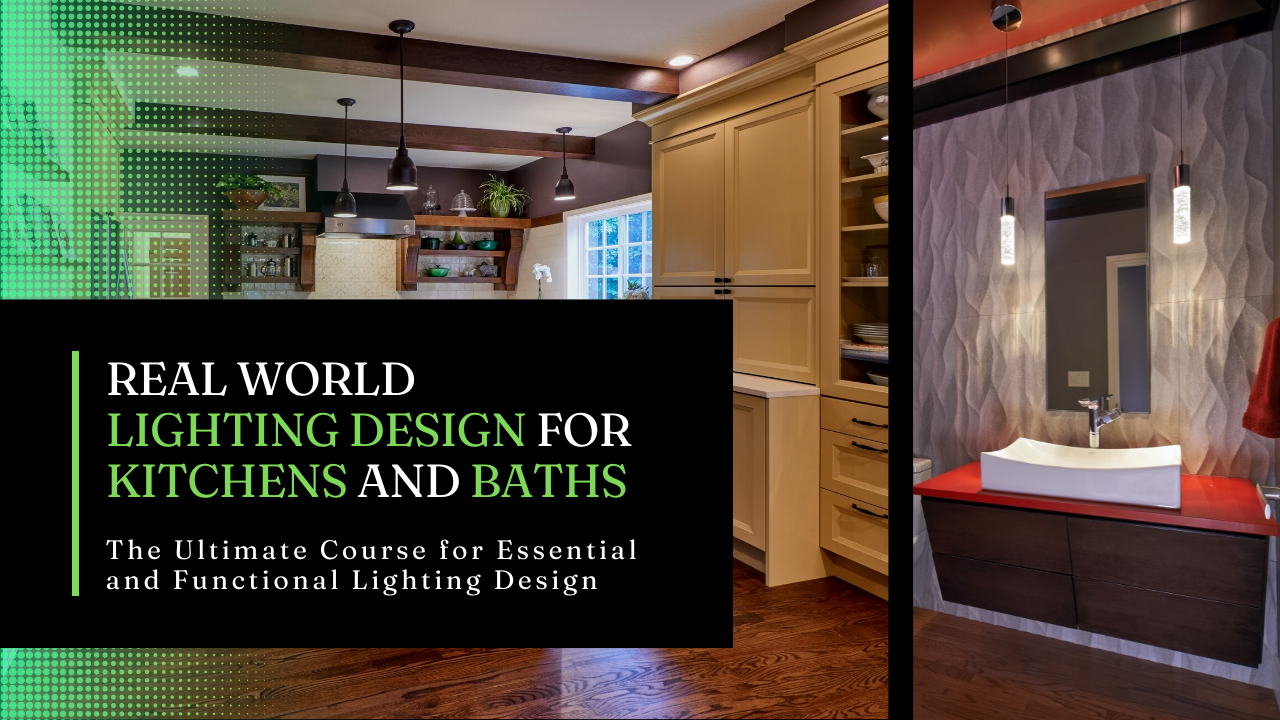
Real World Lighting Design for Kitchens and Baths
The Ultimate Course for Essential and Functional Lighting Design
Discover the best practices for determining what type of lighting is best for an amazing residential kitchens and bathrooms.
hopefully my internet will be okay i think we're live everyone hey welcome to the designer show after we're having this crazy let's get started uh fiasco where nothing was working but now it is so hi
gotta love technology uh renee asked uh do you ever have a time when it doesn't
you don't have problems and i said yeah i had that happen once um no usually it works just fine anyway
welcome everyone happy uh weekend before the fourth of july and i hope
everybody's looking forward to a nice long weekend and relaxing out there so we got a bunch of people logging in
thanks for joining us today we'll look forward to sharing some information here about x14 john renee how you doing doing
great pretty good pretty good you got a big crowd today cool really all right we'll
take it it's a good topic i think you know all the new things in x-14 there's so
much information out there that uh it's hard to keep up with everything but you know i just want to share some of my
favorite new features and i'm sure you guys have some new features we'll share and then we'll talk a little bit about uh plan
views because that's a topic that tends to confuse the heck out of everybody
so although i think i finally have it figured out after all these years
it is a little tricky and renee i know you treat plan views a bit differently than john and i do so
if we have time maybe we'll talk about that a little bit so you guys got anything you want to add here
i feel like we could kill a couple of these sessions on x 14. maybe we should do another couple yeah
about a day a day yeah exactly the uh program does have a lot of new
features in it and really they've really done some really cool things and they continue to do cool things so
um let's hope that they continue that let's see i am getting
i gotta go do something here um
i'm in the right browser okay i'm just gonna show my screen here real quick it's not gonna be exactly
what we want to see uh let me share [Music]
my screen got it we haven't done this for a month and it's like i gotta remember where the buttons are
and we pretty much took the month of june off between uh being a little bit on
vacation and then covet and everything else going on it was kind of crazy uh just ignore this on my screen hopefully
you guys are seeing the chat there uh on the screen where uh
you're viewing this there's a little thing here get the x14 update pdf and then you can check out what's new on the
chief architect page and if you're not on this page so you're watching a video somewhere and you don't
see these links just go to chiefarchitect.com and go to
you're going to go to the where it says um right here x14 update stuff available
now and you click on that and that's going to take you to this page where they list all sorts of things about the
new features in chief architect or next 14 and if you scroll down and i did click
on the wrong page here it is no this is right so you'll see this image here of the little house and you'll see
a new feature summary title and right below that's the link to the pdf that i'm talking about so when
you click on that that's going to open up this pdf and that's going to list all the new features in x14 i spent my
morning going through this up the second time i've done that um it seems like they've changed some things and added
some things since they released x14 or i'm just forgetting things anyway there's a lot
of cool things here we don't have nearly enough time to go through even a poor portion of them in it and give them
really what the attention they deserve but um again i've picked out a few that
i want to share that i've highlighted here in my pdf so i'm going to get started i'm just
going to run through mine really quick because i picked up some goodies and i prepared a little demo here and then
john and renee um i'm going to let you guys show some of your new features and if
people have ques if you guys have questions um as we're doing this by all means type them in so i'm going to get started here
i'm just going to go full screen you don't need to see our mugs while we do this so let's do that all right so i'm in x14
and let's start with number one this is probably my favorite of all of the stupid little things that are that
they've done i like this one the best it's when you do a point-to-point move okay so you've got
this function down here point-to-point move okay and
when you click on that you click point-to-point move and you highlight it the thing you want to move and then you
move it you see how the you can see what you're moving now never used to be able to do that you can
see where you're moving it from where you're moving it to and then you click where you want to put it so
uh that i like that a lot because you can do that with virtually anything so anything you highlight hit point to
point and where you want to move it from where you want to move it to you can now see all of the items move with that i
think that is really cool and it's really a nice addition so one thing
i'm going to show you real quick though this is not in the updates this is just a thing that i tell everybody let's set
the hot key for s for snap so what you would do i don't ever push the point to point
button all i do is push push the s key on my keyboard to activate the snap so
go into your pull down menu tools toolbars and hotkeys and hit customize
hotkeys tools toolbars and hotkeys customize hotkeys
okay when you get into customized hotkeys you're going to type in
point to point
to if i could spell point all right and you're going to come up with this little item right here
what you're going to do is go down here and type in an s right here and then hit a sign
you're going to overwrite is it is this one that overwrites the arc
i think that's e whatever whatever it says just say okay to it and then click okay next time you
want to use this function down here all you have to do is push your s key and that'll have that function available to
you one of the nicest little tips shortcuts that you'll use it'll save you a ton of time of clicking on that icon
all day long so that's your predictive feedback like that a lot let's just keep going here number two there's one here that i was
playing with that i couldn't quite figure out so i'm not going to really get into it other
than to say that first of all chief did finally fixed
i don't know if it's called kerning or whatever it is on the text the the bloop the chief architect blueprint font i
created that font many many years ago sold it to chief they put it in the program and they did something to screw
it up but they finally fixed it again so that the text centers in a box and when you attach arrows to it it works fine
so i have to um in my template i had adjusted for that under attributes where i put a one inch
space above the text by default we can now set that back to zero and the text will now
be centered in the box again finally that that one drove me nuts for a long time
um i told them about that years ago and they finally got to it the uh
thing that i was talking about the cad block layer defaults and again if you're looking at the pdf again i'm skipping
past a lot of things uh let me get back up to the top of the page
okay so it's just kind of running down the page here's your predictive edit feedback
cad block layer default set set defaults not quite sure what this means
um i was trying to figure it out that's where i just remembered and discovered that she fixed
the text but the thing about this and this is not new to x14 is when you want to edit a block a block is a group of
items put together you want to edit that you have two options down here now you can unblock it
and edit it or you can edit the cad items with you can edit the blocked items within the block without
unblocking it and this is really a cool feature in chief because it gives you so much flexibility
to change items in your plan without ungrouping things so if you have
all things grouped and set up really nicely you can now change the things here and
when you are done making those changes when you close that it's going to you want to save
your changes in this cad box and i'll hit sure and that's going to ask you
let's say for example you're changing the size of a bunch of outlets in your plan an outlet is a cad block okay so
you go change that and what you could do in chief now is say if i made that outlet symbol smaller i could say change
every outlet in my plan to the new the way i've done the cad block or i could say only do this one
and that is really cool so it gives you a lot of flexibility to change a lot of things quickly in your plan i'm not
going to get into that we just don't have time but it's really a nice feature and i'm really glad they did that so i'm
going to not save that all right so now i'm back to my plan you guys know what that means on that pdf by
any chance cad block detail layer set defaults
i'm not quite sure what that means i've had to figure it out i haven't messed with it much but it seems like it would
when you when you put something into a cad block it changed it to the cad default
right right so is it saying that we can tell it what we
want it to default to now we can set the defaults within the cad block itself possibly again i'm gonna have to come
back to that another day um i just i'm gonna have to find some tutorial on or something
let you know later all right let's go to the next item this one is really cool
this used to drive me nuts what used to drive me nuts is i put some stools at a counter and then i wanted to
change them all out to a different stool you can't just group select a bunch of stools
and change them out to something else at least you never used to be able to okay now in x-14 we can do it really really
easily with the thing called library painters scoping all right so if i go in
and let's go just take a 3d view of this
item right here now i want to replace all those stools with a different stool so this is a freestanding symbol
so i'm going to click on that first stool and first of all i'm going to go to my library and open my library
i'm just going to type in stool okay search for some stools and i want to replace uh the stools with the back
you know with a back on it okay so i want that to be part of my deal so what all i have to do is once i
highlight this here when i go to the uh 3d view you'll see i can click i could
click on top of the stool and paste a new one after i click this little button down here
look for these little icons down here and there's a thing here called toggle library
library replacement mode so i would click on that and you'll see you get these other buttons highlighted
so now what i could do is i could change just one part of an object in other words i
could change one handle on one of the drawers on that cabinet or i could change all the objects in a room which
means i could change all those stools at once or i could change all the knobs at once on that object i could change
everything on this floor or everything in the entire plan so it's the same way it works for changing textures and
things like that so i would go here and i would click let's just change everything in this room to the new stool
and when i click i've got a whole bunch of new stools now so used to be i had to do one and then
replicate them again and it was real pain in the butt let's take that one step further and let's change
one of these let's change these knobs to something else so let's just go type in
knob for a knob and i want to put that knob on one of
the drawers not all of the drawers so now i would just click on this i'm going to click on
object which means each drawer separately then i can click on one of those drawers
let's see am i doing this right how come it's not doing it i probably got the wrong kind of a knob don't i
let's go find this knob there we go that's the right kind of knob
and i could put that there i did the whole object let's go and do that let's just do one drawer so now i can
see i can change out just one drawer so that's pretty cool so you could put you know if you have an eclectic
cabinet you could put different knobs on every drawer so there you go so that's pretty cool i really like that a lot
nice new feature it used to be we'd have to open the cabinet selected i don't think we could
change separate the hardware separately on a cabinet could we i don't remember i don't think so
all right uh my next one is um copy and paste
and explode bay windows all right i still hate chiefs bay windows they're not really
bay windows they're walls with windows in them um
but the thing that used to drive me nuts okay you could never copy it open a bay
window and paste it somewhere else so
so that is the ability just the ability to copy and paste the damn thing is really quite nice because we could never
do that before so you know you've had how often you have a project that has more in one bay window you'd have to go
spec it multiple times on your project i don't i think there was times when i would use edit layout
to copy and paste a bay window i think that worked but now we can now we still can't save
that bay window into a library so okay that's you know not the end of the world but we can at least copy and
paste it now again chief's not doing you know the bay window the way a bay window really is you
tip the window up into an opening you can put casing on that opening if you wanted to
it's still walls within a bay but it's a big improvement so that's a
nice feature the other thing is you can now explode bay windows okay so you've
got this little icon here which means you can now turn that into walls
and windows okay what does it do with this
opening here i have not tried this yet be perfectly it looks like it leaves the walls
up there okay so i can i can explode it and you can you know within the bay window dialogue you can change the wall
type and all of that so it looks a little better um there are some nice settings there that it gets you closer to looking like
a bay window we still can't put automatic bottoms or automatic tops on them but you know
we have to do some work there anyway that's a kind of a nice little thing all right next item on my list
is um the ability to get back to my floor plan here
resize cabinet hardware this is a little thing like now big deal however it's kind of
cool when you look at it and it relates back to the library print painter thing
so let's say i want to put some handles on that door on these doors but i want the handles to be a little
bit different size so i can go into the i do have to go into the cabinet here
and i'm going to go to the doors and i'm going to go to the door drawer section here and i'm going to go to door
handle i'm going to replace the door handles so i could go here and i'm going to put a let's get a library option item
here and let's just go find a handle
see what comes up i'm just going to grab the first thing i see and click ok
all right that's some pretty big nasty handles for those cabinet doors so now to despair i can now edit those
handles because it'll open this dialog i could say let's make those handles one inch wide five inches tall one inch deep
and there you go and i could also reset where they are i could rotate them and
so you've got just a lot of flexibility now to put the hardware on your cabinets
with more control i like that a lot that's a nice little feature
and have you guys seen that one yet
i don't know maybe you have okay i got i've got 10 things here let's get to number six
many dimension settings and changes all right so as you go through the list here i kind of highlighted this whole
section um of dimensions i mean there's a lot of things here that i'm just not going to
get to there's some nice framing things um oh this is okay i'll come back to this
one a little bit uh dimensions
stack frantic stacked fractions um
just a ton of control in dimensions they've done a lot of nice things with dimensions in x14 so if i go into
chief you'll notice see how i can display the dimensions now as a fraction like that
i think that looks really nice so what you would do to make some of those changes and i'll just briefly touch on this so in my
architectural dimensions i'm just going to double click on the ruler icon okay i could go into my defaults going through
the little wrench icon i'm just going to click here double click on that so whatever you have displaying
on this list when you go there you'll open up the defaults for that that that particular
set of settings so under general we've got different rounding methods
but they you'll notice that they've changed the way you can turn on locate
objects now and they've given you the ability to locate all the different dimensioning tools
differently so i could locate things with my end and dimension differently than my manual
dimensions okay so you can turn different options on and off so if i didn't want to ever
pick up anything except walls in my end to end dimensions i'm going to make sure i turn everything else off so
that i only get walls in my end to end dimensions all right so you again you have that
option to do these different things you can also do some all options primary you know side secondary centers
so all these options were in previous versions they were just kind of a on
this big screen that looked really confusing i think this is a much straight more straightforward way to do
it so when you locate things on the interior on the auto exterior tools
okay and then when we get down to the primary format this is where you would set your
your fractions your dimensions so they show up like this okay so if i go
horizontal it'll be like it used to be if i go diagonal
or vertical see how you can change that and then you can change the size of the fractions so
if i make my fractions a lot bigger you'll see they stick out a lot more take up a lot more room maybe you want
to make them a little smaller depending on the scale you're printing at you want to be careful with that
okay so if you're printing a quarter inch plan at eighth inch you're not going to read those very well
still kind of keep that in mind um so so nice new set i i like those settings
there i just think they're really nice can you go to extensions once before you
leave that absolutely what do you want to see an extension that's just something i looked saw today
i'm not sure this is where to do it but there's an option to change multiple
extension lines at one time how far they're coming off your object you're dimensioning
i and that's that doesn't look like the screen i saw so um i think that's going to be part of a
individual dimension isn't it under um either that or you go select the extensions and then do it
after there's because it was looked to me like it was a modifying thing okay modifying the extensions
anyway so here i can select one if i hold my control key down i can groups
that i could do that or i can just select them all with my shift key so now i can change that set of
dimensions um as a group okay that's probably that's probably it right there yeah i can probably do a
whole bunch of them at once too yeah so again if i go to oh no
nope it's not going to let me i'm going to have to do one string at a time um look at that again
layer secondary format primary format
yes it looks like we have to do them individually
so i could i could do what i saw yeah okay
but again they keep adding more and more functionality these kinds of things which is really nice
um i haven't played with it enough to see
because sometimes there's be nice to have another string in here that does just certain things so i'm gonna look at
that a little bit closer um okay so that's a bit of dimensioning
um number seven add arrows to text items this is really cool so you know how you can you can
do this you can add an arrow and then type your text and then click okay all right that's cool so now what you
could do is you don't even have to add the arrow first and you don't have to go click on the arrow icon you just click
on the edge you want to arrow and you'll see a little diamond sticking out from that edge just grab that diamond and
pull on it and that'll add an arrow so you just click on the edge grab the diamond so i always do these joist
directions that look like that it's way easier than it used to be if you drag the drag the diamond with
your right mouse button you can make a two segment line oh look at that
more more can you just keep going yep yep we'll confuse the hell out of that carpenter there you go
anyway that's cool yeah that's just like drawing any other line in chief again everything we're doing is the line when
you draw something with your right mouse button you're just going to continue drawing you dealt with walls lines and arrows so good good catch john
i like that that is nice because sometimes you do want to add multiple segments just hit escape when you're done and
you'll be good to go that's a simple little thing but really
can save a bunch of time you don't have to keep go up and click on the arrow icon or push this hotkey
is there a way to make it so you can do it as an arc right from the get-go uh no but you can pull a line out and
then right click for your alt behavior yeah yeah
right mouse button is what i did that with and if you hold your control key down while you do that you can bend it
freehand it's not going to what you would what you would do is start just with a single line
short single line and then grab the diamond and use your right mouse button to drag it around where you want it right then you use your yeah i'd send a
suggestion to chief to change that so we could get it in one action let's see well maybe we'll talk to him in coeur
d'alene maybe of course that's not the end of the world to do that but you're right
um i've skipped past one transparency in vector view i guess i went too quick there uh this is another little thing
but i really like it because sometimes i want to be able to show my clients um
elements in a room that aren't rendered like this i want to show more of the vector just the math
you know what shows the lines better so when i switch to a vector view here we can now see through the glass
through anything that's got transparency attached to it we never used to be able to do that um in a vector view so i
think that's just a nice little thing that makes it a little easier to short to do our presentations a little bit better
so something to be aware of there did they add lines to the standard camera in 14 or 13 i
remember lines you mean the uh under the uh when we're going to deadline
camera now yeah you can add lines to any of the cameras right um it used to only be under
watercolor originally right and then they started adding it to all of the other cameras
um technical and vector are nothing but lines anyway so it's
just the watercolor glass house clay there you can add the line drawing on
top and the standard now and the standard yep so just a nice little show
kind of along the same realm there they added an alpha slider in your
preferences to color fill which that's a big one for me yeah and uh i think that has been there
a while no that's that's x 14. is that brand new in x4 yeah i'm thinking something now
you can have uh your selection handles you know be solid lines and and 100 opaque versus
your fill being um transparent and that's it's in preferences under colors under
appearances and colors where
edit preferences and then appearance panel and then colors
under colors subpanel yeah and then so if you click on your selection fill
now you have a um an opacity slider oh look at that yeah well that is cool
never never noticed that it's a little gem that's hidden
so so when you do this you're going to see through a little bit better nice
all right um where was i 7 did that eight i have as
this again silly little thing but you can now copy and paste elevation cameras you never used to be able to do that um
and that's really nice to be able to do from one plan to the next i you know i just was working on a plan
with my son and he accidentally deleted all the elevation cameras on the plan he was working on
fortunately we were able to go back to the previous version copy the elevation cameras paste them in a new plan
done and have to redo everything so it's just you never had the copy button
available in previous versions just i don't think you did um
so and then everything that's you've got in that camera will be saved that will be done in that copy
all right um nine more camera view options and plan reference
what does that mean now i don't really use this feature but i might start using it now because
uh it could really work so if i were to go into a 3d view of this
and actually i have a camera i already saved for that let's go into our our display arm
we'll call that again our project browser thank you and if i go to uh
cameras and i look here where i've saved the camera so this is really also really
nice so you can now click on over here in your project browser was this in 13
if it was i missed it um i don't remember all of that that it probably was i just didn't catch it but
here i've got it as built versus new so i've taken this let's consider what i've just been showing you and as built and
then here's the new where i've got an addition attached to the as built so i can now go in if i click on the
floor numbers right here and you'll see this thing down here
new features okay so what we can do with this down arrow is you can select a plan that you
want to use choose an existing plan that you've drawn okay and what kind of view do you want
it to be so you've got all the different view um
i'm going to give you all the plan views here i haven't even played with that but look at that um but you've got more
cameras now what do we used to have just a glass house and was that it
that we had before yeah so now we've got so now i could go glass house this is
all we used to get just that nothing else okay so now you can see what's new on
this plan versus the old one so this is the plan i'm in and i'm actually overlaying a different
plan on top of it by going here and clicking this option down here
but now i can also go standard i can make it rendered so now it matches the
rendering here so you can't even tell they're different now so i've got two plans coming together looks like one but they're two separate
plans okay um then i could go back here i can also go do technical so now you
can see what you know what the difference is this is the existing plan this is the new stuff
and then finally i could go down here to the last one which is the vector view
and that just shows up a little bit differently not a big deal
okay so little thing will you use it maybe i do know people
that do use that i think i'm going to start using i just saw that today i think i'm really going to start using that it is nice
before all you had was a glass house it's like okay so what that didn't help
i think it'll make it easier for the for my clients to illustrate to their building departments what's going to
happen exactly i think we have it in um cross-section views now too now i can't
remember oh yeah that would be kind of nice too yeah so again
you can truly do an as built and an addition separate from each other yeah if you want to yeah with a lot more
clarity now so if i go again if i go pick out a plan so let's say here's the new feature
yeah new features demo so this is one i've drawn that edition on see how it
shows my interior walls here as being new and the addition is being new this is usable now because now i can
actually make this all part you know one plan again will i use it much i don't know yet um that's to be determined so if i
render it standard it looks a lot like one plan if i go to technical illustration now we can see
again it really highlights what's new and what's existing and then down here
last one vector view same kind of deal so it just shows more in line it shows a
little bit brighter here anyway i hope that helps i think that's really some a nice
feature so if i go glass house on the existing and then now you can see because the
original plan i was working on is is laid on top of the existing it doesn't
you can't really see the difference but so we can also switch the camera views
for the the plan we have open okay so now here you can kind of show in
color so you got a lot of flexibility here with how you can show things again silly little thing okay let me
move on last thing that i really like um is on the layout page so again i've got
a link here so at any time you can use the plain text tool this tool right here
you can type text in your plan and you can add a link to that text
so you have the text you see on your plan and then the link you would use when you want to open the link to that
you can open a web page you can open a file on your computer so when you see this icon down here
it means it's linked to something there's a link in there when i click on that it's going to open up the plan that
i want to show you it's a bigger plan so it takes a second
so i'm opening up a layout page and i'm going to use this to show you a little bit of plan view stuff so what do you guys got on your list
well i got a few things but if renee's game i think we should move on to save plan views
because we only have like less than a half an hour left yep yep so but first let me cover this one last thing so when
you have a layout every viewport on your layout is linked to a plan somewhere unless of course
you've just copied and pasted a picture onto the thing so when i click on this floor plan
i can now open its dialog and you're going to see this looks a little different than it used to
link it says link to view okay linked view and what i can do is say you know if i
looked at this and i the view name is my architectural plan quarter inch let's say you don't i really want to show my
electrical plan in that view so what i could do is go relink it
to um a different view in that plan so if i choose electrical now it's going to show
up differently on my floor plan not only that but i can also go here and relink it to a different plan
at the same time so again don't be doing separate electrical plans from
your plan everything needs to be drawn in one plan and use plan views to just define the different views but you
could switch it to a different plan if you wanted to which is this is new this is really nice i like that
um although actually it's not necessarily new what you just used to do a little bit differently
and then when i click ok and i click ok you see that now the electrical plan will show up here
instead of oh i didn't do electrical on the second floor
let's go change the floor too so i go here and let's go make it the first floor
that's where the most that's where the electrical was done so same viewport i just changed what shows up in it
okay so that's a new thing uh in uh
x14 is the way you do this you'll also see here that you have what's called the box scale
or the viewport scale um and you can change that from this dialog
now as well as you can still use the little ruler icon
here to change the the scale of the box that you have you can make it whatever
scale you want or no scale all right so
again it's not a big thing but it's just a little different so i thought i'd show that to you guys there's there's more
though dan click on that again and go back to that linked view
you can also link it to to the different camera or a detail
go to the you are correct and that is really also another cool thing so that was where's that again
yeah so if it's a 3d view yeah here's your project you can't get
to anything you can look at any plan any yeah any viewport can be linked to any
view any plan any so if i wanted to link that view to a camera
let's just do that here see what comes up
i have some pretty wild compounding link things i've done before
and if you have the labels set up right it'll automatically label it with the right schedule and the right page
yeah and x14 gave us the ability to reference floors in macros so you don't actually
need to have a save plan view that uh saved for every floor because if you write a custom label
macro like i have it in my layout labels that it will automatically pull what floor it
is unless it's labeled foundation or framing and then it doesn't label the floor so
you can do some pretty cool stuff with the new macro designations with floors in
in x-14 what is my what did i do
i'm stuck in a menu here it's giving you yeah you gotta pick something what am i picking um just press
yeah framing it's saying it's missing one of your sets that you're referencing i think um
i just want to get out of here you just press okay i'm pushing okay or cancel
nothing yeah you know what it's an infinite loop i got stuck in this once all right here we go let's get
out of here start over all right um i hit undo there and something wacko happened i'm not sure
what it was uh let me get back into that plan all right so john why don't you explain
what plan views are oh thanks dan [Laughter]
let's go to this one though this this has to do with the labels um alan got stuck on this
oh okay go ahead you if you go to the go to the plan view and
opener that the viewport
and go to the label for it i'm reopening it right now just give me a second here
i had even done this a half a dozen times and came back to it another time and lost it couldn't figure out where it was
what do we want to do so just don't click on the viewport and go to label
and go to label and then go to click on call out use call out and link yeah go click
on that and then here you'll have a list of things the call out label
is set up here you know that what goes inside the circle is set up here but the
text that goes on the line is set up in attributes so go click on attributes
and this will this is where you set up what you want above and below the line for the call out for a viewport label
god i haven't even looked at this yet but not the text above line that's what would go above the line
text below line is what goes on this we could do a whole another session on this this can get really complicated
very powerful but this could be automatic now and it will yeah you know what we see
right here will be automatic with your viewports and it'll also keep your page numbering
up to date right but architectural plan quarter inch and quarter inch equals one foot is set up right here in attributes
right so this is three the three and the circle is set up under call out
okay so this is my plan view right that's where that text is coming
from whenever your cat detail or your picture or right whatever and then this is the scale i've sent it
to the layout on so that's putting in there automatically um that's cool i like this i'm gonna have to play with
this i've not even been in this menu yet reference so we're using some macros
here it looks like okay all right
very cool all right again we don't have a lot of time here so can't really spend much
time on this but that's nice i i don't know if that helped alan or not
but here's here's a here's a question to start off start us off on save plan views okay
plan view is great i still have some issues with text from one plan view showing up unwanted on another plan view
where turning it off affects both plans i fixed that with text layers that are unique to the plan
view foundation text basement text main floor text floor 1 framing text right or
is this right or wrong did it work
that is right
is the exact philosophy i used for all of my plan views be perfectly honest so
i wanted to make um my plan views
as simple as possible to understand all right
um for me it works great and i john you you've said you like the way i did it
too rene you're doing yours differently i said it worked
perfect then it's right well let me show you a little bit about how that how that happens here so
the way you think about plan views is if you had a
plan on your desk that was printed out and you were looking through the pages
those are plan views what are the different plans you're looking at or think of it as vellum you've got the
floor plan view and then you stick it on top and you do that and you add the electrical you stick another page on top
and you do the framing those are all planned views so just in its simplest sense that's all we're
really trying to do is make that simple you always
always do your entire plan in one plan with the exception of as
built-in options okay in other words when you're working on a plan
everything gets done in one plan file you don't have separate plan files for
the plumbing and electrical and heating again i'll tell my story i always tell
about this years ago i went in the contractor's office we needed some help fixing up a plan for
a big kitchen that they were working on a real nice plan the person had
created the plan created a demo plan did a copy of it added the cabinets did a copy of that
added all the framing did a copy that all the added all the electrical and notes like that did a copy of that
adding all the furniture and things like that had five or six different plans for the same project okay
so in instead of me having to go in and change one plan
to make the changes he wanted i had to change six separate plans all right don't do that if you're
finding yourself do that you call me and i'll help you figure out what not to do all right because you're wasting a
boatload of time uh the contractor on this particular case i explained what happened he goes oh that's why it took
her so long to finish the plans all the time and she did a great set of plans she just didn't understand layers layers are
an integral part of plan views okay and we also have a thing here called
defaults and then we have this drop down here called plan views now my toolbar is set
up with the extended tool configuration okay the
extended tool configuration that's why you see more icons and you see all three of these dropdowns all right
that's that's the way that i've set mine up so when i go ahead john
i'm just going to say go through what you just did there you you had changed it to all layers on
and then it kind of messed up your saved plan views so when you went back to fix
it you went back to the safe plan view so the way i've set mine up here is if you
look at any of these lists they're exactly the same okay with the exception of these a
couple different layers here layers all layers off and on you won't find that on this list or this
list all right because you don't need them for that i only use these when i'm looking for something a plan and i can't
find it i go to all my layers on and then i go look for the item i'm
looking for first i'll hit select all and hit make sure this is a check mark and now everything that's in my plan
will be on okay everything so if i can't find it now
all right it's not in my plan it's gone so i'm gonna have to redraw it or redo it
and then after i'm done using that all i do is go back here and click this to re
do this so everything gets put back in the same box all right so this is our layers this is what we
use to turn things on and off in our plan to use different size text for labels
um different size text for other elements in our plan um this is what we use to
um you know show framing versus electrical so we just turn all the different
elements in our plan on and off and chief allows us to set up groups of layers called layer sets where
everything's predetermined all right so in other words so if i were to go look
at here and i switch this to framing you're going to notice that
all of my cabinets are turned off but all my framing would be turned on
if i switch this to cabinets you'll notice that all my cabinets are turned on
kba so now my cabinet things are turned on all my framing stuff is turned off so that's how we can create these groups of
items turned on and off each of those can have different line styles
we can have different line weights we can have different text sizes associated with the different
views that we're working on so here when i say i have a view that's
an architectural plan that's half inch versus a quarter inch the only really
difference between those two is the size of the text that get used on labels
and the door labels window labels cabinet labels things like that so that's really the big difference between
those really nothing else is turned on or off so when i also when i type text it's going to be a different size
so that's layers layers are control what you see on the screen defaults
this list right here so when i click on that little wrench right there
default sets control what things are going to be when you add
them to your plan so when i when i'm on my architectural plan and i'm going to dimension
what size do i want my dimensions to be what do i want them to look like what kind of arrowheads do i want when i add
text what layer do i want it to be on all of that good stuff so these things are all pre-set up
for the type of plan that i'm trying to create so if i'm trying to create an electrical
plan when i type electrical when i type notes from my electrical plan on the screen
i want it to be on the right layer so when i show my electrical items you
know from up here remember i showed you electrical the electrical text will be turned on
right dan i got it can i interrupt you for a second yeah go ahead so default sets kind of became
obsolete with the exception of different print sizes because you could set up all
your defaults in an electrical save plan view now and you wouldn't need an electrical default set
unless it was print size let me ask you this okay because i know we we haven't really
your template's a lot different than mine when it comes to the the this uh when it comes to plan views yeah um
uh you know we haven't talked about this yet so i mean we don't have time to talk about it today right here yeah
this is a big topic right yeah yeah uh it is a big topic but isn't this list of items the same that we get from over
here when we go to our let me go to where am i looking for i'm
looking for a plan yeah i mean my templates have only the one required default set you don't
actually need any default sets um unless you just want them to be able to switch your
print size on the fly all right so isn't this list the same as the list
that comes from up here yeah so if you switch to a saved plan view workflow you no longer need it's not required that
you have any default sets except for one all right we're going to talk about that
not today though yeah yeah you can you can take what dan's done and plug it
in here and it's doing basically the same thing that you've done yeah i had to do it this way we didn't have a
choice when i set this template up yeah right so so basically if
if you think of saved plan views as default sets plus then add in that we
can save a zoom level or we can save a floor reference or we can save a reference
file in save plan views and that's just on top of what default sets give you so
yeah all right well we'll come back to that renee um and we will have that discussion at some point here because i
um i've been intrigued by the way you do your stuff and it is a little bit different than the way i do it but in
the meantime let me just see if i can get people to understand what plan views are and why you need
them the bottom line is that when i switch to one of these when i switch to something else here
it's going to switch this to the right layer set and it's going to switch it to the right items
that i'm going to put in my plan okay so here it should have switched here it's going to be electrical all
right now back to mike's question about he created all these different things for
that absolutely you have to have um you're going to have to have
if your if your electrical text only shows up on your electrical plan
absolutely that text is going to have to be on its own layer so when i go down here to text you're
going to have to have a layer for your electrical text okay
so that's that's a given okay so all the text you used on the
different kinds of plans yes you will need a separate item on the on the layer list for those items so you
can specify which plan they're going to show up on i think one great thing to note because
for some reason this this really passes by people is that remember to change your
plan view as opposed to something else when you want to go work on your electrical change your plan
exactly yeah don't don't people that have been using the program for a long time
and haven't adopted the plan view set yet are used to changing the layers because that's all we had years ago
was just the layer list we didn't have these other options so people got used to using like it took me a while to get
used to not using layers to change my thing john you know how i fought this plan view for years oh yeah
and then finally one day it hit me okay i get it now let's use it it works so and so go back here i did this i did
this with a client the other day and it really helped them uh go to your architectural set
or your architectural save plan view okay hang on a second here our architectural save plan view this
one right here not your default set yeah there you go okay so go to that and put an outlet in here
right so when i try to place it out right here it's gonna pop up a little menu here
the layer electrical is not displayed right so what really helped them as i explained what yes does what node does
and what cancel does right if you hit cancel it's not going to it's not going to place it right if you hit yes it's
going to open that layer on this save plan view which is not what you want to do so let me hit yes and i'll show
people so i hit yes remember i showed you in a separate electrical plan but now yes now i've got all my electrical
outlets on here okay and now you've just changed your save plan view and it's not
going to warn you when you do it because you haven't changed your your layer set you've just turned something else on i just turned
on you i turn on the electrical for my architectural plan all right and then
the other option when you do that i'm just going to hit undo there is to say no
and that will place the outlet you'll place the outlet on and it will show up on your
electrical safe plan so that outlet is there but it's not showing if i switch
to my electrical plan that i'll that will be there now okay
so i don't know if that helped anybody today but it it it uh clicked some buttons for
the other guy yeah this is one of those light bulb kind of functions in chief that you use it and use it and finally
goes oh now i get it um you know i have that with people or some other things in chief roofs are
one of those things where you get light bulb moments all the time and how it works uh there's lots of things in this
program that are like that so um i hope that helped we got any questions
and again let me show before i do questions let me show one more thing if i go to the layout here again
um any viewport as we just showed before so if i want to
take this viewport and show my electrical plan in it but not on this page i want to leave this page alone
i'll just hit copy and i'll go let's go paste that on a blank page i have to go a few ways to a
blank page and i'll paste and hold that in the same position that it's in okay so i go to edit
paste and hold position then i'll just change what shows up in this viewport based on my plan views
everybody rewind that that is great a great workflow yes
so and that's why i always put that icon on my layout page on what every page i
don't know why chief doesn't put that there by default um because it's the paste and hold position icon
use it all the time can i just say that one again yeah i'm just going to repeat it through voice
send one view to layout copy it go to another page paste hold
change the referenced view now you have your views are lined up um if you have a good label system your
label is automated that's a great workflow yeah so
again you can do that with anything now you can do it with your cameras so you could have four four
viewports the same size on a page and throw a camera in there and resize the camera inside of that
um and change the change the view you know change which one you're using or a cad detail and in x14 we have the
re-centering the view yeah yes of your layout oh yeah which is a huge and we didn't get a chance to talk about that
yeah so when i look at my layout now because i use pastel position when i go through the different views so here's my
uh foundation there's my first floor see how they're all nicely lined up they're not jumping all over the place which
used to drive me nuts and it would used to take me forever i'd have to go point to point the way i used to have to do is i'd put
a little line here and then i would go line that all my views up to the end of that line it's like
i mean still point to point but it was extra work that wasn't necessary so um
so that's kind of cool all right so we're about done so yeah
why do you have three boxes and he asked with the layers in each
once you explain your three box your save plan views your default set and your layers up there why you did it oh
the way i did it i kind of just texted out a response if you want to pin it too it helps
what's that now right here rene responded to him by text oh okay um
i did it this way so that there's no confusion okay when you switch to a plan view if those
all say the same thing then you're good to go that's why i did that
okay so that means that my plan view is coordinating with my text and my uh dimensions everything and it's con
it's also with the right layers okay all that layers that's named a little bit differently so that's why i
did that it's just when i set this up um years ago
that just made perfect sense to me it really has worked it served me well the thing that always drove me nuts was when
chiefs which this would switch to um default something or another and then i'd switch this and that
wouldn't change in that type text and in a way it was just confusing as hell but again that's what
we'll get on with renee here we're going to figure out what he's doing um
other questions we've got a couple minutes left um
no i don't think so i think
so go play with it um drop me a line with your favorite things that you've liked about the new
update we didn't really talk about uh linked call outs and that's you could kill it yeah noon talking
about that yeah i mean again there's so much in this i mean we're in version 24
now guys that's this program is maturing like crazy okay into it you you want to
put my work um i'm sorry dana interrupted oh go ahead
uh you want to put my webcam front and center and i'll show up just what a linked callout is real quick you have
i'll put you you have to share your screen
let's see i just need to turn off so anyway the program's grown to a lot it's got a lot
of function in it so yeah i mean again it's still easy to use relatively easy use for beginners to get
into you got those good functions but you know as advanced users there's just
so much you can do with it now and i think renee i think we consider you an advanced user don't we um
let's see here i need to there's a question how do i get a replica
remove the source files for the as built versus new separate plan files or different layers
depends on what you want to show nick if you want to show like a a hatched as built then yeah you might
change the layer set um of the referenced file
yeah what we were showing earlier though it was two different plans can you just show your screen
when you see the way your cameras are set up um oh you can't just pin my camera in
full screen um let me see can i solo that here we go there we go
um this is just my my template and it and it just has
this new linked call out that has a a leader arrow so if we open this up this is just a call out with a cross section
line with an arrow that's new in x14 which is awesome and then this links to a detail in my
plan so all i did was double click it same as just um you know opening in your edit
edit part of the view right so that's linking to a cad detail window yeah so i mean and this is
you could kill a whole hour session talking about the capabilities of that function so then you put that send that
cat detail to a layout and it populates the page number and
yeah and then kind of something i was mentioning earlier is um this is a
this floor this saved plan view is titled floor plan but you see it says first story so we have some new
capabilities in the macros um and if i want to change
you know the reference or the linked view relink it to something i could change it to a second floor if there's one there i
could change it to foundation you know um right here on the fly so we can change floor levels on the fly uh of an
existing save plan view so you no longer have to save a saved plan view for floor 1
versus floor 2. it's a little bit advanced trying to get this all set up but
i have a macro in here that it looks for terms like foundation and then it omits what floor that is
so you can truly automate a set of plans pretty quickly now
in x14 and i think we're running out of time yeah we already ran out of time we could probably talk all afternoon i'm sure
um which we probably wouldn't be a pro um we got one one uh somebody in here
asking us just keep going [Laughter] why sometimes when plan view is selected
does using standard defaults show in the default window
that's again um that's again that this is that area between where rene is and where i am
that i don't necessarily get why they do it like that but again we'll come to that but let me just what happens is
what happens is in my estimation is let me show my screen here
um when uh when i set up my plan views okay so if i
go in here and i look at this um
i've set up all my my all of my paint plan views are hard
i'll call it hardwired or whatever you want to call it so when you open up this architectural view
it's going to open up this architectural
default in this architectural layer set i've got them all hardwired so
when you choose them they're always going to open those chiefs don't do that in that when you
choose a different plan view some of the defaults up here again
i don't know i don't have a real explanation for it it's when you change the layer set dan that it changes if you
go change the layer set you're going to get it use the default layer but yeah i really worked hard to get it
so that when you change it always stays the same because i've always found that extremely confusing when i'm working on
something that says default up there and then i add an outlet and it says you want to turn that layer on it's like
huh anyway so if if you're using dan's template the thing to keep you happy is to keep
these three names the the plan view the default set and the layer set the same
thing yeah and then you'll be a happy camper yeah anyway we'll bring more we'll bring more
later all right real quick uh let's wrap it up here um if you guys want to
i'm just going to bring this up and mention it all right uh
february i remember the date second third week of february
we're going to westbrook or virginia beach i have
reserved this 24 bedroom house and we're going to have a total
immersion week-long event where we'll have unlimited time in that
week to discuss everything that we're talking about so um
this is happening mark that on your calendar i'll be in i'll be uh
introducing you soon john and renee will be there along with with uh robin and uh we're gonna have
fun this is an amazing facility so if you go to the gallery black stallion
you search for that and again it's it's just it's really an incredible facility i
can't wait to go here this is going to be cool got my brother and sister coming to take care of everybody like we've done
at the at the um builder shows we've got tons of room to set up and do
our trip you know i have our classes and everybody gets their own room so i'm
excited about this you don't sound excited enough well it's it's
you're right i don't partly because i got a lot of work to do together yeah i know
so so anyway guys this is going to be awesome we're going to be there um we're going to be teaching classes and also
you can come talk to us in between classes we might be floating around the house doing well i might have to cut you
off at one in the morning but yeah yeah that's where you know in all these events that i've done over the years
that's the place where people have really learned some really cool things is when you're
sitting on a little side chat with a bunch of you know a couple people and you're going over things and you
he's light bulb you can see the light bulbs going on left and right it's pretty cool um
but uh yeah i can hit you guys with more goofy hacks than you can even
fathom come on come hang out going to call you hackmaster i think
yeah so all right do you have a link for it yet dan no i don't have anything
prepared yet so and what were the dates again um we're going to do it do it for two weeks
in a row one week at a time right yeah it's in
february 12th to the 19th and 19th to the 26th
so two different sessions one week one week each yeah
it's going to be cool i hope we got enough and we're going to be doing um different types of classes both weeks
kind of well i don't know yet i haven't figured all that out yet i think i'm going to be at the builder
show what is a couple weeks prior or something uh about a month prior to that yeah yeah
i'll be at the builder show too if you guys are at the builder show yeah i'm well i'm
i'm going to try to get to the builder show but i'm not doing we're not doing the classes or anything like we've done in the past um it started out where i
couldn't get the house that i wanted um and then i thought oh hell let's just go look somewhere else and i found this
place online and it's off season and it works for pricing and it's going to be good it's got a nice
big swimming pool in the backyard but it's not going to be heated no the spa will be though maybe even functional i'm
not sure but no it won't you won't be able to spool we're not there to swim that's right that's right we're there to
swim and all of the chief knowledge that let me run blah blah blah all right you guys thanks
for being here today um look forward to uh
to uh next show coming up in a couple weeks and in the meantime if you have any questions let us know so you guys
take care bye everyone

Elevate Your Chief Architect & Design Business Skills
Reserve your Spot to the 2024 Chief Experts Total Immersion Summit For Chief Architect Users
Outer Banks, NC
March 1 to 10, 2024

Mastering Kitchen, Bath, and Lighting Design BUNDLE - Only $595
Special Bundle Offer: Four Courses for Just $595!
SAVE $1,737
LIMITED TIME ONLY
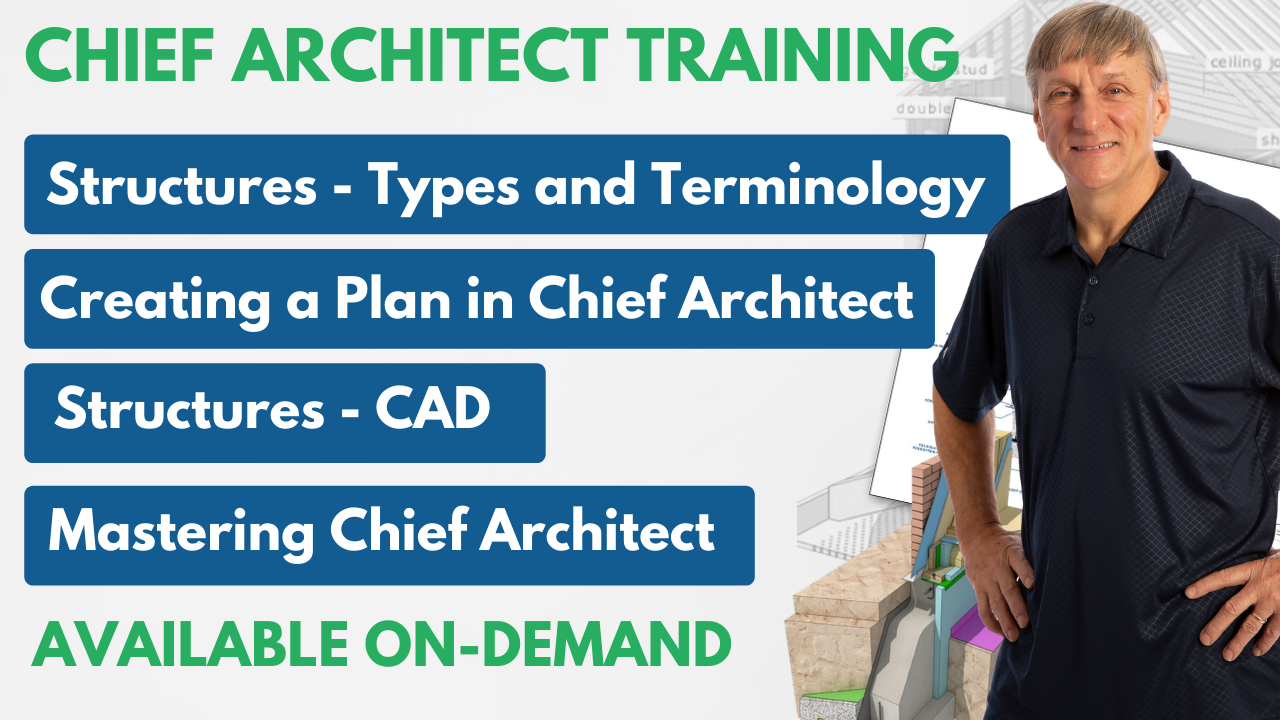
On-Demand Chief Architect Training
Don't Miss These New Courses With A Simple Goal: "Help You Become A Better Designer"
- Understand And Define The Structural Elements In Building Construction
- "Creating a Plan - Quick Start" course for Chief Architect users
- Define And Draw The Structural Elements In Your Projects
- Discover the Inner Workings of Chief Architect and What it Wants From You
Upcoming Events