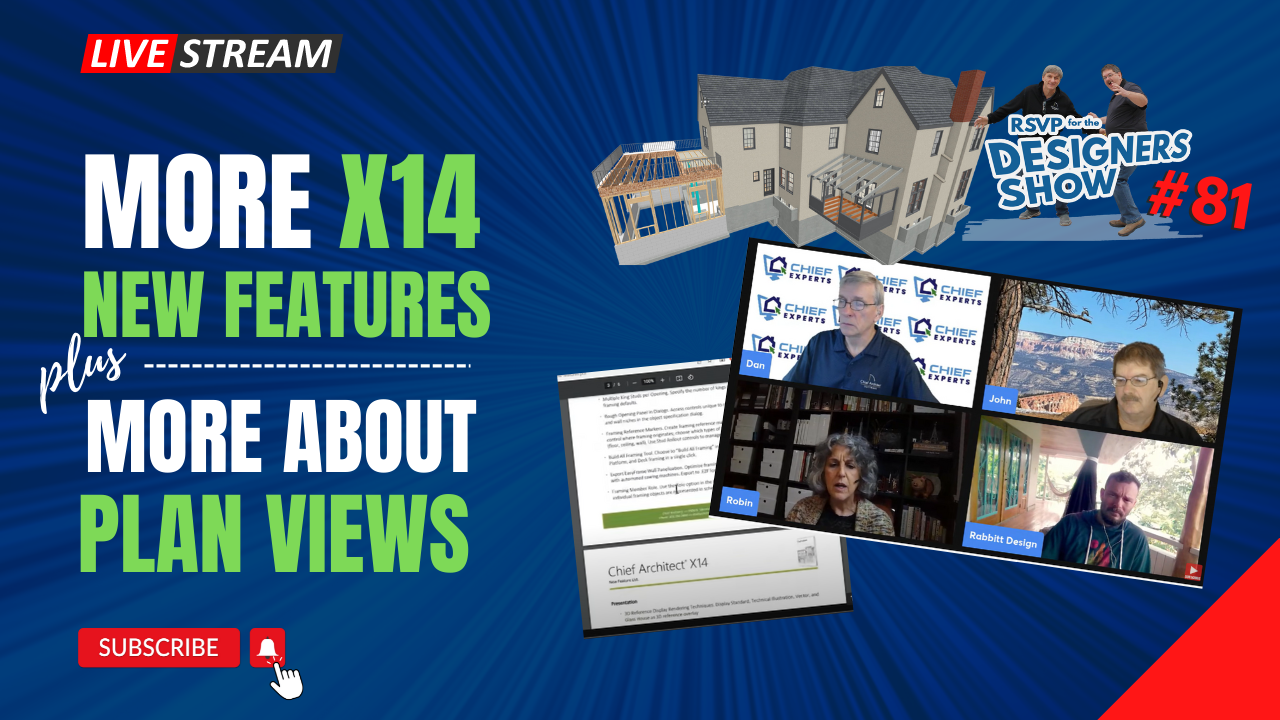
In our last designer's show, we discussed some of the new features in Chief Architect X14 and a lively discussion about Plan Views.
In this session, we'll dig a little deeper into more of the new features. Plus, Rene Rabbitt will share his insights into how he uses Plan Views.
Once you understand "Plan Views" and how to use them, you'll wonder how you got by without them.
Welcome 00:01
Explode and Edit CAD Block 03:27
Library Painter Scoping Review 08:14
Merge Collinear Walls 12:16
Shutter Enhancements 16:14
Shoe Plates for Roof Overbuild 17:55
Frieze Board Per Wall 20:14
Framing Per Wall Options 21:22
Build All Framing 23:40
Callouts on Layout 26:58
Add A Page Number to Layout 32:16
Renee Explains Save Plan View Feature 36:55
Edit Active View in Plan View Tab 46:47
Chief Architect Couer d'Alene Event Lodging Info 58:17
Dan's Training Event in VA in February – SAVE THE DATE! 59:49
Closing 1:03:01
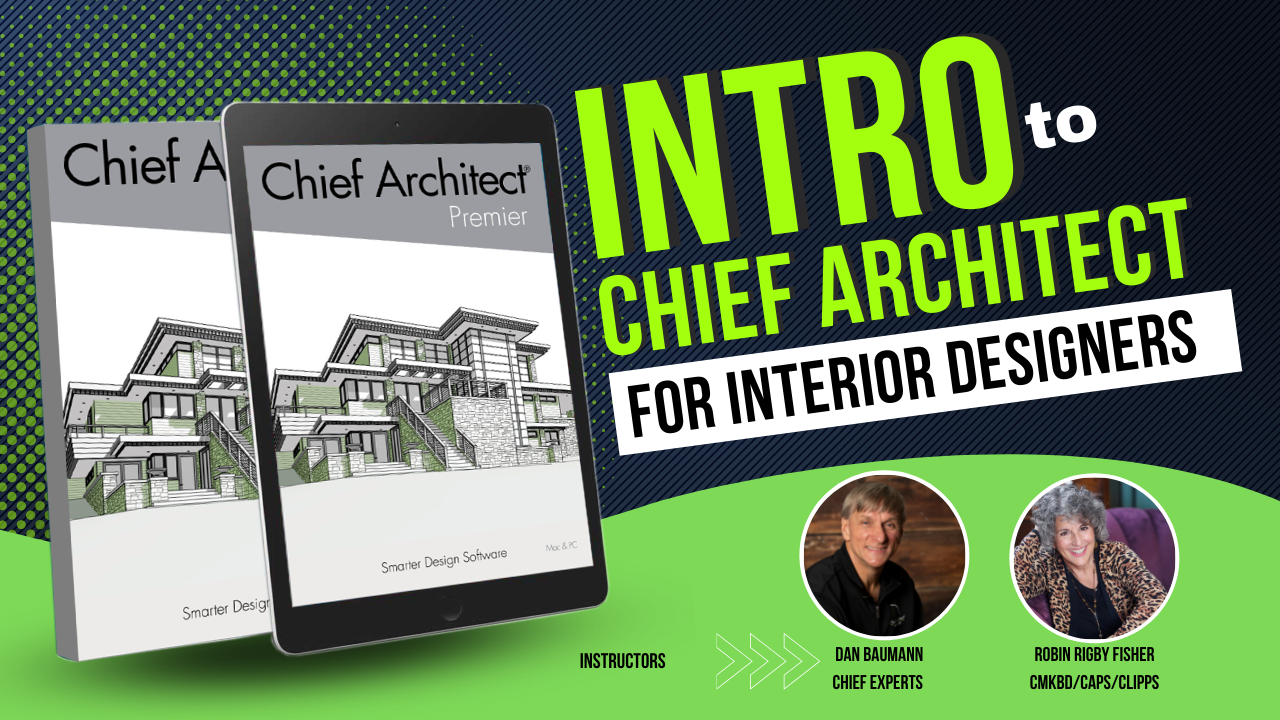
Intro to Chief Architect for Interior Designers
This course if perfect for interior designers who are new to Chief Architect.
Spend less time learning Chief Architect and Take Your Interior Design Skills to the Next Level.
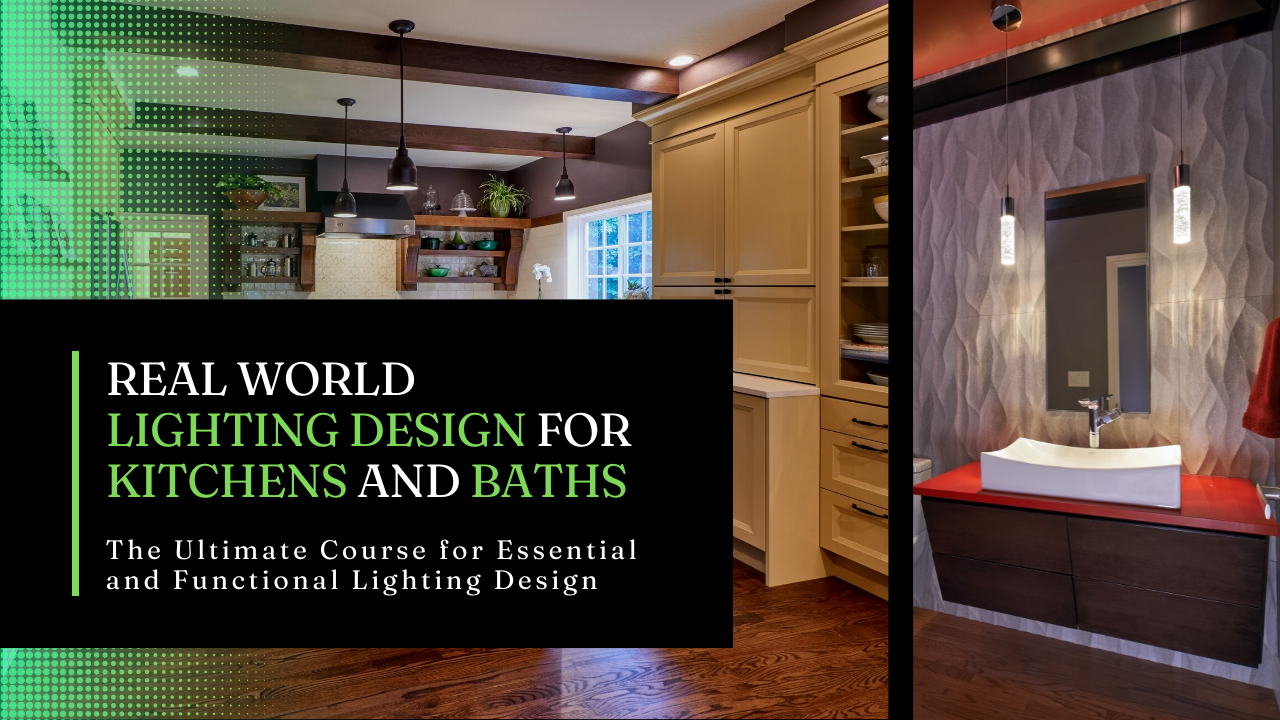
Real World Lighting Design for Kitchens and Baths
The Ultimate Course for Essential and Functional Lighting Design
Discover the best practices for determining what type of lighting is best for an amazing residential kitchens and bathrooms.
every day and i think we're live hi everyone uh dan bauman here on with the designer
show good morning good afternoon to wherever you guys are yeah every day yeah we're late every day
yeah we are late today we were just playing with some things that made us late today although that never
happens in chief you know i'm always right on time with all my chief plans
yeah right anyway hi everyone i'm glad thanks for being here and we're going to talk more
chiefs things today i'm on with john and renee welcome you guys uh
robin couldn't be here with us today she is uh in the throes of her son's wedding this weekend so as you can imagine she's
got a lot going on so congratulations robin yes we wish her well and we wish her son well too so
uh it's always a lot of work anyway um cool we got people from all over the place welcome welcome and uh
don't hesitate to ask your questions as we get going here all right so i'm in sunny minnesota
where it's actually quite beautiful today it's in the low 80s and we got gypped out of our rain last night they
said we were going to get so that kind of sucked but other than that it's really beautiful out here john you're up north or where are you today yep i'm at
home i'm gonna i'm gonna step away just for a minute and take this phone call okay cool
renee you're in your living room in sunny california yep dining room i got a quiz
quiz for you later so according to the dining room yeah okay
got it all right um we'll wait for john to come back uh you guys if you have questions be sure to enter them into the
dialogue we're going to talk about some chief features today some new features
so if you are on the show page you should be sure to go ahead and
share my screen be sure to get on here and
um download the uh pdf update and then you can also view
what's new on the chief architect page so we're going to talk about a few new things today
nothing too uh nothing too dramatic we're going to talk about some new features and rene is going to last time
we talked a little bit about plan views and i gave my take on plan views and renee's got a little bit
different spin on it so renee you're going to get your chance today to talk about your spin on how you use plan
views and how you you don't use default sets so i think that's kind of the big difference between how you and i operate
which both ways are right i don't think there's any wrong way to do that as long as it gets the results that you're
looking for i think someone had a question last week about or last time about you know i'm doing this and this is that
the right way to do it and my answer was does it work for you and he said yes and then yeah that's the right way to do it
there's a lot of that going on in chief all right um so be sure to check that out check out
don't really have a lot of new things happening at chief experts working hard on the updating the pro
academy so you're gonna see some new things coming on that and then we've got some events that we'll be letting you guys know about
soon so uh keep an eye on it we've got some fun things coming uh
we've got okay so that okay robin's not gonna be oops i forgot to update this on our show
page sorry anyway let's move forward here let's start out
with the wheel of icons this is something i've been playing with a little bit
because there's you know 1200 icons in chief architect how do you go about explaining them all so let's do it this
way let's just have some fun and we're going to explain one icon right now but i'm going to spin the wheel and we'll see what comes up all right
so here's our wheel of icons and we are going to talk about that icon
explode block all right that is the right one right
yeah okay cool yeah let's what is explode block all right so let's talk
about what a block is so a block is a group of items put together it could be
cad items it could be uh furniture it could be whatever you want so if i took a bunch of lines then
you can actually block one line if you want to just by highlighting and holding your shift key down
and you'll get this icon down here to create a cad block all right if you're
grouping furniture and things like that you're going to create an architectural block if you're grouping windows and
doors you're you're mulling them together that's a mold block i guess you call it anyway let's group those cad lines together now you'll notice
when we have an icon here it's not the same colors but uh i might have put the wrong account
there's your explode block icon okay so if you click on that
it won't be a block anymore i'll be back to the individual cad lines now let's just take that once nah we want to take
that one step further how you edit a cad block sure okay we'll go one step further you
see another little icon blowing apart with a pencil on it
all right this is something they added i think an x13 you can edit the cad block you can edit
the items that are in the cad block without exploding it
so if you click on that it's going to open a new tab you know what it says up here it says cad block
window one all right so there's those cad lines and now i can work on them i could edit them
i could add items to this i could add text text to this um i'm going to display the text here
though and i could so there you go so i can edit this all day long when i close this window
what do you want you know what do you want to do with this now okay remember i never exploded the block i'm just editing the block now i want to save it
okay so i'm going to save the edits i did in that and you're going to get another screen that says oh
you know if i let's say i changed an outlet in my plan but the cad block that is an outlet to a different size or i
added something to it i could update just the one i changed just that cad lock or if i have a whole bunch of
outlets in my plan i could update them all at once okay just by clicking that so i'll just
click only this instance actually i said that backwards but um you get the idea there you go so there's
my changes it's still a cad block i'm good to go so i saw that when you opened that to edit it it put it into a
cad detail did it stay in the cad details it still in the cat detail
no it doesn't put it in a cat detail it just opens it up in a cad detail but it doesn't put it in it opens it up in a
tab well that's a cad detail sign right there at the end of it though oh by golly it is but doesn't put
it in the cab detail though um okay i don't know why it does that
i don't think that's not my that's not my deal yeah that's just a cad block yeah so
but if you got in the cat block add detail on the tab
right or was there like something i can't see well yeah okay so it does it is putting in a cad
detail management category but it's not actually putting in the cad detail so okay why i don't know john
you got me on that one all righty all right um the icon was red it's different than explode with all
blue i don't know why it's a different color you know why it was different color
i'm going to preface this by saying i'll conclude this by saying that spinner wheel i just dumped a bunch of
icons in there i didn't even look at what they all were so um next time we'll be we'll be certain and
no we have the guns by the seat of our pants yeah there are over 1200 icons in chief architect now so
uh we'll have some fun with that okay let's move forward here and last week we talked about these different things
predictive feedback had layer defaults uh libraries coping copy paste explode bay windows resize
cabinet hardware many dimensions uh you know i'm not going to just go over that then we talked a bunch about plan dudes this
week let's talk about these few things layer painters scoping actually i think i did talk about that
last week let me make it dizzy by going in and out here a lot um and
but let's just review that real quick what is that layer painters sculpting so if i go into a 3d view
and by the way when you get your pdf downloaded uh from the page
oh hey you know what someone made a comment and they're absolutely right um you did
an architect you did a cad block but the symbol that was on this spin the wheel symbol was an architectural block
architectural block is any kind of you know symbol class blocked together same
concept yeah it's a good point though thank you for uh correcting that yep obviously i did get that
well see we're all learning here you know all right let me get back to where i was where was i i was going to my pdf i had
clicked on something in my screen froze there for a second um so here's your pdf
that you're going to get when you download it all right so when i go in here um
the layer painting scoping so when you want to replace individual items on things and again i think i covered this last week but let me just do it again
real quick let me get the chief here oh chief crashed on me oh weird
it was that wheel spinner thingy that caused it maybe um
i've been having my fear of issues shared issues with my computer so
i just updated my drivers yesterday so hopefully that'll take care of everything else
all right so back to this yeah that crashed when i did a 3d view
hope that doesn't continue it's not the wheel picker thing that's causing it um all right so we've got a piece of
hardware here let's find a cabinet that's got multiple hardware on it so we've got this it's got three different handles on it i
could go to my library and i could go to let's go
um search for a handle you know we did cover this but i'll
cover it one more time it's really cool so i did that barn door handle i'll put the i'll do the same thing
so when i click on that library into my drag and i come to my screen
you see it turns into a different icon and you want to look at these icons down
here in the bottom left corner now okay so what happens when i click on this
door knob here this knob here if i leave it set to c
that stands for component it'll only replace that one item if i click on o
for the object it'll replace all of the same kind of items on the entire cabinet
r is for room s is for floor f is for floor p is for the entire plan okay and this
is the icon that we're looking at to replace items in our plan
so that's what will happen so if i just click on one thing it's going to replace that one handle i guess the doors are
one thing in this plan but it didn't replace that so if i were to hit undo
this time i hit object and i click on that handle so it's going to replace all of the hand
all the handles on the object it should replace that one too shouldn't it have unless it starts
oh it's different because it's at a different angle okay that's what's different about it
um if i do the entire room all of the handles up and down in the room will change
okay see they're all changing so i would have to like my handles um
the floor and plant so that's how that works nice feature you could do that with different things you can uh also
replace you know if you have six well i did the bar stool thing last week too i think if you have a bunch of bar
stools and you want to replace them all at once use the same tool and that works really well
let's merge collinear walls this is actually a feature that i'm pretty excited about because
that drives me nuts uh so when we go into our defaults
okay you go into your defaults and we go to walls and we click on the general wall
defaults all right there's a new little button down here that says auto merge code linear walls
what the hell does that mean well let's turn it back on i'll show you what that means all right so when i draw a wall in my
plan you ever done this you draw a wall and you want to break it and you want to make some of it
framing and some of it not framing or something like that so when you break the wall
and then you click on something and open its dialog box and then you close it
the wall all snaps back to one big wall alright drives me nuts all right so this
new feature in chief i can turn this on now general wall
auto merge done now i can break the wall and it will not hook itself back up so now when
i open up the dialog for the box for the wall i mean and i make changes to it i do something
a little bit where i'm not really changing the wall much i'm just doing something uh and i close it it'll stay broken
i can even you know move where the walls join and i can join it back up here and it will stay broken
okay so this is really this is kind of nice for framing like say i'm going to frame in a doorway for example and i
want to just do framing and part of the wall so i want to do this and i just want to frame that piece right there and
i'll just say no so when i switch to my framing plan now now just that part of the wall is framed
so that's a nice new feature that i can do with that now if i want to hook it all back up into one wall no problem
turn that pull in you'll take auto joint off and you can do that back but that would
that would join all your walls back together is there any way that you can not in this one only if you jiggle them
only if you jiggle up yes is that a technical change that's a cad term in chief yeah jiggle no i made that up um
and jiggling means you click on a point and you so even if you just click on a point or
you move it a little bit or you open the dialogue and closing it you're kind of jiggling
so you you're reactivating chief's ability to snap things together
and so that's what that is so the answer to this question is no no yeah
yeah per item feature instead of global uh no so get your stuff done as long as you know
you're not going to go back in and you know touch your walls at all um turn it up the other thing the other
thing about it once you've done the framing it won't join back together either um i don't know about that it won't change
the framing we won't change the framing better but it won't change the framing correct it won't change the framing and
if you if you the way i've done it in the past is you just go in and you you break the wall
and you make that a copy of the other wall and now you got two different wall types so it will stay broken then yeah so here
yeah see i opened and closed the dialogue and it all joined back up again but
that framing stayed the same that didn't change right so if i were to look at the framing in this plan now i would see
just that little piece of wall framed in oh messed up my plate still oh there's a bug that chief needs to know about
interesting what happens if i open up this oh there it is
huh weird oh we got one for chief to look into all right
so i like that little feature so simple little thing but really a nice thing when you're dealing with walls
that keep snapping back together and you don't want them to um shutter enhancements uh it's a silly stupid thing but
we do have the ability to do more with shutters now so if i were to click on a window open its dialog and i go to the
shutter option i can use uh mover
and now i've got a few more options here where i can have the louvre this is nice to be able to do the louver size you've
never been able to do that before so now i can actually adjust the louver size i can show the louvers closed and open
i can reverse the directions of the louver i can you know a lot of these things are
still the same but just just those silly things because yeah sometimes i'll work on a plan and it's like yeah i want to
use louvers now i gotta go library find one or where this will just do fine and uh that will work really well do you
guys do much for louvers or shutters on yours i have um two free symbol actually one's
freed once paid uh one free symbol on my site that is a
door with a security door and the security door is a shutter oh so yeah kind of clever
um so yeah i'm glad that they gave us some additional options the other one is using a door as what looks like an
operable window okay you can open and shut yeah the door yeah you can make a
shuttered door and i'm using 100 shut shutter to create the um
uh the sash profile from the manufacturer okay yeah
um let's see merge display control of shutters mover size for shutters yeah so simple
little things um shoe plates for roof over build yeah is this a big deal yeah maybe maybe
not um so when you have a roof say you're doing a remodel and you're going to add an addition to your plan
all right and when you frame this roof you want to put a shoe plate down on top
of the existing roof i've tried to do this in the past way because i wanted to show it my framing
is like it's really hard to do because you have to use a roof plane i've been asking for this forever yeah so now all
we have to do is um let's switch to the framing view
and we go into the now where was this again go into the
roof dialog and you go under the structure and it's right down here at the bottom of structure
roof over framing okay so over frame to the roof finish the
sheathing or the framing so if you just want to put those on top of the sheathing do that so then
when i click okay you notice i just did it to those two i didn't do it to the whole plan and now when i frame those two roof
planes because it's in addition and it'll put those roof right there those
plates on right there so that is really quite nice because this is the way a lot of people do that
so if i bring this up there they are okay say doing those any other way
i tried it and it's virtually impossible well it should not be well now although
now with solids it would be a little easier but this is much easier just clicking a button i like that
does that replace the trust base option no
no that's just that's just something for hand framing well actually yeah i don't know what
would happen with your trust trust me i guess you'd have to try it yeah yeah well we're not going to get in that
right now trust bases have always been real flaky for me i've never been able to i've
never been able to put a definitive this is exactly what you have to do to make the trust base work
um i've gotten close but it still is uh flaky depending on
the plan all right let's go back here next item i had on my list was um
freeze board per wall all right you ever had a house where you didn't want free board on a few walls
um couldn't do it unless you opened the freezer froze the lock layer for freeze boards and turned it off there and then
of course you couldn't do your freeze board anymore now you just click on a wall open its dialog box
and under the roof tab you have a new thing to include or not include the
freeze board so that's under the roof tab so that
that's kind of that's kind of like turning the base on a bass on and off or an individual wall so just really all
you're doing is you're telling when chief use puts that freeze board on there which is a molding polyline you're
just telling chief not to put a a 3d item on that piece of molding polyline
so that works pretty well uh let's see what else we got
come on computer okay
um framing per wall options
let's go up the pdf for that there's a bunch of things there okay
all plates per time um the number of wall plates you can have the cut length of the wall plates you
can specify maximum king studs per opening roof opening panel a rough opening panel
in dialogues uh and then a build off framing tools that's different but let's just let's just look at
uh that particular option in a wall let's open up a walls dialog box
and then let's go to the framing and not right here under for
where'd you go framing where's framing
uh hello oh i'm sorry they moved it it took me a
second it used to be a separate framing option here now we're doing it under wall types so
when you go define a wall type here's all your framing options now okay what kind of framing you use
stud spacing stud width top plate count top plate width bottom
plate count bottom plate width maximum plate length 12 foot
horizontal framing that's if you're doing a purlins on the walls you can turn that on
so you see it you'll notice it turns off a lot of these other things that maximum plate length is probably to help out
with the material list i imagine exactly exactly yeah so when you when you run on the
truth so when you run a cut list yeah you'll get max you know you don't get that just linear feet of two by six or
whatever exactly so so if you're doing framing in your plans and you want it to be a
little bit more specific you have those options now so i see that yeah looks like they keep
adding a little bit more to this dialogue um you really got to pay attention when
you're clicking on the different elements here as to what these these things say down here
all right so that's kind of cool because i do a lot of 3d framing plans i like showing framing or if you're just doing cross
sections too that way you can adjust the walls that you want to show on your cross sections the right way
all right a couple more uh the build off framing button yeah again it's a silly little thing but
it's there now so if we go up to uh to our framing tool where to go
we got a little new icon here called build all the framing at once you don't have to open the dialog and click
through the tabs and click build framing click build framing so now we can just click this and do it all at once
and i'm just going to say cancel that because i'm going to go to my framing
plan you see i have some trusses built in certain parts so when you have trusses in your plan
already and then you build off framing chief will not put the framing
in that spot so now it's thinking about it there's all my framing so there you go so it's really easy now
you can do that take a look at your framing yeah it looks good okay
and then later you can come back and make adjustments to these things all you want um
oh yeah i wasn't done framing this so that it's a silly little thing but it's a
time saver you know versus going the way we always had to do it was oops click the wrong button
so you guys got any favorites that you uh have found you used to be we'd have to go here and we did build floor
framing you know we did build wall framing then we'd hit build roof framing build all uh i mean i'm in the remodel
game so i like to select what's being built i actually really like that feature the select
so like i'll select a wall that's a remodeled wall and then frame that only exactly
yeah this is really helpful for new construction just to build all because yeah it was it was silly that we had to go through every single panel just to
update all framing yeah and i do like that you know you can frame floor joists per room now that's kind of nice that's
a new feature so anytime you see this framing icon when you've selected
something in your plan that means you can frame whatever you've selected so that is a nice new feature
i was doing i didn't have time to troubleshoot it but i was doing that the other day i collected a room and i did
not have that icon why was that the framing yeah uh maybe
you didn't have a uh it doesn't do the ceiling frame you know it does floor frames you have to have framing in the
structure yeah maybe the floor was set to concrete um it had been set to concrete but i
changed it um that's the only well actually
here i've got mine set to concrete and it actually still brought the icon up um
what else room name i don't know if room name affects that if you named it
i i haven't been working on myself all the time so okay i don't know somebody else yeah you were
probably an x13 yes i was actually it was an x13 then it
wouldn't have been there there you go thanks renee so yeah there you go cool
uh let's see did i have anything else on my list um let me go back to my quarter inch and
call outs on layouts oh yeah that little bugger that's actually my favorite that
one's cool i think we should get love for today yeah it's still too big of a topic you
could burn a whole show on that i know but we'll just cover it real quick okay here's the gist of that new feature you
know and it doesn't i was looking at this and i was trying to find where it says that down here
under layouts and it it's if it says it here it's very ambiguous because i just don't see it
okay but let me show you guys what we're talking about i know renee you do one for cad details
too let's just cover the elevation ones right now all right so when you go in and you take a note let's go make an
elevation of this cabinet right here all right i already have one there because i was playing with this so
here's my elevation all right so i could add my dimensions and text turn the color on do whatever
you want to it that's fine oh i see i got my new handles on perfect um so
i'm ready to send this to the layout and the plan you know with the layout you had to add your own text you know this
is the kitchen elevation and this is call out number blah blah blah all right now all we have to do let's
let's start by we're going to save the view to start out if you've written on it it's going to ask you to save it
already but i'm just going to save the active view then i'm going to click on this little tool here or this little tool here
they're both the same and i'm going to edit this active view and here's what you have to do
where it says general name type in what you want to show up on the layout page okay here is my
cabinet elevation okay i'm just typing that so you'll be able to see what's going on so that's
what you have to do that's going to be your label on the layout now then you go to plan view
and you can change what's going to show up on the floor plan okay um i'm just going to leave it set to e2 for
elevation 2 right now sometimes i just a lot of times i'll just use a b c d or something like that
leave the text below line set to automatic okay if you want the page number to show up
in your callout on the floor plan leave that set to automatic which is generally that's what you do
uh let's see um under label yeah so that's all i have to do in the camera
view i can also i can also do that by clicking on the
little callout on the floor plan and opening its dialog box
and it's the same information here so you can do it either way you do it while you're in the elevation or do it on the
floor plan all right so let's send that view to the layout okay so i'm going to open my layout
and let's go here and open recent and i had a little layout all set up
now let's open that you know just go to page two i think in i think this is undocumented
and i might be wrong but i think if you had just clicked this send to layout it would have sent to the
to the layout you had already established a view from this you mean while it was open
um instead of opening your your recent layout i think if you just hit send to layout it would it automatically figures
out that you were you were previously linked to a layout and it sends back to that one well no this
would have opened that um but this is a brand new camera this was the existing camera well i
don't know if i go look i don't know what you're saying i'm not gonna let's just do this yeah
okay so i'm gonna open that i'm gonna send that view the layout so i don't have to open the view to send it to layout i can just click this icon down
here or i could open it and then click the icon up here to send the layout either way so i'm going to send that to layout
which page on page two i'm going to have it a half inch scale and i'm going to just leave it as lines
and then click ok just a comment on that sent the layout on the bottom icon there you can select more than one camera and
send them all to layout at the same time too yeah it'll open the dialog box each time to set your scale and stuff but it
is a big time saver but you notice here now here it says here's my cabinet elevation that's where i that's what i
typed in to that uh box okay and i can highlight the view and grab the little the thing
here and move this around all right but watch what happens now and if you don't see that
when you send the view to the layout what you want to do is open up the layer for that viewport
and you want to make sure you turn on the viewport borders and the viewport well you don't have to have the border turned on but you have
to have the label turned on okay for this to work i'll leave the i'll turn the borders off so now i've just got
that so now you have to do one other thing open the dialog for the viewport
go to label and tell it to use the call out okay and then you can edit what you want
it to say right well here here it's picking up the reference from what you typed in
in that elevation or you could change it here and type your own words here all right
um so there you go and so i'm going to do that now i'm going to click ok and look at this
here's my label i can move that around done
okay i don't have to go create those stupid labels every time so that's really nice now the other thing you could do
so if you want to have a little bit more information some people like to have the page number below that that's one of
those yeah give or take things so there you would turn on um
there would have to do an edit and then here i would have to put text below line throw my global
uh layout info and then you're gonna use the layout page label
and then click ok and now you'll have the page number so it's on page two if we go back to our
plan you'll see now it says it's elevation two on page two
now what's cool about this you'll never have to mess with this again if you add and move pages or if you move the view
around so if i go put this view on a different page
by opening its dialog box going to the
selected line or line style i could say put this on page three and i click ok
when i go to page three now the page number will be three and when i look at my floor plan the
page number will be three as well if you move pages around if you add insert pages
chief will update those pages automatically so that's what's really nice about that so if i'm looking at my
layout here i go to pages here's that page that's labeled wrong but let's say i move i want this to be down here now
okay page seven it changes the page number automatically that's really cool
i don't have to create these stupid little things anymore can you uh click on that again and then go to go to the dialogue for it and go
to attributes there was something there that i needed to do the other day under the label
okay edit call out and then go to attributes for that okay
what was it that was messing with text above line i don't remember there was something
that i wanted to label somewhere that didn't wasn't doing it and i had to do it in the attributes okay so if you're
having trouble with that just look at the attributes too it might fix what you're trying to do okay
um and the other nice thing is you get a preview of it too
think is that i think that's new isn't it that that kind of a preview all right so there's there's some pretty
cool things there that that one i love that that's one of my favorite enhancements in chief
that really works well maybe next time we'll talk about running how you do the cat
detail call-outs and those kinds of things we're running gonna run short on time yeah sure so but
you're gonna do another wheel of icons now no let's jump into your stuff only one
of them like you should be quizzing the group get only one of those wake them up just spin it and then they can comment
in the in the cycle yeah there you go all right there we go we'll do that let's see what we come up with of icon
so i love this idea i'm gonna hide this choice and then i'm gonna hit spin
and let's see what comes up and what is that all right everybody
let's have your answer think maybe one of these times we'll start writing content actually that is a lot yeah that is a
i'm not we can't say what it is we're going to let people tell us what it is that's a good one yeah yeah
this is a really cool little app you can go to uh image picker wheel search for that it's 25 bucks a year for
the thing if you want to do everything with it and you can uh you can use it for lots of
things yeah we're doing this on my facebook group yeah i bet you will i i knew you would
like this um so uh and then you can hide your choice so you
can do lots of things with it and oh bill got it we should have prizes for this
is that style palette yeah
that's right you gotta you gotta pin it on the screen so we can see it later yeah
all right let's move on here so renee i'm gonna turn it over first bill got it first didn't he yeah yeah well he didn't
say style palette though i don't know i know why would you give it the dodger specific
standard hair if this is wheel of fortune he wouldn't have got that the prize
unfortunately is not the wheel of fortune all right we're having as much fun as we are with this yeah what do you got look here i'm
i'm not i'm not being a pain this time i actually clicked on the share screen thing there we go all right i'm going to
make it full screen so we can see your so we're talking about save plan views right yeah let's talk about that because
um last week last time we talked about plan views and i like to use default
sets you don't like you don't use default sets i'm not saying you don't like to you just don't use them and you
know here's why well our old school people know we call them
annotation sets right yes right and here i'll just do i'll do a
demonstration we're um this is not my plan template this is chief's residential plan
template so we know that we have a number of annotations here
um let's see if i maybe i need a magnifying glass right so we've got all these
we also have a number of different views all sets now though right yeah yeah and and even though they show they
still show annotations annotations right right um then i've got my save plan views and this is this is your
residential um template your out-of-the-box template yep so let's just mess it up a little bit
and see what happens that's that's the only way i could think to explain this so
um i can get into the project browser and in plan views i can kind of
group select so i'm going to shift select everything and then just delete all these
okay so i'm not going to have any plan views but just one the working plan view that's all i got left working plan view
now i'm going to get into my default sets and i'm going to click on this little
icon edit default set and it's going to show all my default sets yeah
and you can't do a shift select here but i can just start from the bottom
click on delete what happens if i try to delete all of them well it's not going to let me delete just one one you have
to have just one okay
click done okay there we go so we have one saved plan view we have one default
set and can we function with that you still have all your old layer sets yeah so i'm going to drop an electrical
symbol in here we're in the working plan view what happens if i switch and this is back this is taking it back right all
of a sudden we're back into this just switching layer sets all the time yeah um so if you've been in the software a
lot you know that this was a workflow that we had before um so now i've got an electrical symbol
in here let's just uh let's drop a couple things in here just to see some differences
and then maybe we'll turn on framing right we're going to frame for this room and i don't want to show the display
and i'm just going to say no to everything so now i've built framing for everything right but we don't have any
way of seeing that without just changing our layer set well let's make a few save plan views
let's just switch over to our framing floor layer set or framing roof layer set any one of
these and we haven't built a roof so that would be helpful build a roof
and we can switch over to any number of sets and from these sets in our
our toolbars we have the option to save activeview ass and so now we're establishing
a saved plan view so this can be my electrical plan so for just starting back from the beginning
now we have an electrical plan well what happens when i want to write text and i want it to be on the electrical plan's
level well by default it's just going to be on the layer text and why is that
well because we have nothing pointing this save plan view to that set of defaults that we had established where
it's we want it on an electrical text layer so i'm going to hit cancel instead i'm going to go into my edit
active view and then so this is if you want to take the approach of let me start where i can
go bare minimum and then come back and kind of establish what i want well it used to be that we
were setting up annotation sets what are now called default sets right so we could be setting up a bunch of default
sets we're establishing which set of defaults we want with our saved
plan view except for now save plan view that's redundant so in our save plan view window here we
have selected defaults that selected defaults panel this is where we can come
in and designate things like i want to set this to electrical text defaults i want to set this to
electrical rich text i want this to be my electrical dimension defaults
so it's redundant to the default sets right and once you recognize that you realize you
just built an electrical plan perfectly that functions perfectly well exactly the way that you want it to
without needing default sets we still only have one default set and you see it
switched off of that one default set to using active defaults and that is
pointing to the saved plan views active defaults this gets really complicated to
explain i'm sure it's complicated to understand so you know it took me a couple of years
to understand what this is all right exactly so instead of having the defaul are our
default sets driving our sets of defaults for a view i'm using my saved
plan view to store those defaults instead and on top of that we get a little bit of extra functionality
we've in our general tab we can say that we're going to use any floor we want to which is really
powerful and that's what i'm using in my current ran templates right because i can send one view of electrical to my
layout and in layout the way it's linked i can set which floor i'm on
and then i can copy that to another page in layout and then set that it's going to be on the second floor
so we only need one saved plan view for multiple floors now and that's really a
powerful thing i'm going to stop you for one second bill asks why is your screen unreadable
what i'm going to tell you guys but really i'm running are you running 4k
uh yeah okay so you've got really high risk and compressed so if you guys are running a smaller resolution
make sure you're making this this meeting full size if you can on your
screen and that will help um yeah i actually have two screens i keep one screen set to the 1920 by 1080
when i do these kinds of things yeah here you're gonna you can see it better but now your icons
are now we're pumped up to the moon now yeah yeah exactly so you know if you
could go halfway in between where you were and where you are now that would probably work yeah um let's just see if
i can get to the default set yeah that's a little bit better yeah it'll work for today more or less
yeah so i keep reverting back to the default
toolbar just for um you know the purpose of teaching and stuff and i noticed it doesn't even show our layer sets and
our defaults it only shows plan yeah so it's tricky to even get to this stuff if you don't it is i know
and i mean that's kind of um that's an indicator from the developer that where we're headed is that we don't need to be
paying attention to those layer sets and default sets as much anymore is how i take that
so how do you handle it how do you handle it if you are working in a save plan view and you change a layer set how
does it how do you so um well and what would be the per tell me the purpose of changing that layer cell um sometimes if
i'm working on a save plan view and i want to go find something i'll go to all layers on or all layers okay kind
so i have um two approaches to that one is i have a working plan view um i call it working
plan view because i'm i'm prepared to mess that plan view up okay i'm prepared to turn
on any layers i need to turn on or hide any layers i need to you know turn off
i have the hide i wish you had this in your wheel of icons i have the high layer icon in my setup in my working um
toolbars so that i can turn a layer on as i need to in my working plan view and then quickly go hide it again
the alternative method to that is you switch your saved plan view to none
and then and then make your changes and then make your layer set changes if you need
to go find something or you could just be working in none and know that you know whatever layer set you're in it
doesn't matter it's not going to associate with anything so um you can create you know a billion layer sets to
show whatever you want to show and so long as you're not modifying one that's uh linked to a saved plan view that you
care about then you can keep turning off and turning on layers as you need to to just get the job done we set up layer sets or
i set up layer sets for a client once that we put an l in front of everyone that was intended to go to the layout
and he didn't touch those when he was working the great method yeah absolutely it's a good training method
um so you know just to dive in a little bit more on on the power save plan views and
why we even want them you know why can't we just do it the way we used to do it in in
x whatever it was 11 or something like that where we didn't have save plane views right
um might have been x9 i don't even know um x one i think was the first one was saying
planned views i think no not say but save plan views are newer yeah those are way newer oh
you're right so in our general panel in our edit active
view and i mean edit active view only came around when we got saved plan views and edit active view that's multiple functions based on
what we're doing and what we're looking at you know what's the classification of the tab we have open
so if we're in a plan view tab edit active view is going to give us our general panel our select the default
panel and our reference display and we all know what a reference display is or we should so that we can show you know
another document or another floor or another floor with a different layer set
so we can do that in our reference display panel but in our general panel this is where we get a little bit of magic and save plan views which is we
can designate our floor we can designate our you know our pony wall display
that's simple enough we can also remember zoom and rotation and that's a
big one so if i click on save remember zoom and rotation this is huge if you want to do
one of the reasons i use this a use case is if i if i have a a master plan it's a
master remodel plan but i want to have a different scaled view of my kitchen and
i want to remember the zoom that's a great way of doing that this save plan view could be set to a
different scale and then remember the zoom level and
and by set to a different scale i mean set to a layer set that has
different scaled text and dimensions right so your dimensions
and your text defaults are driven by say a half inch layer set where the rest of the plan views are set to use a quarter
inch layer set so we can do a zoom level on a bathroom or on a kitchen for those little details where
all i have to do is switch to that view and i've got it zoomed so i'm going to do that i'm going to check remember zoom level and that
you're going to be answering this question right here too right how did where are you where do you control the text size for a plot plan my
plot plan texts are always too big yes well
i like to drive all of my text based annotations based on text styles
okay so if you have that workflow built in um to your plan template you know how
to use just the regular text not rich text if you're just using regular text
you can switch all text within a save plan view by switching the text style
associated with the layer that that text item is on so if it's a
dimension layer or if it's a text layer you're going to drive that text style for that
individual layer on your plot plan saved plan view it's hard to show this as quickly as i
can say it so you know and we only have so much time so i've got a first floor plan
right and i create it from um it seems like the electrical set i'm lost without a little
my regular tool part oh man i might have to just pump this up
pump this down button size uh but and this is always good to note i
love throwing this out whenever it comes up if you've got a global change to the software it's in preferences if you've
got an individual change to an architectural component symbol classification or something like that
it's going to be in default settings so um let's just save this so i can come back to it
sure and title three ways x11 was the first one to have plan views
x11 okay yeah i guessed right i think yeah i just heard that
we re launched this and i changed my icon sizes and we can actually see so here we go i've got a working let's see
open recent untitled three so there we go we've got electrical
layer set associated with the floor plan first floor now what happens if i switch to the electrical plan it's going to
prompt me to save now this is also another powerful feature of the saved plan view you can
set your saved plan view if i go into edit active view down at the bottom here save options
we have the option to prompt to save always save and never save
and so what that means is if as we are working we change something like
if we have this set to use the first floor and i save this and i press ok
and i build another floor
now if i try to switch off electrical plan view to first floor it's going to see that we registered a change and why
is that because all of a sudden when we built a floor the view changed to that floor that was
being built and so if we switch off of that saved plan view it wants to ask us
if we need to save that change or not so something that's powerful and i'm going to say no because i liked the floor that
it was associated with so if i switch back it's going to be back on that first floor level
so if you check never save if i check never save it's always going
to keep my established save plan view and this is really powerful if you're using
um a template plan right if you're using the save as method where every new
change and update you've made to your current project and you want to
save that as your default for all projects going forward we can get into the file menu
and we're going to get into save as templates under the templates
section people don't know about this you're going to go into your file menu templates
submenu save as template and what this is going to do is it's going to save my current project as a template plan to be used
for every new plan going forward so really powerful things here so a couple things let's backtrack
we've got a saved plan view we've established it the way that we like to establish it right we don't want
to mess with it ever again now we can say we never want to save this view no
matter what manner of messing up this view that we've done we never want to save it we
don't want to save the new layer set that we incorporated nothing but if you change if you change the
existing layer set it's going to keep those changes it's no it's not it's going to revert back so if
we switch to let's try it here i'm going to edit the active view i'm going to say
never say let me just zoom in on this i'm going to click on never save okay and i'm going to switch
uh my layer set to a camera view layer set
now i'm going to switch my saved plan view back to the working plan view okay we've switched no that's not what i'm
saying if you add if you add something to that layer that's part of the save plan view it
won't let you know that you added something to it right you added a new layer to it right we
don't have any prompts to never save on layer sets right you know kind of cool
that's fine if you turn on electrical on your framing plan it's not going to correct that you're
stuck with that yeah until you go turn it off which is why it's kind of important to have a
layer set like the working layer set where you can kind of mess it up as you need to right
so if i switch back just to make this point which was not what you were asking but
if i switch back we see that my electrical plan view was reverted back and taking this full circle the reason this
is important is because we can have a set of saved plan views that we are allowed to
mess up as we need to just to get the job done in terms of designing it in terms of building the model you know we
can do that just on the working set in fact i even do all my annotations in the working set and and that's what it
should be viewed as something we can mess up so that when we switch back to something else we know that it's going to be
exactly what we want to display in our print set so
now if we have saved plan views that are established and and we can depend on them to look exactly how we want them to
without ever having to even touch them well now we can have them pre-sent to a layout
and and that layout will be the same every next project it'll already have those views set
and let me just give you an example so we'll get into my we'll get into my plan templates real
quick yeah make this quick yeah i know we're running out of time yes we are so here we go i'm in my
working set i'm going to draw a couple walls i'm going to pop in some windows just to
differentiate this for everything else and i'm going to mess this up as you
know any way i'll i want to because we're in my working set
and then when i open up a layout
it's hard working with a big screen like this big icons and everything yeah yeah i know here we go i've got a
i've got a layout and this is a new layout this is a brand new layout and
the only thing i need to do to link this to this plan i just started is i need to
save this plan and on project stemi berg and then in my
new layout in tools in layout
reference plan files i'm going to re-link basically my reference plan files to that
this job i just created i just created this on this show just now right
so now when i re-link it if it's missing a save plan view it's going to run some errors but other than
that we should have views that are already pre-set and so it should already establish that
we've got our electrical plan view we've got a roof plan view we've got everything
oh we always run out of time with these things would you bring that that layout from a
template or from just a layout um this is a template layout this is um
it's just one of my template layouts with views like that are pre-sent and the linking is not set up because i
use the wrong template plan but if you have a template plan so long as
all the plan views that exist in this template plan um exist in the plan that
was pre-sent to layout you will when you re-link you'll automatically have your floor plan your
roof plan your electrical plans already sent to layout all your elevations are already pre-sent to layout
half your work's done by the time you work with the new re-centering tool for the viewport yeah it makes it really easy
which we could burn another show exactly yeah yeah or or 10. um
all right cool that's i learned some things there too uh
i learned that well i learned a lot about how you think but uh
the flexibility in the software has grown dramatically so it's really amazing all right we are we are at a
town we are out of time so i want to thank everybody for being here
any um i'll tell you in just one second about that um first if anybody here is going to go to
the coeur d'alene in august at the end of august first a
few days of september oh let me show my screen okay
i just want you to know that we're going to be there i've rented some houses there
and i have a couple spaces available and all i'm doing is covering the cost of the houses we're not doing training
classes anything like that we've got a bunch of people staying already um it's 5.85 for four nights if you want to
stay with us give me a call drop me an email i've got two spots available that uh two rooms available that you could get
for us and you come hang out with us for four days so if you want to hang out with the the group of us and
some really cool people that are going to be there some very experienced users of chief so this uh the the show the
training event is a what is their deal a thousand bucks something like that to attend their deal it's a really good
time i would highly recommend it if you want to really dig into chief even more it's the kind of thing we keep going
back to keep going back because you learn something every time you meet new people every time it's just really a cool event and that's the whole thing
about chief you just never stop learning the stuff so it's pretty amazing
um let's see uh the february event is i'm still putting i'll put the
information page together let me see if i can find
um what's the name of that place so here let me see if i can find
give me one second come on
that's not it i wasn't planning on necessarily talking about this
so in other words you haven't you're not ready to release anything yet well reserve the dates basically um and
the dates are either the 12th through that week or the 19th through that week here let me go to my calendar real quick
and i'll show you the dates um it's
uh these dates right here so we'll you could check in on the 12th check out on the 19th or and then check in on the 19
check on the 27th so people stay in the second week we'll get an extra day for free um
it's gonna be a five-day event we're all gonna you know the three of us will be there robin will be there we'll have lots of other people there my whole
family is coming in there to do all the cooking and taking care of you guys and you will have a ball um
i'll just say this is gonna be about four grand for the whole event okay just to give you an idea what the price is going to be for one week
for one week yeah that's seven full days that's seven nights
um [Music] eight nights no seven nights um all your
meals all the f and b that that and you'll be fed so well remember the saying here is come for the food stay
for the training um and it's very true uh you will have a
good time that that and meaning different designers with different you know workflows and mindsets and
all over yeah yeah and the the was it called again the black stallion i think it is if you want to look up the place
uh that's the name of one of my computers yeah so this is where we'll be staying
and if you go to the gallery you'll see that um it is quite a place that we're going to
be at it's off season in february for the west uh west
um virginia beach thank you and uh so we're not planning on doing anything we're planning this is going to be
called a total immersion event you will be there we're going to talk nothing about chief architect and how to
increase your design skills and increase the profits in your business for that whole week so i'm going to i'm going to
wager chief architect symbols on games of pool do what now i'm going to wager chief
architect symbols for games of pool oh are you a ringer that's the room right
there yeah i bet you a ringer too um so anyway return
so mark your calendar uh you go check out blackstone.com and uh this is going to be cool so i'm
pretty excited about this and uh yeah you will leave with a lot more knowledge
than you thought your brain could hold at least that's what i'm hoping all
right enough of that uh thanks again everybody for being here we'll see you next time uh at the designer show maybe renee will
join us maybe uh robin will join us next time and uh if you guys have any topic ideas
let us know it's always a challenge to come up with i you know what we're going to talk about in these things so
um cool thanks guys oh hey one more thing yeah guys go to the chief experts facebook page if you're on facebook um i
always drop free symbols every friday so oh yeah yeah so
yeah just go just look up our group we have the chief chief architect training by chief
experts or something like that group if you just search chief architect training on facebook you'll come up with
our group go ahead and join our group and join us or go to my home page at
chiefexperts.com let me show my screen again and if you go to
you can find it really easy here if i type in the right thing
and you scroll down the very bottom of the page you can join our private group right here that's the one on facebook
it's free you can join in uh have a conversation have some fun and you'll
get renee's stuff so all right thanks everybody you have a great week weekend and we'll
see you next time bye

Elevate Your Chief Architect & Design Business Skills
Reserve your Spot to the 2024 Chief Experts Total Immersion Summit For Chief Architect Users
Outer Banks, NC
March 1 to 10, 2024

Mastering Kitchen, Bath, and Lighting Design BUNDLE - Only $595
Special Bundle Offer: Four Courses for Just $595!
SAVE $1,737
LIMITED TIME ONLY
On-Demand Chief Architect Training
Don't Miss These New Courses With A Simple Goal: "Help You Become A Better Designer"
- Understand And Define The Structural Elements In Building Construction
- "Creating a Plan - Quick Start" course for Chief Architect users
- Define And Draw The Structural Elements In Your Projects
- Discover the Inner Workings of Chief Architect and What it Wants From You
Upcoming Events