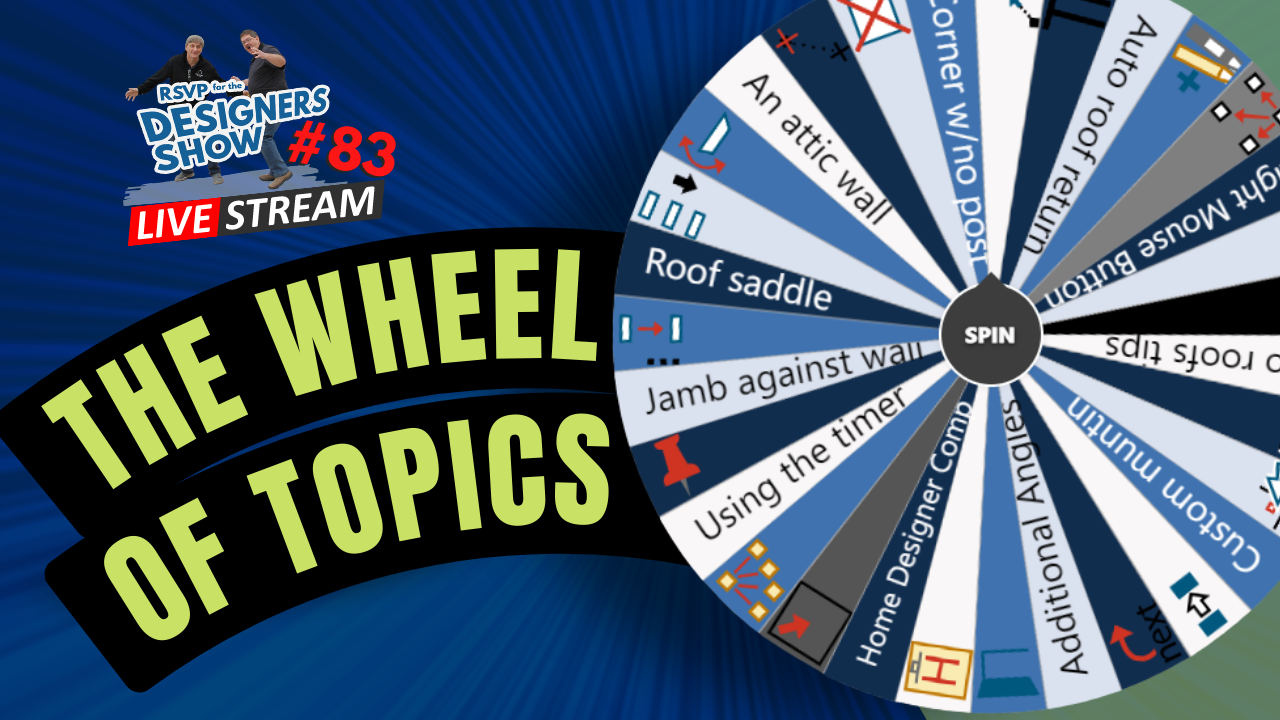
We had a great time with this in our last Designers Show so we're going to do it again!
Sometimes it makes sense to learn Chief Architect a little at a time. Did you know that there are over 1,200 icons, and they all have specific functions?
In this Designers Show we have some fun and spin the wheel to see what icons or short topics we'll discuss. Chief has grown into an extensive program, and sometimes the best way to learn it is one icon at a time.
Welcome & Introduction 00:01
Right Mouse Button 05:15
Drawing Stairs 16:55
Match & Apply Properties (Paste) 19:42
Move To Front/Back 26:35
Using The Timer 32:07
Delete 41:15
Object Properties 42:43
Extend 45:00
Polyline Union 47:13
Copy Paste 51:50
Snap Point to Point Move 55:40
Dan's Edit Handles 1:00:10
Center Tool 1:01:42
Dan's Training Products 1:04:50
Wrap Up 1:06:30
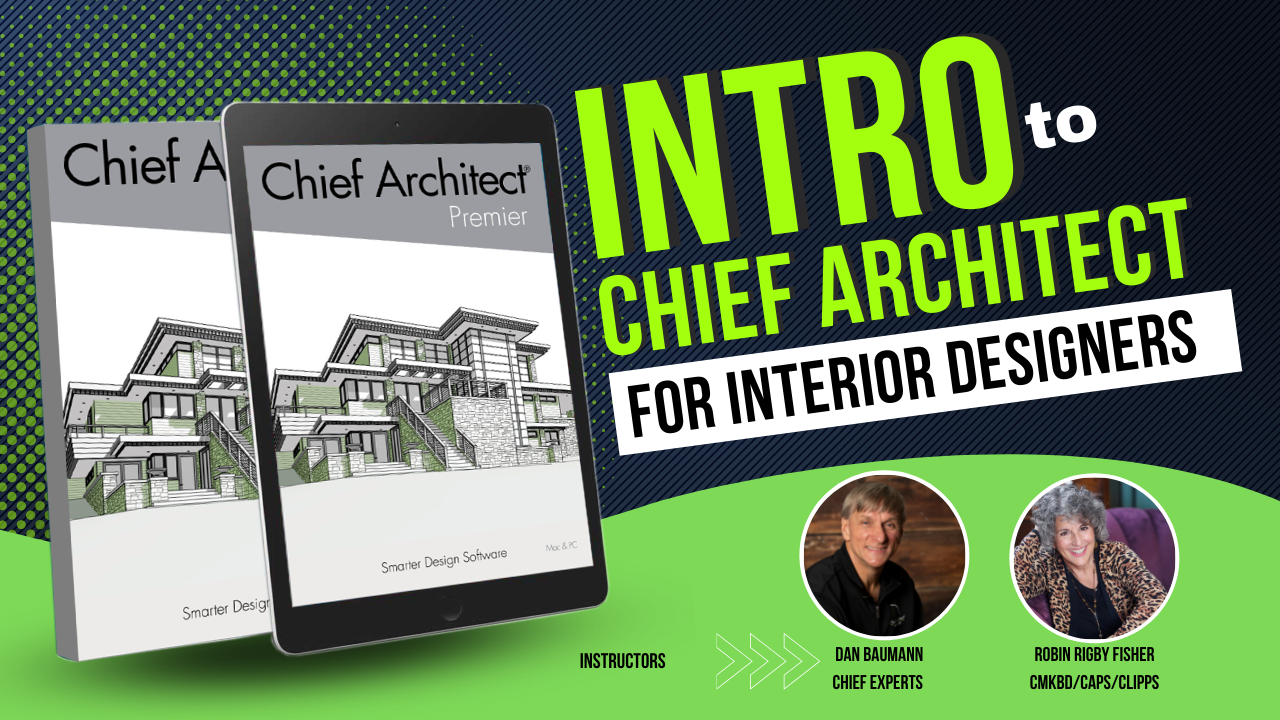
Intro to Chief Architect for Interior Designers
This course if perfect for interior designers who are new to Chief Architect.
Spend less time learning Chief Architect and Take Your Interior Design Skills to the Next Level.
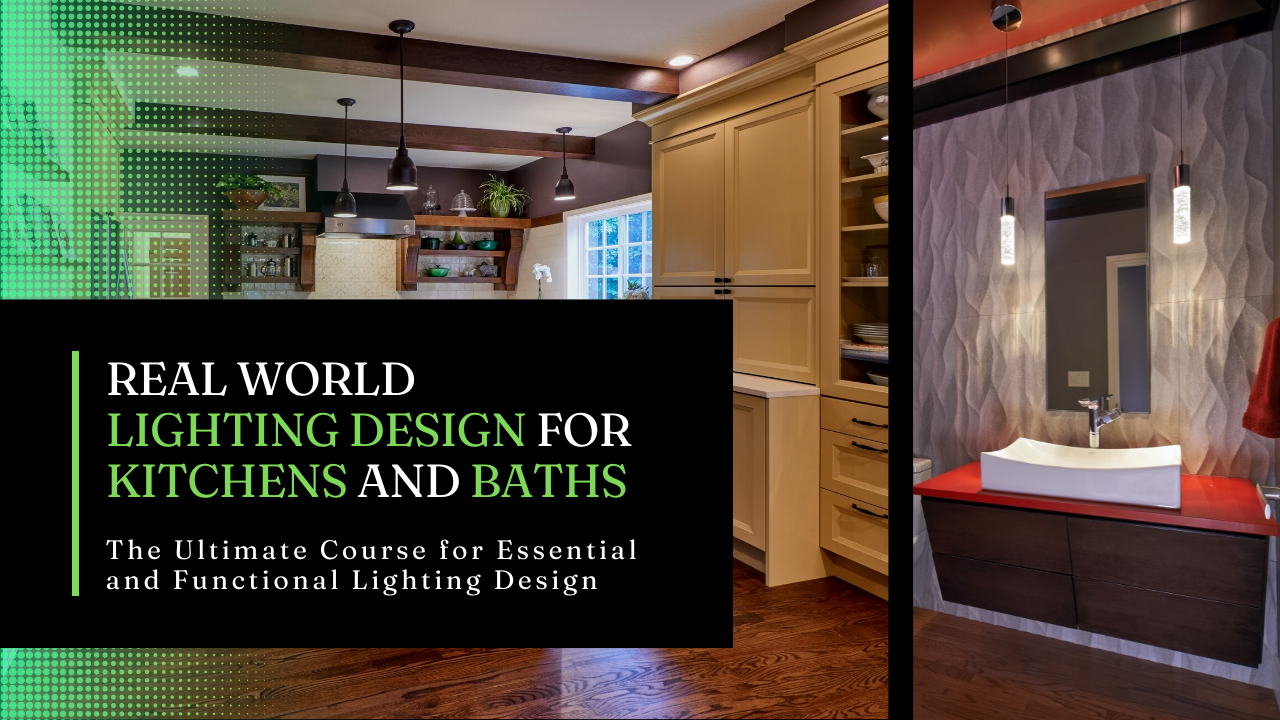
Real World Lighting Design for Kitchens and Baths
The Ultimate Course for Essential and Functional Lighting Design
Discover the best practices for determining what type of lighting is best for an amazing residential kitchens and bathrooms.
uh good morning afternoon evening everyone wherever you are uh welcome to the designer show i'm on here with uh renee rabbit and uh john probably i'm not sure if john will be here today or ben robbins busy traveling to meet her new grandbaby so uh she's got priorities in order so we gotta love that anyway welcome and renee how are you today i'm doing good cool checking my mute yeah yeah i know how that goes um um let's see we'll have a few guests i see edits on there i edit nice to see you thanks for joining us today and um anybody else on here you know feel free to say hi let us know where you're at where you're healing from and we'd love to hear we would love to hear from you so i was just telling renee this this morning kind of just like poofed by i mean it was like i got up early i had all this time to get all this stuff done and next thing i look at the clock it's like oh time to start the show so fortunately i got most everything done anyway excited to be here uh we're gonna do a little bit more of spin the wheel and have some fun with that uh in the meantime we'll uh we'll just have at it so if you have questions feel free to type them in renee how's your week been anything exciting happening uh it's it's been a while i'm going through a refinance it's been wild oh yeah you're still going through that now oh yeah yeah gosh you're self-employed too right yeah so yeah if you had a w if you worked at mcdonald's and had w2 it'd probably be a piece of cake yeah oh man yeah i've been there years ago i remember what that was like to under finance when you're self-employed it's not fun so if anybody has any advice renee feel free to chime in uh i'm i'm closing the day i think so this oh okay well it's all gonna be done yeah hey mike uh william from new jersey got jeff hey jeff you're gonna pick me up a week from tuesday uh be fun to see you guys again in coeur d'alene so looking forward to it hi susie all right we got a bunch of people hello jeff's in norcal what's that jeffrey's in my area jeff rexford uh oh okay yeah jeff where are you located i'm sure you'll meet renee in coeur d'alene jeff oh he's going cool yeah he'll be staying with us too so jeremy margaret and there's renee all right yep cool again thanks for being here uh feel free to ask questions as we go and we'll just have a couple quick house cleaning things um let's go over to show my screen here we go i need to click the right buttons here so a couple of things i want to point out i'm going to get to the right place um this our summer sale is still on till the end of tonight so it's 40 all about off of all of our products so feel free to check that out if you head over to the store chief experts academy or just chief experts dot com and all of the items on here except the pro academy are on sale 40 off so check out at the bottom of the page be sure to check out the bundles where you can get groups of items at a fairly substantial savings so there's a lot of stuff here and the sheets that we'll be talking from today where i'm showing icons are from my mastering chief architect course if you so i do have lots of those type of sheets in there where i lay things out you go through them in pretty great detail to show you what uh what it's all about so this is the sheet that i'm talking about and you know things like that were just i spent time explaining a lot of different things even things like the mouse and all the function that you have in a mouse so a lot of stuff and renee as you know very well there's never enough there's what's the right way to say this there's never an opportunity not to learn something new in chief architect or vice versa so there's always an opportunity to learn something new in chief architect so it's a it's quite a program and it just keeps growing and getting better and better so i'm i'm excited to go to coeur d'alene uh a week from what week from what is today friday yeah we have two weeks from today we'll be done with the course and uh we're going to be sitting through the advanced ii course so we'll be able to really uh pick the brains of the chief people and yeah and come back quick yeah hoping to come back with lots of great information that we'd share with everybody ben uh usually when i go to these things i take a ton of notes and and it's really cool to get refreshed on all those things just like you guys are here today watching this stuff and you know you you you watch the same video or same thing a couple of times you're gonna pick up something new every time so just keep that in mind all right uh renee you're hearing me okay i think i got the right mic picked out here so yeah let's just have at it let's go spin our wheel and see where we land today so again the uh we did this last week so we're gonna do it again i added some new icons and real quickly the ones highlighted in yellow are some of the icons we covered plus we covered about a half dozen other little topics so i did add a dozen new icons to the wheel and let's go let's go grab one and we'll have at it so i'm gonna hit the spin button and we'll see where we land and again if you guys have questions while we're doing this feel free to ask them all right the right mouse button this is a good one um you know you guys you know i i don't use a fancy mouse like rene does i just have my plain old logitech you know two button mouse with the scroll wheel and some buttons i haven't even programmed so um let's go talk about that for a second what you can do with your mouse and the mouse even a simple little mouse like i have has a lot of function to it so let's just talk about this right here oops i want to talk about the right mouse button that's this button right here and what's it used for in chief architect so let me just run through this quickly so when you're working in chief and you're selecting things chiefs the button is called the right mouse button is called the pick button so what that means is you can select virtually anything in your plan when you click on it so if i take my right mouse button it doesn't matter which mode i'm in on top here i can click on anything with the right mouse button now you notice i don't get that drop down menu this contextual menu when i right click the first time because in my preferences so when i click on preferences right here you have to double click huh you have clicked twice i have click i've clicked twice the display turned on and the reason i do that in preferences is because uh whenever i'm doing something i might just want to grab that cabinet and move it or i want might want to grab this window and dimension it so i don't want that menu there in the way all the time because i always have to go select and then do my thing so first time is just this ticket second click gets the menu which i do use that once in a while so it is handy so check that so so the right mouse button is your pick button it's used to select anything in your plan i'll click twice to show contextual menu that's just what i showed you draw wall lines with the right mouse button draw walls slash lines with the right mouse button so what does that mean um so when we go to our plan let's go open up a new plan real quick and when you start working and you're here let me just go to this one so when you're gonna draw something you know how you click on an item and you start drawing with your left mouse button you have to click each time to draw use your right mouse button to draw and then you won't have to see how it just it stays connected then i click with my right click with my right and i'm done so you don't have to pick your mouse up and position your cursor again same with canvas continuous draw mode that's what it's called thank you so same with cad lines so i can just keep drawing without having to click on a specific point and draw those cad lines out and get whatever shape i want when i'm finished i just hit escape and there you go so that works pretty well all right um the other couple of things that you could do draw stairs going down so if we go in here and you typically when you draw stairs going in your plan you're going to draw them going up sometimes you want to draw them going down use your right mouse button to do that and then go down it's going to get a message here just read it and do what it says typically you only draw steers going down from decks to terrain uh in your plan itself you always draw the stairs from the first floor to the second floor second or third floor basement to the first floor because chief will automatically recognize the top and bottom of the stairs within that floor system so keep that in mind uh that's a new one to me i've never used that function going down how do you make your stairs go down i just flip them around oh well there you go you won't have to flip them around anymore or reference to the lower floor and then click it yeah that's cool yeah yeah so renee if you're watching the the uh the chat or the chat come in because i'm kind of over on this screen in the chats on the other screen usually john watches this for me yeah so if you could keep an eye on that and if people have questions i don't know if you you you can't highlight the text i can't highlight them no darn i normally john does that but just let me know that there's a question and i'll go highlight it like this one right here i see dan i like the pages instruction sheets you put together my desk is covered with them for referencing thanks doug i appreciate that uh yeah it's i put a lot of effort into these things yeah a lot of work i am excited to do it again here coming up so i've got lots of plans i'm not going anywhere anytime soon all right so let's go back to that sheet i've got a couple more uh ben line stairs roads what does that mean when we uh everything in chief starts with a cad line doesn't matter what it is cad liner or a polyline shape but when you draw something if you want to bend it just use your right mouse button and you can grab the end of that and bend it so if you hold your control key down you can bend it freely without it snapping so that's how you can bend things same with walls since walls are created out of lines you can bend the wall you can bend stairs because stairs originate from a cad line going down the center of it you can grab the center of the stairs and bend them so that works well roads sidewalks same kind of thing they all originate from a cad line down the center of the object and you can bend those cad lines to perform whatever shape you want and uh resize to you we've got another alt behavior i know is uh resize is that what you're doing next year yep you got it ah yes so when we draw cad boxes and you grab the corner of a cad box you can go like this but if you use your right mouse button it goes like this so you can re you know re-size those two sides at once so that's a nice way to do it it works on the layout sheet for viewports and things like that too so you know basically anything made out of a cad box uh does it work with cabinets uh no cat well i guess it does you can resize cabinets both ways same thing so the cabinet's kind of like a polyline box um so that does that and finally you you got a comment from carl wants to talk about the stairs again real quick sure carl what would you like uh could you say that about stair floor levels again okay let me finish this one last thing and then i'll do that carl um i got a few actually got something a few things i need to add to this list but edit library items this is kind of a new i don't know if it's a new thing or not but it's one of those things that i've really gotten used to in chief so when you when you're in your library and you're going to do some things in your library i have my library disconnected so if i'm going to go into my user catalog where i've added some symbols or something like that you got a lot of right mouse functionality in your library so when you right click on something in a library you could do a lot of things you can open that object without having to place it in your plan to work on it i could change the color the sides a lot of different things about that item i could right click on this and i could open the symbol itself because this is event that i made i needed in a project so i i can oops it's object so i can now i can open that symbol and i can make changes to the symbol itself here so i could flip it i could you know change the way the 2d block looks lots of different things that you can do with cymbals i've been using this a lot on a big project i'm working on where i'm putting a whole bunch of buildings on a big lot and i had to use that a lot so you could do that um you can set your search attributes so if i wanted to be able to keep this on my library and search for it i could put keywords in like vant or gable uh gable event or something like that whatever keywords all the items in chief's library have keywords associated with them dan i'll i'll add something to that part right there search attributes in my library um i put my prefix of you know rabbit design is just rds so i put rd vent and so oh yeah i just get my catalog only that's a great idea that's a really good idea so uh there you go so um keep that in mind and then a few other things you got text macro manager and how to get into that and then you could edit the cad block every uh every symbol in chief has a 2d cad block associated with it so if i wanted to change how that 2d item looks with the symbol i've never even done this before i always do that in the symbol i could change that cad block and then i could hit save and it's going to then when i look at that symbol and place it in my plan i'm going to have that cad block with the x on it so if you wanted to have an outlet with a different size you know different size outlet on it you know the cad lines on it you could do that you could add text to an item so it makes it really easy to edit those items in your library and one last thing that's really cool and you guys might not be aware about two things when you're in your libraries so let's say you're looking at molding profiles and you find a nice crown molding that you want to use in your plan but you want to put that in your drawing not from not in the 3d you just want to draw that so what you got to do is click on ca34 over here you can't click on the picture you have to go over here and click on ca34 and then you can hit right click and hit place that molding profile in your plan and you can do that and now there's the cad drawing of that molding so now you could do that i could take and combine other moldings together too to complete a cad drawing of that molding which is kind of nice um and the other thing when you're searching for things so let's search for a i don't let's just search for a refrigerator okay so i'm going to scroll down my list and i find one that oh i kind of like that it's similar to what i want so when you're in search mode you can right click on this item and now hit show in browser and what that's going to do is show you the library where that refrigerator is coming from and then you can click on it and get to the lot to all the items in that library so i use that quite a bit too when i'm looking for items in my plan if i find a stove that's kind of like i want i'll click on it show the rest of the indent library i might get lucky and find the one i really want so kind of handy there so there's your right mouse button a lot of things you can do with it we should do a show just about libraries we should do a show about libraries yeah do that that would be more than a show it could be more way more than a show all right cool um let's go back to that stair question that uh that was asked here by carl i think it was come on i got something on there the screen blocking there we go so carl you had asked about the stair loads okay so when you are um drawing stairs in your plan you can make your stairs go you know by default they'll go up if you want to go down like from a deck to the grade you use your right mouse button to draw them okay when you're working in your plan inside of the building because chief will always recognize the floors from one floor to the next so this is a two-story house so when i draw my stairs i always want to draw them going up so that chief will automatically recognize both floor heights and divvy up the stairs treads evenly the stair risers evenly then i just cut a hole in the floor to display the stairs and i can see the stairs through that hole in the floor so that's why you always draw your stairs going up inside your model outside from deck to ground or something like that you don't do that or a lot of times i tell people if you're working you know a lot of a lot of people do a kitchen plan they want to show some stairs going down but they're not going to draw the basement or anything they just want to have stairs in their plan they're going down go ahead just go ahead and draw them with your right mouse button going down you're good to go okay you might you know now they'll show down in your plan and that's what you want they'll still hook i think they still hook to the floor right um no they hook they did the bottom of the stairs attached to the lower floor so if i was going to show a 3d model i'd have to click on that stair and actually push them down into that hole in the floor unless you create a hole in the floor first i don't know you have to play with that a little bit i thought we were talking about carl all right let's go spin that wheel again that was a long one so when we don't have time we don't there's john hey there's johnny hey about time you show up man i know you got lost in there you got lost right now you got lost in the woods didn't you yeah i did i did so you're up north yet yep helping your friend do some taping cool yeah and you're in the woods john's using a fake backdrop yeah yeah that's the real today it looks like a real backdrop to me it is yes somewhere or for real can you hear the traffic behind me again yeah okay hey carl's trying to stay with you still [Laughter] what's that hey carl i'd let you but it only has one bed girl so it's not gonna work out if this is ongoing this is fun no fold out on john's camper you can sleep in the front seat if you want every week he's gonna hit you up for that okay we gotta get back to our wheel all right let's spin it up here sorry that one i knew that one would take a long time all right the uh didn't we cover that last year yeah we did that last time all right i didn't i must not hit hyde choice all right we're gonna spin it again if you want to see that one you have to go back to last week's show go to the blog or go to youtube and you can see that all right we've got the uh uh what the hell is the name of that icon i don't remember right off hand but i don't remember that one either i'll find out in one second uh because i'll go to my icon sheet wherever it is because that's not the match properties one what is that one that is the um all right where'd it go why not did i put a errand icon in there um or did we cover that one oh here it is apply properties it's the apply properties icon okay there you go okay we've got match properties and we've got apply properties okay so we can't really talk about apply properties unless we talk about match properties so we're going to talk about both of those icons so if the other icon comes up we'll just say we've already talked about that so when we go into chief and here's a really good use for match properties it's a really simple uh solution to something that can drive you nuts sometimes so if you're working on a big plan and you've got a lot of rooms in your plan and you you come up in and so you open the dialogue and you've made changes to all the floor heights and everything so here below here we've got a floor height that's 121 with a i'm going to change the ceiling below to 96. and so we've got different so you want to at some point you might have a lot of stuff going on your plan i've done this on plans it's like i need to check my plan to see which rooms um are the right floor height so we're going to use match properties okay and this that's this icon right here and so when i click on that i can you you have a lot of values there's a lot of values in any room any space anything in chief actually but in this case i just want to check my floor elevation so we type in the word floor up here and here's the floor options so my floor elevation should be that number so when i click ok you'll see that well you know what happened when i changed that it changed the whole lower level because there's no walls down there yep oh there's a wall down there why didn't it change the whole thing should have not no they're different chief what are you doing i hate it when it does this so let's try that again check my floor properties and check full floor i didn't practice this one before the show today guys um that was part of this comment about the morning went really fast uh okay so let's hit okay okay so it's not working so let's go and do some let's go down here and do it let me add a couple rooms down here proper preparation there's a 5p thing i forget how that works if kyle hunt talks about that all the time what does he say um anyway i usually try to practice all of this stuff before i start let's lower my floor by two inches here okay so uh so i'm going to click on this room right here and i want to see if all my other floor levels are the same so i'm going to i'm going to hit match properties and i'm going to check the floor level and so what i could do it with any of these things and so if i wanted to put this floor level in other spaces if i want to put this crown molding in other rooms so select the items you want to take out of a room and then you could cut paste them into other rooms using this particular setting so you'll notice now that some of the floors here are come up highlighted so those floors mat this this room matches this room but i want these to all be the same so here's that other icon that just came up it's called match properties i i just call it my paste button my paste properties button okay i can't write with my mouse but i really can't write it with my mouse uh so let's check my handwriting yeah mine too uh that's why we type uh so what we have to do is click that icon that's your paste button and now i could go click on the rooms where i want to paste that floor height and now all of these rooms will have that same floor height so that's a really easy way to kind of go around your plan and do that for the parts of your plan where something's just not working out right or if you want to put the crown molding from this room into this room you could do this select the crown molding paste it in the other rooms and all of those items on that list work that way so that's your paste properties button apply plywood i've been using that a lot too if i wanted to change like the exterior wall type okay brick or something like that um just do that to find all the exterior walls and then change it you get them all selected at one time and then go change it oh does that work for that yeah i've never tried that so if i click on a wall and then you can find the wall type and the match properties now it's down toward the bottom might even be i think it's one that that you can't change you can't apply the properties to it it might be yeah yeah that one right there select that little section and selected all my outside walls which this back wall is stucco so so now i could open the dialog and change all of those walls at once cool i like it i've not done that before i usually click on a wall and click hold my control key down and click all my extra walls to change them into something else nice nice i like that john good one see we put our heads together we're coming also for finding stuff that's on the same layer like that guidelines that are on the same layer or something like that works great for that oh yeah okay i can see that because you can't necessarily group select if you have cad lines that are on you know a couple different layers you can't group click yeah i could say that you can sort them out that way so the the apply properties thing they've come up with a lot of new that's really changed a lot of late so that never used to have that much stuff on it but as with everything achieved they keep getting better and better all right let's go spinner wheel again um i tied that choice and i need your timer john we're going we're spending too much time on these things all right what's that one i know what it is anybody come on uh it's the layer one that move it on the right move too shorten it out move yeah move the layer that it draws order there you go draw order move the front move the back whatever you want to call it so whenever you are working in a plan and let me just create a couple cad boxes here so i'm going to create a box that has a fill of black and a fill of different color and all right black and blue minnesota united colors all right so you'll notice this black box is sitting on top of that so as you add things in your plan they do get tend to get stacked up on top of each other so what we want to do sometimes is we want to change that that orientation and that's what this icon down here does that allows us to move things to a different position on top or behind other items so when i click on that you'll notice you get a bunch of little icons over here okay and so this one of course nothing that just takes us back to the last menu so i can see that that item is on draw order number 21. um so these different icons mean if i click this one it's going to move that black box all the way to the back of everything else it'll be behind everything else in my plan on the floor plan this is only for the floor plan if i click this one it'll move it on top of everything in my plan so it'll be in the number one position this will move it forward one at a time backwards one at a time in this one and actually the forward backward um the 21 with the line above it it's saying that whatever that item is it's at the top of the stack on um so if i click this one and i click that we should see that line but there's no line now no okay that makes sense uh that means it's in the middle when there's no line so there's three levels per number cool never noticed that before so anyway i can just click that and i can move that item backwards all the way to the back i can move it all the way forward i can move it forward and back a little at a time just by clicking on this and selecting the item or i could just use these i rarely use these numbers right where i'm clicking them like this and see how it changes the numbers um so that's what that's all about and i i use that function a lot because you know like you put some framing in your plan you put a beam under some floor joists and the beam sitting on on the floor plan it looks like the beams on top of the joist you need to move that back or move the joist forward that's object specific too so if you just have one joist that needs to show up a certain way you can put just that one joist on that layer on the draw right right carl says the designer show is great in rabbit design as well plus renee we really love having you here so yeah thank you i appreciate you joining us we love your input um can i comment on jeffrey's absolutely that one right there it does work well for furniture but i have another preference if you've got something like a rug or something that just doesn't need to have a fill style i'd rather go modify the symbol and remove the fill on the 2d symbol panel okay of the symbol classification so oops there we go and then save it back to your library and never have to mess withdraw order again oh okay oh yeah that makes sense you're picking materials right now there you see that now i know i got it i was picking the wrong thing so so right right now that rug is sitting on top of my counter so i need to move it back in my plan so that's where i would use this draw order thing right behind everything and since i have a you know i have a transparent semi-transparent fill on my countertops you kind of still see that edge of that rug there so instead of that open the open the symbol itself and then get to your 2d block panel and then uncheck fill just uncheck fill oh oh that's where we do that yeah and now press ok and now save it back to your library and that way you don't have to fight with draw order okay that would be a good thing to put in your temp can that be a thing you put in your template renee um if you're just storing cymbals in there yeah like for your cabinets for for like dan's template that he has for doing asbelts yeah you have to turn off all the fills on the yeah you'd have to do them one at a time probably huh so you can do them at properties and do them all at once maybe oh yeah possibly right i think you can do that on symbol fill though so if you have the furniture layout we'll have to look at that yeah all right so let's spin it up again good point john though because that is for those builds have no appliances with the fill and it's a real pain using the timer all right you guys how many guys here how many of you use the timer renee yeah and i use it all the time what is the timer okay our plan timer that's this little bugger right here where we see this uh these things right here i don't manually turn the timer on and off but i i'm too scattered all over the place to be able to do that um i use this i use the cumulative time timer and so when i click on that what you're going to get a list is a list of the time that you have working on a plan so this particular sample plan i've had open for a total of four hours so we did it last week's show i i played with it before last week's show to try out some things for the icons we used it during the show i opened it a little bit before this show and now we're using it during this show so four hours total now the thing that bugs me is this list is pretty much unreadable okay so here's what i like to do so i'll take this and i'll export it as a csv file or text file whatever you want to use it doesn't really matter let me just throw it in here and i'll just call it my test test time then what i do is go into my spreadsheet and i import and i open that file so i open a new workbook i go file import or file open and then i bring that time in and you can do some some things with that now so i can i'm going to go browse for that file i'm going to go because what i like to do with my clients is i kind of break it down by the day so i mean you know five hours this day three hours this stay and you know if i do it soon enough i can remember what i did on those days so let me go find that file real quick so i got to switch down here to see it to the text files and go open up that test time file you always going to be fixed it's always going to be delimited and comma separated and then hit finish and here is that list of time that i had for that project so then what i like to do and this is just me do whatever you like let's throw a couple spaces in here so insert lines between the different days okay so on the fourth i had that many on the fifth i have that many and now on the 19th i have that many and then i just go add up these columns so i go equal to m and i just saw an excel thing yesterday i got to go look at that now i can add up the time for these different days that i've been working on it now i have a total for each a day at which chief would do this in their stupid program not stupid program i wish they would do this in their timer thing but no they don't so this is how i will then you know i'll kind of go back and i'll think back what i did on the day and i'll make a list of it and bam give that to the client so it's a way to it's just a way to come up with that now that's a little confused here because let's see three and a half it's not coming up to four hours probably i wonder if it's because i didn't save it or something yet today yeah what were you saying renee i i was going to say that i've been using the comments on the time time schedule too oh yeah that's a great idea you bet so you can put in you can just put in there what you worked on that day yeah yeah i got a good trick for anybody that might not know it uh if you as soon as you start a project if you associate it with a layout file then if you take the timer from the layout file that will be full time for plan and layout that way you're not you know um having to figure out the difference between a plan and layout files time tracker because the two overlap does that work that way yeah it does if you if you associate it from the get go it will always track that plan if you have layout open to get it the full time yep so that will include your you know your comp your comp and layout all your work and layout so all you really have to do then is open up a layout and put a floor plan on it save that layout and you'll be good to go yeah which is the way you have layout open when you're working on the plan yeah exactly so you always open your plan from the layout then yeah so if you want to track a full project from start to end including construction documents you got to have a layout open okay what i've been doing and i like that suggestion i don't know if i'm disciplined enough to have a layout open all the time while i'm working on a plan what i would always do is open my layout time and then i would create a separate sheet for that but then i would put the word layout after the layout time then i would combine the sheets and sort them that way and then i could kind of see yeah so it's going to get me pretty close yeah because if the layouts open all the time while i'm working on the plan and they're not linked well it would be linked at that point but i might get double time on certain things anyway here's another trick so you don't really have to bring it into the to an excel file to add it up would be to if you're going to get in the habit of making comments on the timesheet make the comment and then put the total number of hours that were there at the end of that day that you got done working on it so then you can just you know like today it was four hours tomorrow it's the total six hours so i worked on it for two days two hours on that one day that makes sense yeah yeah but i'm lazy yeah so like many of us um i work on a half dozen different plans every day sometimes right so i'm not going to keep track of you know i worked on this from 15 and i worked on this one and i went back and worked on that one and but the time tracker will keep track of that for me and if i just you know take the time to separate the times like i did on the spreadsheet it's working good for me um you know i'm feeling comfortable with that it's it's pretty close another thing i've done is i've changed my time i have it shut off every minute if i haven't been on it for a minute i haven't shut it off that way i can see if how many times i got interrupted that day or oh sure that kind of thing one last thing about that if you're working on if different people are working on the same plan make sure you go up to your preferences and go to your time tracker um where is that here again it's under general was it i think no it's got its own word no no see it no i think it's like file management or something uh i know it's time tracker the one that says time tracker on it right the space too small i can't read it to see oh yeah there you go all right make sure you put your name on the computer you're working on put your that person's name in there because then when you move the plan back and forth everybody's name will be associated on that list and there's where you would change the minutes that you wanted to time out yeah so if you stop working on your plan you go work on something else for five minutes um you know it's gonna stop counting the time after that so this is where it gets tricky because okay so now you're on the phone you're on the internet looking for things for your project that you're working on so you've just spent an hour doing that and then you go back to chief well chief didn't count that hour that you were just doing that so you have to i set mine to 15 minutes because of that reason right there that's a really good idea so i'm going to do that right now and a lot of times i'm not doing stuff like that i'm just working on a plan for somebody you know cleaning it up that kind of thing yeah that's why i set mine at a minute so that it holds up sure there you go all right cool um you can also turn off the the stop timer dialog too in that same same spot all right um again before i do this next one you guys the uh forty percent off sale ends today so if you're interested in any of our recorded products and again a lot of stuff that i'm talking about i do cover in the mastering course too um so you get a lot of information from that uh ends tonight at midnight so summer 40 is use your code um that's not including the pro academy right now today so let me know if you have any questions let's go back and spin the wheel again john we need your timer you've been doing good you've been doing good i've been keeping an eye on it all right well this is an easy one uh delete yeah don't push that don't ever use that button just use the delete key on your keyboard okay i've i've had guys in my class that would be you know they do something then they always go down here and hit delete and it just drives me nuts just you don't that's mouse movement that you don't need to do just hit your delete button on your keyboard so um or if rene which one of you has your left um your one of your buttons set up is delete anybody on your mouse yeah i do i do yeah i have delete and space on my mouse and and that saves a ton of time there you go so you want to delete something just click the button on your mouse that does the delete so bam done um i set my hotkeys up so that um delete is x so that control x is cut oh there you go that's a good idea the x is the delete key because your hand's always right there anyway i like that let me do that make a note of that all right cool 15 minutes left how many more can we do oh the big o open object no click properties there we go yep so when you select something um you'll have a little icon down here that'll be that one right there oh yeah so rather you know if you want to find out what object property that is when you click that it's going to show that that item i clicked on is a normal wall it's got wall layers so you could you could control that item from this list right here without having to go into the full set of layers now what's better than that even is to just turn on your layers on the side here okay hit the little gear icon turn on you know i like to have usually i have all these turned on i'm surprised they're not right now so i turn on the first five don't turn on show on all layers show all layers then on columns you know i guess i do leave these shut up shut off but now you've got your complete layer here so whenever you click on something now you've got your list of items right there it's just a nice way to work with the different layers in your thing a hundred percent of the time when i bring a dwg and i will use this to uh adjust all the lines in the dwg just really makes it easy to do um i won't get into that right now but uh so i feel like the only reason to use uh the object layer properties is if you have show all layers on in aldo here you mean if you have this turned on yeah yeah because then when you click on something you get in that whole list of layers that you would get from by clicking on the icon up here and it kind of defeats the point of having the side window so don't turn on show all layers and you'll have a much better experience using the layers but that's what that icon does chose the layers for that item and if you have your layers shut up then it's handy to have that because then you can just bam there's the layers for that item sometimes you know i'm working i don't always have this turned on because i'm you know i'm turning all this off to get my screen real estate bigger i don't want to work on things yeah and so that works fine too or you could open it on your other screen all right let's spin the wheel spin the wheel spin the wheel here we go comment here these shortcuts are cutting into my billable hours no come on no no no no no no no no raise your rates dude raise your rates yeah set your timeout higher and then send your time tracker out yeah yeah okay uh that's an easy one extend all right i won't even have a guess oh that's that's my favorite one i feel like people don't use it very often what's your hotkey for that one i i don't know what i actually don't have a hotkey for that one i use it all the time and i don't have one for that either i use it all the time for construction lines yep oops okay i'm just gonna make a bunch of copies here oh god that's that really let's say you wanna you have some cad lines in your plan and this is this this tool works great for framing i use it a lot for framing but the concept is here you you can trim and extend things okay so we're talking about extend here so i want to extend these lines up to here and even if that's offset you know if i put a break in here and i offset that now i can extend the lines to match that offset so so when i do an extend and i don't have a hotkey set up either but i'm going to um you just click the extend button again you highlight the item you want to extend to hit the button and then you draw a fence what's called a fence over see how you can kind of see what it's expanding up there i love that i love that number 14. i know yeah this is so cool before you never knew what it was going to do and there you go so you've just extended all those lines up to that if that trick doesn't save you hours on a framing plan oh my god yeah well then the opposite of that is the trim button we haven't spun that one up yet john can't talk about that no but it's right there the same thing maybe we'll get lucky so extend is a really handy tool uh we didn't get it all right this one is that um is that the one that is that's intersected right yeah polyline union yeah okay so one of my big questions i'm going to have when i meet the people in coeur d'alene is using that new 3d solid thing how do we do it doesn't work the same as it used to which yeah it's a little different it's a lot different actually but that's all right i just want to learn how to use it but anyway in the meantime let's say you've drawn some things on your plan this is you know it works good for roofs um works good for anything made out of a cat box so let's say you have a bunch of cad boxes drawn and it could be roofs it could be countertops it could be sidewalks roads it could be a whole bunch of things and rather than having the roofs have to be in the same plane exactly though true even a quarter of an inch off they have to be in the same plane true yep and i think that's what the coal planer button does too i think i don't know but probably right yeah but anyways so let's say that that you just drew a bunch of countertops and you want that all to be one countertop not three so you just group select them and when you click this button right here this union polyline union think of it like this what the program is going to do is create an outline of the objects i have selected okay so that's what it's going to do it's going to make an outline and when you're done this is not well i used the wrong box didn't i no i didn't um why isn't it working oh you made a copy oh i did but it didn't ask me to delete the original because you told it somewhere not to ask you i did the same thing on mine where did i put that i never did that i never said that i don't know if this is one where you tell it where if you check don't ask me this question again it automatically doesn't do it anymore yeah and there's no way to reverse that without like reopening it yeah i haven't i haven't had that coming up in a long time and the only thing i can think of i did maybe i did that ask me again i like that question because most of the time i want to get rid of the originals so well restart the program that's all you you made a bunch of copies there or did you no i didn't yeah mine doesn't keep the originals the way i do it i took i must have told it not to keep the original and then told it to not ask me again yeah normally when i would click that button the dialogue would pop up says you want to delete the originals i said yes and then i would just have the outline so this kind of a pain i have to go back and delete the things but anyway so that's what that is there's a setting where that can be set up so you don't have that we'll have to find that don't you find that john nice yeah yeah um as far as the solids so the solid still will combine but sometimes you have to convert something like a column to a solid they're not immediately a solid um by definition so there it did it just fine and that is a solid so yeah it's not deleting original i know i don't know what's going on look at your defaults in cad and see if see if there's something there real quick and cad is there anything i've never seen a message i've never seen a message like that construction line there's some go to preferences there's a cad section under preferences too all right real quick preferences anybody else have that issue when you try that draw some boxes and highlight that does it ask you if you want to delete the originals um okay always using it by cad block fill you have to dig into yeah i set it up the way i wanted it and it's been months since i did it i don't remember how i did it okay well if you think of it let me know clear that up next show okay let's go back to our we only got eight minutes left uh it's in general plan settings i think okay that could be a good place because maybe maybe the warren is that worn before deleting the vehicle before deleting that's for anything that you deliver oh yeah that's obnoxious that's extremely obnoxious yeah um anyway okay well if you find it let me know all right spin it up here um all right what's that one that weird i don't remember what that is that's copy paste isn't it wasn't it copy paste yeah yeah i'm just i used to think that was black it's blue actually yeah never noticed that before it's blue not black so if we're going to chief copy paste so a couple things about that i just draw a cat box here whenever you hit the copy button so that is actually blue not black um that's why it puzzled me i thought i thought that was black um so the couple things about the copy paste button so when you click that the second you've clicked it there's a copy on top of the original and you can take and drag that copy off so that's really handy like when you want to stack windows or something like that so when you have a window in your plan and you go into an elevation and you want to come on i don't know why my computer stalls when i do this i've got my drivers up to date and everything just you know it's first time i bring up a 3d view today john dan come on come on man what is going on there we go there you go all right so whenever you do it like this you hit the copy button and then you can drag the copy off the original and uh that keeps them nicely lined up then you can make the right size put where you want it you're good to go so copy it's copy drag not copy paste you know you can hit the copy button and hit the hold the pin button or you just copy and you can go paste that somewhere else you'll notice you get a lot of functionality when you hit the copy button you get all these other options okay you got the push pin to lock the copies in so you can keep placing a lot of the same things you got the paste hold position um so i won't show you but sometimes i'll create columns with a cap on top of it so i make a copy of the column i hit paste hole position now i've got the copy in the same spot then i'll open the dialog for it or i'll i'll hit my c key you know concentric jump that out an inch or two so i can and then i'll open the dialog and make that three put that thing on top of the item and we can do copy point to point copy center copy center copy center between two points copy center by clicking on something and then a reflect so after you hit copy you can do a lot of different functions which is really really handy so but but if you don't take any of those steps if you click on it and hit copy and you don't take any of those steps you don't have a copy there right if you yeah if you click this and then you don't do anything and you hit escape the copy's gone i mean it's not it's not going to create that copy right and you'll have to there you have to physically do something you have to move it or or click one of those other buttons before it'll do anything for those for those kitchen designers out there i use copy reflect about every kitchen so nice to reflect about a hood or you know a wall upper cabinet reflected about a hood yeah exactly with my program programmable mouse i've set up a copy reflect macro too so i only have to hit one button yeah cool and i can you know just hit one button and i can reflect it right away that saves me a lot of time yeah so don't get the delete option so just me must be my computer all right open it up we got time for one or two more couple more maybe let's see what it lands on all right that's the old point-to-point move right snap point to point move okay i put the word snap in front of that for a reason chief doesn't call it snap i do but it it's snapping things together and the reason i put that word there is because i set up a keystroke to do that um next to the e key setting up the e key to open up and edit dialog so when i click on something i hit e and it opens the dialog for that option snapping is my second most used function when i want to snap two things together i hit my s key and i can snap those things together like that really easily so you have to set up a hotkey for that because chief doesn't have a hotkey for point to point i used to do pp where i pushed the p twice but that's all the way on the other side of my keyboard and it's real pain in the butt um so plus i always had to explain what pp means no i'm not gonna go pp um so what you do is you go up to tools you go to um toolbars and hotkeys and you go to um customize hotkeys then you're going to do a search for point to point point two point move is what it is okay it's this one right here you're gonna go down here and you're gonna type an s and then you're gonna assign that s right there and now you will be able to snap everything in your plan using the s key so when i move that to there i hit my s key i want to move this from there there i hit my s key okay point to point is now snap i'm going to snap that item right there that's why we want to always keep all your snap points turned on so that you can snap despite parts in your plan choose a cad program let's treat it like one okay i've done a i've done a macro for that too copy point to point one button and you're moving it exactly well and we can do the same thing we do have to click the icon so if i want to copy now i hit point to point and i can just hit my s key right here i think let's find out and yeah yep i could move that copy up to there so yeah before i was doing that i had i have c for copy s for point to point and r for reflect so you just select something hit c s and you can point to point it right away now here's a little uh throw one at you guys so if you'd like to use keystrokes john just talked about macro but let's use the keystroke to do this so when i hit ctrl c that's your copy button and you have to hit ctrl v to paste that doesn't work all right so what i want to be able to do is have the same functionality i have when i hit that button copy paste but you see down here i would have to hit control alt c it's like i'm not going to remember that that's a real pain yes because you gotta use three fingers i don't like three fingers so what i always do and i haven't done that here which reminds me that i need to do that and is to make control c act like that button by changing the keystroke to control alt c so go customize your hotkeys and we go um let's just type copy and look for ctrl alt c okay and we're going to change that to control c this is the way it should be in my mind i just use c dan didn't work well do you do anything else uh not anything that i wanted let's find out when i hit a sign we'll overwrite concentric edit i use concentric key i use the c key a lot so i'm not going to override that so i'm going to i'll i'll go ctrl c that's a typical copy command anyway that you use everywhere else except chief so now i'm going to hit a sign and it's going to say yep it's going to conflict with that fine i i'm okay with that so yep and then hit okay so now i can go like this ctrl c s move my point to there to there and i've made my copied like just like that again control c s at that point to there done but easy key stroke works really well hey um before you do another wheel spin yeah curious if anybody would be interested to see your preferences on your um edit handles and stuff i i personally like them they they're very clear oh sure um i would be happy to show you that that's one of the first things i always cover in my classes is you know when you click on things you notice i have a blue handle i have red handles and i have a pink fill and it's just easy to see and i do it so that you guys can see what i'm doing plus so i can see what i'm doing so when you go into preferences and you go into colors this is what i have so i have my handle fill set to bright red my second hit dairy set to bright red which that's fine with me and then my selected edge handle is a bright blue then i always turn my selection fill into that one and i just lighten it up a little bit i've i've seen people that go you know really dark but that's kind of distracting you can't it covers up things sometimes that's my settings i've been using that i like to change the select selected line too you've got a gray oh yeah you know i usually do change that to blue you did in the past yeah i must have missed that one on this one so that when i select a line um that line would be blue so now i've got a good dimension i think your dimension string's blue now all right yeah yeah so that's a good point i guess i missed that one cool good good good catch there all right we got one more we're already over we'll do one more the centering tool did we cover that last time i thought we did but we'll cover it again that's a real simple one so whenever you want to center something on something because chief is a cad program when we have snaps everywhere make sure your snaps are turned on so we're always looking for a center snap on something so if i want to center this box on that box i'm going to use that tool right here that's your centering tool as long as you have a center point you can snap things to that center point so i'll click on the item i want to move click the centering tool and actually i thought i had a hotkey for that one too then you just click on the center so if i wanted to here's here's a simple way to do a circle center it twice center it this way and then center it this way and i've centered that circle in that box i could do that with point-to-point too but that's another way to do it so you can center things on rooms on any anywhere you can get a center point you want to show it in 3d too i show it in 3d uh i just wanted to see your computer lag again uh funny yeah i'm yeah you got the tab open i'm close to buying some other uh yeah i did i'm close to buying some some parts for new computers so i set my uh g key g key up for the center tool and h for paste hole position and t for transform replicate yeah just kind of mess everybody's computer keyboard up yeah yeah well doug says he likes what i did so i figured i'd keep on going here yeah you're making him give up concentric though that's a no-no i am not going to give up concentric do a or something like that then it doesn't have to be c it does concentric has to be c it's something i don't know do a for save yeah copy i mean do a for copy or but for me i'm used to control c in word and excel and every other computer program out there so it's a natural for me it's a natural finger movement you know if you think about it if i change it to c then i have to think about it and i'm probably going to stop doing so much of that single key thing because with a programmable mouse and stuff you can do the macro and just hit a key on your mouse you know or whatever and the with the space mouse we got the radial menus that rene showed me i didn't realize that was there yeah well he started doing that so i know i've got the um i've got the uh pad mouse with the keys on it and stuff which i i haven't i've started programming and then i got distracted and haven't got back to it um someone asked john what what uh device he's using for all these hotdogs i'm using basically what you have only i have a g502 and i recently bought uh the enterprise the 3d connection mouse along with the space mouse and i'm kind of liking that yeah because you can put the radial menu on that too so all right what do we got anyway um all the training products that i have here are still on sale for 40 off until midnight tonight so check them out let me know if you have any questions um if you're not sure buy them if you don't like it you have a 30 day money back so just let me know i still sell my old chief x6 class because it was a really good class i put a lot of effort into that one um almost as much as i put into the x-14 anyway thank you guys for being here you guys want to do this again next time um i mean i'm working on getting some guest speakers things like that uh to talk about i think a show that would be great is really going through all the preferences yeah that's true we could do that um how about you guys in the audience you people not just guys guys and gals um you want to see more of this stuff you want like a spit neck spinning new wheel i think it's kind of fun and that is a really cool little piece of software you get for 25 bucks a year you get a free if you want to do more with it you can it's 25 bucks a year it's virtually virtually free and you can do it i have a friend that's using it with her kids for rewards um it says if you do this you get to spin the wheel and you get whatever's on the wheel um you know you get to go play in the playground you get to ride your bike or something like that she's having a lot of fun with it with that with her kids so i could see using it for business i could see using it for lots of different things it's super easy to use it's just the roof saddle one that's good yeah that's actually ready to do all this oh and then convert to spline yeah and convert to more yeah you got a bunch of good ones yeah there's a topic for a future thing talking about building walls different wall definitions the road and then it won't highlight um where do you see that oh there's more sorry i wasn't at the bottom left yep yes to preferences setting up preferences good wall definition yeah everybody's keeping doing what we're doing okay yes all right we'll maybe mix it up a little bit i think we'll spend maybe next year we'll do preferences for a little while then we'll do some spinning of the wheel but preferences on your wheel oh there we go you could spend half a show on that though um no i mean he means individual preferences just go to the preference thing and put on there like the colors you did today yeah okay yeah we could do that so all right cool all right everybody thanks for being here today i appreciate it and we'll see you next time don't forget about the sale and uh we'll fill you in about this thing behind me here oh and very soon so i'll have a free symbol on the chief experts facebook group later today and what are you doing today i don't have no idea oh what's the last one you just did you did uh i did a stackable washer that had the laundry hookups i got i was gonna go grab that i'll have to go do that yeah that was a really good one great idea so awesome yeah all right everybody and it's your birthday tomorrow oh yeah it is birthday yeah know that you're wiser another year wiser i get that nice happy birthday thanks yeah i get the privilege of going on social security tomorrow so all right yeah yeah where did that where'd it go it's just amazing just amazing so anyway everybody thanks we'll see you next let me time chad can you pin his oh boy that's a little more intensive but you can actually go look at all your icons they're in your if you're on a pc they're in your program files um under resources all the icons that i can click on and see an individual video about that icon yeah oh i see what you're saying you could pay two grand for it that's kind of what i've been doing in my mastering course um it's all indexed so you just have to fast forward to the time code to get to that explanation of that icon i probably did 300 of the i don't know how many icons i did a bunch of icons in the mastering again again there's 1200 icons it would take a little bit of time to set that up i've actually chat i've thought about it i really have so and i haven't stopped thinking about it so we'll figure something out anyway i gotta go we'll see you guys
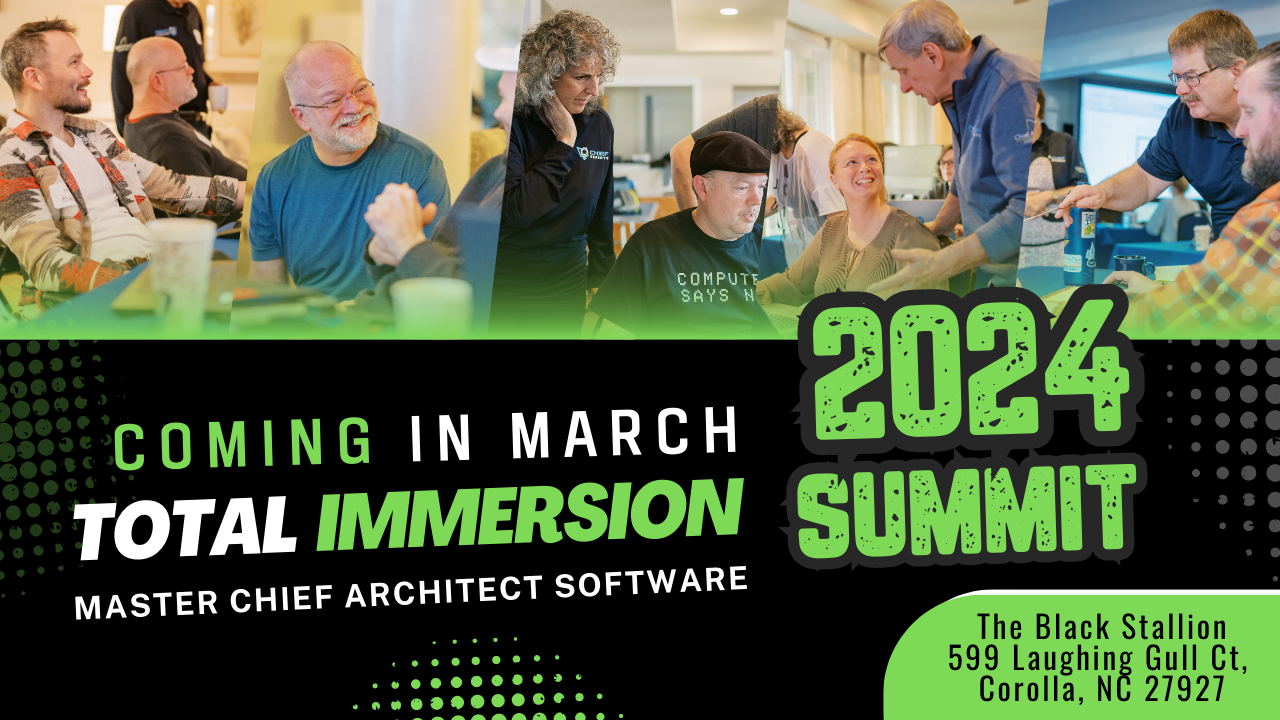
Elevate Your Chief Architect & Design Business Skills
Reserve your Spot to the 2024 Chief Experts Total Immersion Summit For Chief Architect Users
Outer Banks, NC
March 1 to 10, 2024

Mastering Kitchen, Bath, and Lighting Design BUNDLE - Only $595
Special Bundle Offer: Four Courses for Just $595!
SAVE $1,737
LIMITED TIME ONLY
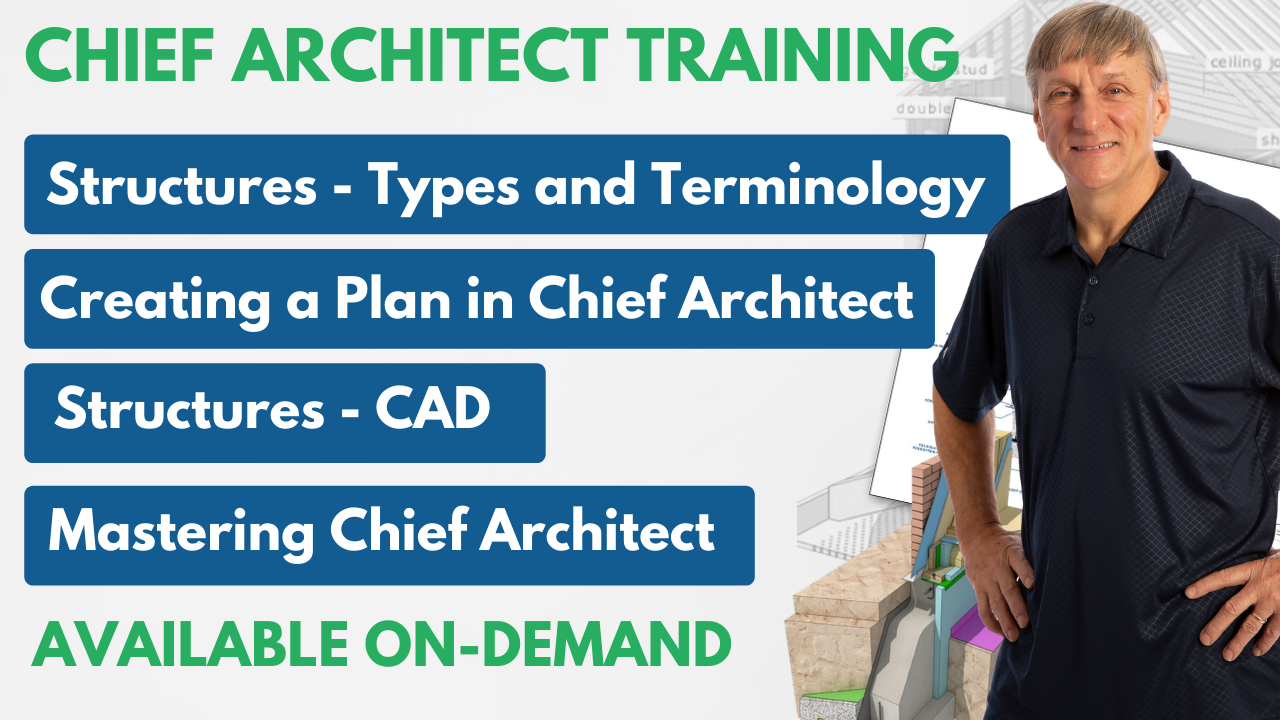
On-Demand Chief Architect Training
Don't Miss These New Courses With A Simple Goal: "Help You Become A Better Designer"
- Understand And Define The Structural Elements In Building Construction
- "Creating a Plan - Quick Start" course for Chief Architect users
- Define And Draw The Structural Elements In Your Projects
- Discover the Inner Workings of Chief Architect and What it Wants From You
Upcoming Events