
In our last show we ended up spending the entire show discussing "Preferences" in Chief Architect. Turns out we had more to discuss than anticipated.
This week we'll hit the Wheel of Icons again and cover some more functions hidden in the many icons in Chief Architect.
We do have fun with this and it’s a good test of our ability to share some great information with you.
Welcome & Introduction 00:01
Change Line to Arc 04:40
Make Arc Tangent 13:20
Dimension to a Reference Drawing 19:53
The Make Spline Tool 23:30
Using Construction Lines 26:38
Join Line 30:31
Screen Capture 33:55
Clipboard History 40:42
Joint Wall Tool 44:54
Center Tool 46:22
Attic Walls 49:55
Auto Roof Return 57:39
Disconnect Align Tool 1:03:50
Check out Dan's Total Immersion Summit 1:08:18
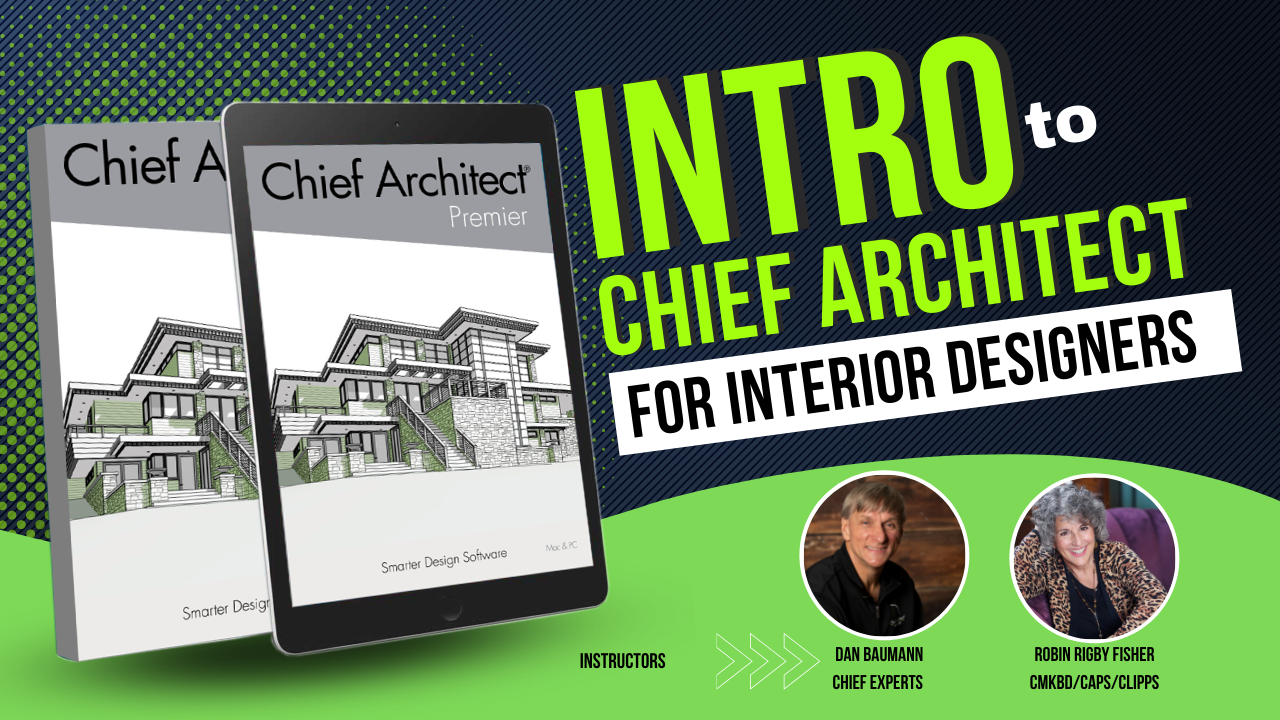
Intro to Chief Architect for Interior Designers
This course if perfect for interior designers who are new to Chief Architect.
Spend less time learning Chief Architect and Take Your Interior Design Skills to the Next Level.
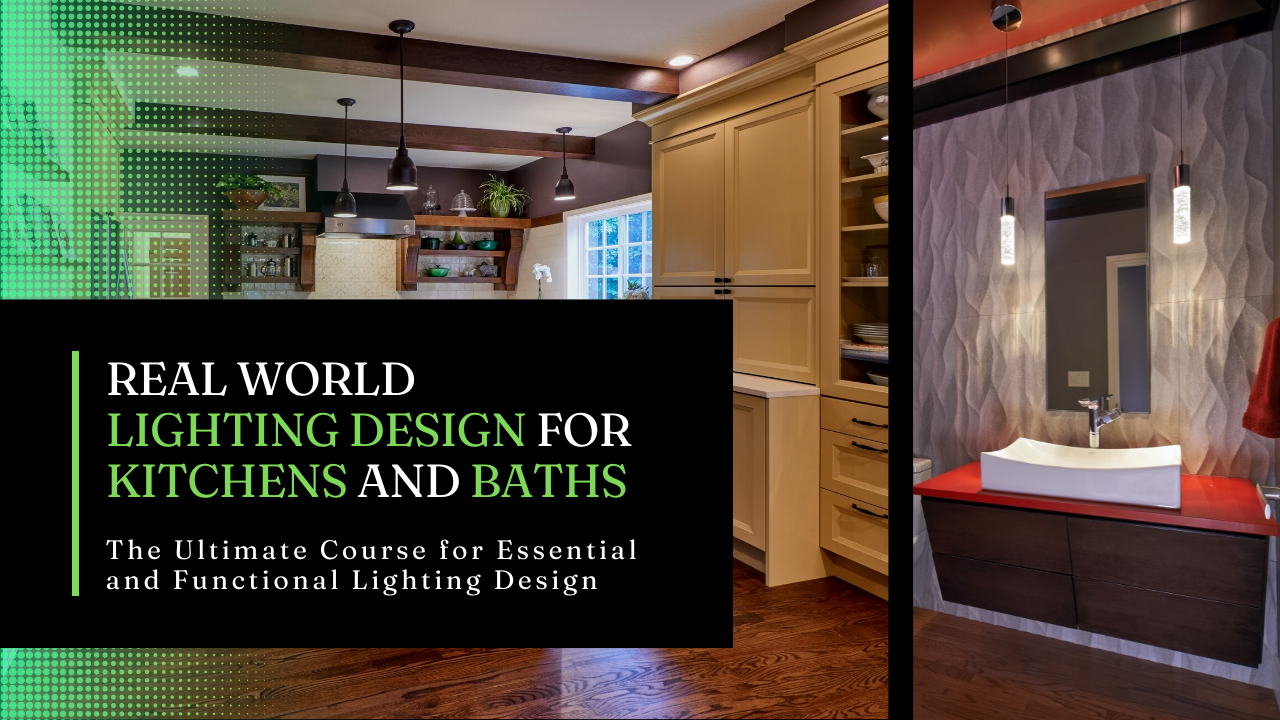
Real World Lighting Design for Kitchens and Baths
The Ultimate Course for Essential and Functional Lighting Design
Discover the best practices for determining what type of lighting is best for an amazing residential kitchens and bathrooms.
you are live hey everyone dan here with chief experts on live on the designer show online here with uh john and renee and robin welcome you guys how are you guys doing today doing good awesome john it looks like you've got some of renee's sunshine on your on your face there yeah i'm sitting in the front seat of my van and it's kind of hard to figure out how to get the light to work uh i know it's bright it's lightening you up really well so yeah i had a light on before and they went out on me so you look fine you look good all right anyway how's everybody else today uh feel free to chime in with any comments let us know where you're hailing from it'd be fun to hear from you so all right uh some of you might have just gotten an email a few minutes ago that hey we're starting soon usually i try to send that out about an hour and a half before the show for some reason technology which has not been my friend the last few days decided to do it today too and that email just sat there and spun spun and spun for about an hour so it finally did go out so if you made it today welcome if not you might be watching this on a replay so uh welcome to that too anyway today we're go kenny kenny crocker just signed in so we got hey kenny from kingsland georgia how are you welcome to the show kingsland georgia yeah i visited that a long time ago it was a nice place you guys got a little busy busy little place there along the freeway um all right today we're going to spin the wheel again a little bit uh um and we'll kind of move forward from there if you have guys have questions feel free to type them in and we'll go from there so uh you guys have anything you want to add here this morning before we get going no i loved the whole thing last week on preferences i i think we can't spend enough time on preferences so that was not helpful it was great there's a lot there i was thinking about how i could put together some sheets on that to make it a little bit easier to explain and i'll be working on that for our event coming up here in in uh in february so rene renee and i were talking before the show and he said that he came back from court oh john with chief john you just froze up there a minute say that again can you hear can you hear me now renee and i were talking renae and i were talking before the show and he said he came back from coeur d'alene faster than he was before no good grief now he's moving at lightning speed right he said he he had worked he came back to a plan he had to work on he thought it would take him two days it took him three hours you're gonna have oh cruise you're gonna have to be like seven or eight hundred dollars an hour renee you're never gonna i know just do more jobs i guess you'll be finishing your plans in a couple of clicks i mean jeez it's not fair anyway but uh no that's cool uh yeah it was fun to be with you and watch you uh perform some of your uh amazing things that you do yeah i'm bummed that i didn't get to be a symbol while we were there so we'll have to talk about that i tell my my my friends are sick of me they don't want to talk uh tech with me they they don't know what we're talking about so it's really nice to meet you guys and be able to talk shop you know yeah and we do tend to talk a little shop don't we so little chief architects shop it's it's fun it really is amazing how this program is just fun to work with so okay um real quickly on the designer show page let me share my screen you'll see if you scroll down a little bit you will notice that there's a little uh deal there about our dole immersion summit coming up in february feel free to join the wait list and we'll let you know as soon as that's ready i should have all the information done on that here very shortly so i'll let you know about that and we'll kind of move forward from there looking forward to that and uh god damn time is moving way faster than i was hoping can't believe it's the middle of september already but uh it'll be good all right and with that i don't really have anything else to say today um other than oh here's here's what the waitlist thing looks like just enter your name and email and we'll keep you informed about uh what's going on with this all right i got nothing else hey it's so simple there let's jump should we join the wheel should we jump into the wheel the wheel um all right let's do that let me get to the right screen here we go uh let's go full screen here and i've added a few new things to this wheel although i think i've covered some of these things already but i don't know um so we'll just run with this and if i've covered already you're going to get a double take on it so let's just spin the wheel and we'll see what comes up and if you guys here i have questions comments things you want us to cover by all means feel free to add them to the comments and we'll try to cover them best we can all right we all know what this one is it's the never drawn art by hand icon okay that's what it's called no that's what i call it you know chief has uh chief has in its toolbar uh these tools that you can use to draw arcs um where'd they go you could draw walls you can draw arcs right here it's like we don't need those tools at all because we're going to use the tool that chief gives us to draw arcs called the change line to arc or change arc back to line that's this icon right down here when you click on an edge you click on a line you click on a wall what else does that work on does that work on anything else it doesn't work on roofs or anything like that but basically you draw a line click on that tool and it makes it into an arc and then you can take that arc and you can bend it by grabbing the triangle you can uh move it back and forth let's let's look at a practical use of that um in a plan so you might be drawing a room and you might decide you know what i need this to be a curved wall all right so i always do it like this so i always draw out the shape of the room i'm getting that what's called the cord that'd be the cord length would be the correct length by just drawing it like a box and since walls are like lines they originate from a line and the line is right there in the wall being highlighted when you click on the wall and you click that convert wall to an arc you can then do that and then you can start making that arc any size you want and if you have done that and you said yeah you know i don't really want that to be an arc now you can make the arc back into a line by clicking on the same tool right so that's another great tool another good use for that is in when you're doing countertops you're working on a kitchen you're drawing custom countertops let's just draw a little l-shaped countertop here put a break in here okay so at any time you can convert any of these lines again any poly line in chief can be converted to an arc at any time so i can click on that tool there's my arc and then i can make that arc any size i want in fact i could make it into a little table at the end if i wanted to um really handy tool and again good to note that your secondary handle fill is letting you know which edge you're selecting to make an arc exactly so you're talking like this one right here that handle yeah so these little bitty handles are not selected edges that's the selected edge we covered that last time in preferences on how to change the colors of those buttons those handles they call them so that works you can also do another way to do the you can do arcs within a in a line too just by breaking it so if i you know i i've made countertop before where i want to put a specific i want to put an arc at a specific spot so i'll dimension that spot oops got the wrong tool here so we'll go ahead and dimension that all right come on i can do this and let's say i want to have a five foot or a four foot arc right there of course i would dimension that from the end too so what i would do is click on that we're going to add the break using the break tool remember we've covered that that's the number three key we're gonna hit add a break here and three key to break three key to break and if i get my cursor in the right spot it'll break it exactly at the right spot here i missed it i'm just going to pull that down there now i can convert that line in right there into an arc as well so you don't have to do the whole line you can do part of a line and there you go it works really well it's a great let's talk a little bit talk a little bit about walls um when you're trying to bring an arc into a into a wall if you don't get that radius exactly right and you don't get that wall coming into tangent um when it's coming coming all the way around like for a stairway or something the walls don't join properly yeah that's true so if you know exactly if you can if you figure out exactly what the radius is supposed to be you can open up the dialog box for this lock the cord and put in the right radius and that will make your walls go together a lot nicer it does yeah so john's talking about is once you start drawing a wall again the thing that's the most important to understand is what the chord is this is the chord length right here okay when we're doing arcs we want to lock that so that it doesn't move where the ends are so when we click on an arc whether it's a wall or a line and open its dialog box you will have that what what are you going to lock here um oh where'd they put it here lock hello okay you're in the wall you're not yeah on a wall it's locked by default the chord is okay yep um on a on a line you have a lot more options yeah if i have a line and i open its dialog then we have we can specify which we want what do we want to lock on that arc the starting start of the arc the end of the arc the center of it the arc itself or the cord and again when you're trying to change the arc radius you always lock the cord that'll keep those two that'll keep the two ends locked in place and then you're just changing the radius by a lot by changing the number real quick if you select that wall this one yeah we've got a handle fill there that's that dot handle fill that'll change your cord length too this one yeah yeah that's true so you can that's that's something new where did we use that once john um we were doing something one day and you showed me that and i'm going oh cool that's how that works uh maybe an arch over a window or something i don't know i know i remember now it was making a copy of an arc so so when we have a line and we want to copy that at specific distance you know say we're trying to create a fill of some you know a true blue whatever um and then what you do is you hit the copy button and you pull in by that oh yeah yeah that pulls and see how it holds it in nice and even right for making a arc i use it for doing uh beams and stuff like that on a gable end sometimes exactly yeah so now we can join those together that looked like it moved a little bit didn't it um no one didn't so but that works really well so now we've got a nice evenly spaced arc yeah and you can i think start pulling at once and see if you can hit the tab button and tell it how far you want it to move i would think we could let's see okay copy we're pulling it and hit tab we can say move that in what four inches and we should have four inches one sixteenth don't ask me why it's not giving an even four but um that's it seemed to work just fine yeah all right that's a nice nice tool i like that one any questions on that one nope everybody's happy with that cool let's move on to the wheel oh yeah speaking of arcs that's the uh what's that one called let's go back to chief i don't remember um that is it's so weird i can call it if i had chief open i could look at it and know exactly what it is tangent and you just said that word a minute ago john i just said that you know what and i never used that tool so let's look at that one well okay here's what it you don't you only see that tool when you make an arc all right um when you click on the arc and you click that tool you can say i want to make the radius of this wall what now this is different than it is for cad lines so and then how do you want to make that radius to what well of course we you know outer surface you know we'd probably use the outer main layer because that's the layer we have selected and you can change the radius here to whatever you want oops zero i didn't know that if i make it zero it makes a tangent i didn't know that i was typing a hundred actually um i still made it tange it didn't matter what it was you were in the you're in the tangent tool so anything you put in there is probably going to make it tangent yeah it's like okay well why in the hell all right so why do they give me the option to put something in there is there a way to uh change its angle or anything change the chord angle what else you got there no is it just what which layer of the wall are you selecting is all we have uh unconnect it from the other wall all right let's try that like take take one wall out you need to have one straight wall but just have one wall coming off of it now try it no we don't get the number no no get it really no is it still connected you moved that out of there so is it still connected to that or did you make a copy of it no i just wanted to undo i hit undo um yeah so that's where definition um make change the angle of it once because it's tangent now change the radius of the of the arc with your just your arrow key there this one yeah yep now now disconnect one wall nothing still don't get it back so for walls it has to be connected but for things like this now when we get to make tangents we're like or like a counter top for example you want to make that a rounded end so you hit the that tool you you click on it and hit this to make tangent and now we would just say you know it says the radius that it is right now but all we do is hit okay and it's going to make it a half round okay do you have to have that selected to to both the two lines just like we did before i don't think or can you i don't think you can do with uh with that tool let's see here um yes you do can you guys um let me share my screen for a second absolutely or or pin my yeah you could do it just uh go ahead and show your screen i haven't figured out this interface yet yeah it's there's a you got the share button down there in the bottom oh boy here we go put me on the spot okay i see it share slides execution screen there we go and i think i have to hit that okay i mean yeah so yeah if i extend the wall out and then i i like using the alt behavior so i left click to make my radius okay so we've got this now and now we have um should have that option same option to make this tangent look mine's not showing it either now what's going on here it looks like it's hooked up yeah funny it's not showing now let's go back interesting okay so that's still not showing so how about if you drew a wall here okay so now when i click it and just press ok there we go okay hmm how did that work so try try doing a 45 degree angle try it on three walls one at a 45 degree angle yeah of course that's gonna that'll work fine that way but the way rene just did it why did it do like that that's interesting i've never seen it done that way before but cool and then you um yeah and you could click on it now and just change the radius yeah and it's going to and it's going to auto cut this this one over here it's moving back and forth so yeah so it does have a lot more function i wouldn't even wear that okay cool there you go you are making it a bigger radius in this situation because now the cord length can grow and shrink okay is that where the cord between the two angles ah like that so now now if you're buying a spiral stairway or curved stairway that's already manufactured you're just going to put it in place if you know the radius of it yeah punching your number you just put you in your number and you got your wall in the right place yeah cool okay man that took a day's worth of work out right there yeah now you have to raise your rich money 100 sometimes now you're up to 900 an hour geez one more thing about radius walls when you're drawing stairs draw your radius wall first and then drive your stairs the the stairs will follow the radius of the wall that you draw when you put it next to the wall tip yeah yeah so you're not going to know that you uh you know you i don't think you can create a spiral stereotype case doing that you can get pretty far on that rounded thing but uh but anyway if you are doing a kirby stairway that works pretty well cool okay moving on any questions we have a question we have a question is there a way to dimension to a reference drawing about using a point marker reference i'm trying something new doing my as builds and one drawing and referencing and wrote in a renovation set which is why i would like to build dimensions from a reference drawing i don't know that you could do that can't you can't you just do that you should be able to copy the dimensions and bring them over you should be able to snap to a point you should buy a snap to a point yeah it's not i don't think it's going to snap to something you would have to create that point so if i went in and so if i went in and just referenced another plan i'll just go reference something so i'm going to click on my floor number and i'm going to go reference um see which one do i want to change here i want to change which one do i want to change i want to go to choose an existing plan let's go find something somewhere on my computer yeah i guess it doesn't let you no i don't think anything you would it's gonna be like it's gonna be no different than referencing one floor to another um you're not gonna be able to snap a dimension to something that's not really there rough so here's another plan i'm referencing so i can snap to those you see how i can snap to those spots the snap tools will work to it we'll go to it but i'm not going to be able to draw a dimension from that to that or you could draw a line there yeah i could draw a line and put a number turning i'm going to make that suggestion whoever that user was to chief talk yeah that'd be a good one so can you can you copy construction lines from one plan to the next yeah copy what yeah that's probably that's a great suggestion just to mention to your construction lines instead yeah but here i use you know here if you use the the point-to-point dimensioning tool it will snap to the right spot you'll get the point there and it's always going to stay there you can make it really small and then you can dimension that way i don't know any other way that you're going to do it i might have just figured this answer out renee but i i just started using construction lines and i couldn't get it to dimension to it i can't pull dimensions from construction lines you should be able to i can snap to them with other things but i can't go up to your line tool and then construction lines right there that one there um i couldn't i couldn't dimension to those i had to put a line on it in order to dimension two well what kind of line is it it's called the selection that's the layer it gives you temporary dimensions but do you have yeah yeah you've got to turn it on in in cat objects there's subcategory construction lines so you're going to have to go to your dimension defaults and locate under cad um there you go right there the last one last item there oh construction lens oh i did it and i didn't have that turned on yeah well i was doing it end to end did i have it turned on there no it didn't i did it and it fashioned fun that's good to know it's good to know anyway so you have the option and that's what i figured out just before i asked the question that okay that's probably what it was but anyway cool all right next that was a good part we made it through two in like half an hour yeah we're really cruising here aren't we we should slow down a little bit the magic hey i know what this one is the magic wand make spline it's a big spline tool yeah yeah that's a pretty simple one um so where do you guys use that i don't use it anymore i used to now i just use when i'm doing arrows i like curved arrows so i draw a straight arrow then i alt click to make it an arc arrow and then i continuation diamond and then alt click again but i used to draw spline arrows okay oh speaking of curved lines and arrows um just for fyi for those of you then now we're stepping back and spend more time on that first one when you draw a line with an arrow on it all you have to do is right mouse on that and you can bend that line into an arrow it's my favorite function and then you can break that line as well and then go the other way if you want to you could do arrows like that real easy so just hit your three key you can add those breaks all day long and make your arrows go pretty much anywhere you want and if you've already go ahead and draw two lines dan just two straight lines um two three straight lines whatever yeah use the empty three straight lines no no it's together they have to be connected oh like you're drawing a arrow for a label like that now hit your spline tool and it turns it into a curve so if you've done it like that and you want it the other way you don't have to go redraw it you just click on it and hit the spline tool so this is an old suggestion of mine it takes the arrow away though oh it does yeah so you'd have to open it and put the arrow back on yeah in fact i wrote a macro to automatically put the arrow on for me so much okay yeah i don't ever use that kind of a line yes i don't have lines for that now one area i do use that convert line to spline tool is if i'm tracing over a plot plan i don't have anything prepared for that so just pretend i have a plot plan open and it's showing the contours so you know how a contour can be you know curvy you know like that kind of a deal you can draw those with splines i found it a little easier to just draw them with lines you know just kind of hit where you think the points are of that contour with that and just using your right mouse button to draw that line so it stays connected and then convert that to a spline and then do your final adjustments that way i found that to be a little quicker for me on certain plans um yeah i still i used to used to do that but now i just leave it as a straight line and and and make them elevation lines and it it makes the curves in there for me so i just leave my my data lines straight so i can tell which ones they are yeah and let's let chief build it what the hell is chris ignore was asking what do you use construction lines for yeah i was going to bring that up go ahead talk about it it's part of your line tools at the bottom when you open a segmented line isn't it no you can draw splines oh i don't know where it went am i missing something huh okay so when you talk about construction lines here i can show my i can show my screen as a reference go for it okay that'd be great um see if i can figure this out again okay so construction lines i've got a conversation i have to have with my engineer and a conversation i have to have with my client i'm going to tell my engineer you actually carrying people come on now that's no fun what's that nothing i'm just stupid i say look at that bearing line to the engineer well it's very clear they can look at that on the on the set of drawings bearing lines drawn right there a client asked me can we change that cabinet out okay which one well the cabinet in between line four and five and lines enf it's just a great communication tool between you your your engineer your construction crew and your client so you just have them as kind of dotted lines this is kind of creating a grid on your screen yeah it's a light grid it's not too overwhelming it's my personal you know taste on it also if you take this when i'm presenting with a client something that's helpful is i might take my construction lines open them up and say draw infinity line in plan view that way as i zoom in you're going to see that those lines remain in the shot so that it's really easy to talk about you know between this point and that point the other great thing about these is they show up in elevation as well so if i've got an elevation and i'm trying to reference something if i've got those construction lines turned on in that elevation as you can see here it's really easy to see where it happened that's where i was i forgot where they corresponded with each other that's what it does yep got it and then you can i'm just working on a building right now for a client it's a four-story building so there's bearing points that have to line up as it goes through the building so instead of turning on reference layers to make sure things are lined up i just use the construction lines and things like you know you can line stuff up off of those so yeah from floor to floor because they show up on every floor right you go up a floor down a floor as long as you have them set in the settings to show on every floor yeah it's really easy to figure this all out and ever since i started marking my bearing lines oh my engineers just love that yeah i like i like that that's a really great idea so then i'm like not to drive not to watch not watch keep your eye on the road mike just drive mike yes i've done that before too mike and it works so just listen but don't look yeah see you'll get the double i mean you'll unders you'll go back and say i know we talked about that um so the other thing let's go back to arcs for a second um i'm not seeing the icon but it's under the cad tool the spline tool you want to share your screen again all right i can do that i got it yeah i got it now john no now i could just go whenever i want and you can fix it at a boy um so the spline tool so again use your right mouse button to draw the spline and you can get those much more accurate so all i'm doing is drawing draw click draw click draw click and then you can go back and adjust those so that's that's why i didn't do that earlier um anyway let's go spin the wheel good nice take on those construction lines i like those um the join line tool now i think we talked about that before i'm going to do it again so that that particular tool is it's next to the polyline box to the right of the right here right there right there jesus i thought it was part of a drop down but thank you okay if you stare at the screen long enough you won't see it so that's so there you go here we go chris thank you chris it's a nice thing we have these wonderful people looking out for us yeah chris is like do i really have to type this out okay um what did i just spin the joint line tool okay so whenever you have two cad lines i always explain it this way so let's say i'll explain it both ways so you have a cad box you have a roof a countertop an edge um something that is just all broken up and it's got breaks in it and it's kind of a mess and you just want to get it back to a square and this happens with roofs a lot um so here's here's the way that join line tool works so that's this tool right here all right the join line tool it's very similar to the you know to the fillet and the chamfer tool we're just joining two lines together so if i put a line here and i put a line here okay so just just visualize that this line is this line this line is this line all i'm going to do is join these lines together okay so i'm going to click near the edge of this one i'm going to click the join line tool and i'm going to click on the edge of this one and you see how it hooks them together well if i do the same to this shape this line here joins this line here bam you have to say okay to this i'm going to turn that off cleans up all those breaks in that edge now you're back to a single box that's the join line tool i have never used that tool and i'm about to start i taught renee something new today yes good one yeah it really will save you a ton of time um when you're trying to you know i want to clean this up right here i'm gonna let's see if i can join that to an arc see how that works works perfect so it is a really nice tool in fact that's one of those i think i have a hotkey somewhere i know i didn't set it up on this but i have it on my list to do um you know here i want to clean up that arc join those two lines together done so nice tool save you a ton of time especially when you're working on roofs and it works in 3d as well so when you have a when you have an edge that's all broken up um like an edge of a roof i really got a mess on this one so let's say that you've got this and it's got a bunch of breaks in it and you need to clean up that edge same thing up here so i'm gonna you gotta click back far enough to where that line would be i can't click out here i have to click back here where they would join hit the join line tool and then i can join it right there clean that up so there you go that's the join line tool hi spin the wheel i just saved a thousand dollars on that tip now your rates going up to 9.25 all right cool screen capture anybody using the screen capture tool in chief architect anybody starting to not as often as they probably should you starting no no because i'm on windows and we have cooler stuff well kind of they're from out of function there right um let me show you or should i just hide that choice and keep it a secret um i'll go show you i use it so much i even put an icon on the screen really yeah right come on get in there dan where's my oh my cursor is being goofy there it is all right here we go so i put a little icon up here that's what it looks like that's your screen capture icon so if you go to your customize toolbars you can put that in there so when i click that tool it's going to open up this dialog box screen capture setup this tool is also located under tools screen capture okay and here's the icon don't get this one don't get this one get this icon here that's the one you want you want the three dots under it because you want to be able to choose what it is you're going to capture when you do it so from this icon i can capture a picture from anywhere on my screen on any screen i can i can capture a backdrop a material or an image so if i have a picture some tile i want to capture and put on something all you do is click this capture it done i can paste it right on what i'm working on i want to capture an image and make a 3d image of a tree or something like that uh when you have to do a massaging tool you could try it and see if it works but if i'm doing a if you're doing like a billboard or a sign on a building that image capture works great too so let's go into picture for a second and let's let's just capture a picture and let me show you one way that i use that um and let you choose if you like it or not so i'm going to go to a google i'll go to google maps and let's go into a render view or a 3d view like this and i want to capture a lot i'm going to capture this house as part of my plan all right now if i'm in a sometimes you can be on the the tax you know the property tax website and you'll see property lines that kind of stuff but i'm just going to capture this because maybe i want to see the neighborhood but i want to i want to scale it i want to make it to scale so first thing i'll do is just kind of rotate the screen so it's pretty square to where i'm i'm going to scale it because scaling has to be back and forth and up and down okay it can't be at an angle in chief to use their scale tool um at least i don't think you can i haven't tried that for a while no you can't it's locked up and down back and forth so then i'm going to go to right i'm going to right click on this map and i'll hit measure distance and i'm i'm going to draw a distance line down here okay and we'll just i'm from 0 to 800 feet all right now i'm going to go back to chief and i'm going to capture that screen you could do this with any photo capture thing but i'm going to hide chief while i'm capturing if you're capturing something in chief uncheck that so i'm going to hit capture i'm going to grab the screen i want just draw a box around it there's my deal right in chief done i don't have to open the dialogue and hit save and plan then all i have to do is scale that is just click here and click over here type in 800 feet and i've got it scaled to where i can trace over it compared to what i'm working on done so that's one use of that captures tool right there i didn't have to go out of chief to go get a different program i use snagit for a ton of my captures but when i'm in chief this works really well so let's say you want to save you want to capture something else so let's go into let's try this here in 3d see if this works in here so there's my capture i'm going to capture a material a material i'm going to get them i want to create a material for my plan so i'm going to do that and i'm going to hide chief while i do this and okay now it didn't hide chief for some reason did i hit height chief i didn't hit capture you didn't click on it though i did hit capture no but damn dan um the box isn't checked no oh i want it checked don't i yeah dude it's mine hit capture okay let me try that again so i want to capture something here what do i want to capture let me find what i want to capture material yeah what am i doing i'm going to get to and you can capture come on keep getting the wrong screen here you can capture um any screen here we go all right so i'm going to go in here try it again let's go back to chief hit capture i'm going to create a material i'm going to hide chief and i'm just going to go over my other screen and get it anyway and i'll get a picture of me here's what i've just captured i was going to be robin but i decided so i've just downloaded this much better so i've just created a new material you know here's dan um now i can take that material and put it on anything that i want to unspray it on the walls there i am just like that so put them put myself on the floor there i am and then you can you know right now that's interesting here i'll put myself on the roof that was good i like that you like that isn't that fun so you can have fun with there i am um oh that's funny so you can also go in there and edit that material then so from the dialog here i could go edit this material open the object and in this dialog i could say because right now it's stretched to fit maybe i want it maybe this is a tile pattern i want to repeat so i could change the the scale factor here i could tell it not stretch to fit so that when i put it on something now you're gonna you know now you're gonna start seeing lots of view and it automatically goes into your user catalog pardon automatically automatically gets put in your user catalog you don't have to go save a picture import it it's just done that's what's so nice about that um can i share one one thing i was talking to you guys in coeur d'alene and i was telling you about clipboard history yeah um in windows machine if you hit your windows key and clip on uh oh there you go if you type in clipboard history import settings you've got the option to turn on clipboard history now mac has this too but it's it's a separate uh program you have to install so for your mac users this exists as well but the nice thing about clipboard history is um built into windows the windows key shift key and s will get you a screen clipping well i can screen clip a couple different items and i can also come in here select the wall selected mid dimension copy it and if i want to paste any one of those items i'm going to hit my windows key and v if i have clipboard history in the bottom corner here i could paste this dimension string which i just did right there or i can paste one of these clipboard items and convert it to material backdrop or image i'll just turn that on oh my god so if you've got a bunch of dimension strings you need to copy or a bunch of images you need to copy and paste make sure to turn on your clipboard history get used to that tool that's a huge time saver oh my gosh that's cool i just did that i don't play with that i like that that's a good one because yeah there are times it's like oh gosh i wish i could paste that thing i pasted three not three numbers ago or four numbers ago yeah so yeah so so here's the here's where that shines compared to the screen capture from chief too you can't do the screen capture when you have a dialog box open yeah that's right right in chief correct in chief yeah you'd have to you would have to click on yeah if this is running and you had a dialog box open no you wouldn't be able to right so you can use that use that clipboard thing for that like if you have roofs that you're trying to uh get all the information that you want do it do the clipboard thing and then you have it that's a great use of it um so shift windows key s and then screen clip that whole setting and you can go paste it in your roof plan to reference it it's great right yep so and then windows v to open that list by golly there it is very cool shift windows key can you repeat that again so it's here we can show mine real quick yeah um so it's shift windows key s yes yes and that's going to bring up it's going to kind of black out the screen and there's a little um set of icons that you guys can't see at the top and then i draw a marquee and now it's copied it to my clipboard there cool so now all i have to do and mind you you have to have clipboard history turned on in windows settings but now all i do is windows key v and i get my tray of different items here so um like john was just saying if i get over to say a roof plan and i want to copy all this information here shift windows key s highlight this section and then it's easy for me to come into some other view and paste this and use it as a reference yeah i do that all the time with my uh to snag it with snagit and i do it all the time with chief too capture portion of it yeah yeah um and then if you if you have a programmable mouse or something like that and you can get it dedicate a key to it you can put that in as macro yeah so it's just a one keystroke thing and you're done yeah cool all right i like it all sorts of goodies um okay let's go here we got a question we got a question going back to join two lines tool can you join two walls in plan yes but not with that tool right um yeah you want to use a different tool which is the joint wall tool so when you have two walls um click on the end of the walls and you know i don't know why they don't combine them but you got this tool right here this will join the two oh we're not showing the dance come on john i'm sorry i'm sleeping you have to turn that message off now there we go isn't it great having control um so so you want to join these two ends of the walls together and this is good for when you have walls coming in at goofy angles and stuff like that um it's it'll be this tool down here i've only used that when i have have something showing up that the wall wall's not connected can you will it delete walls out of the middle of it too if if you do that um i doubt it i don't think so no it's only good it's it's just like joining the line join lines um but i don't think it's gonna clean up any stuff in between that's probably why they have it in two different places so oh battery phones connect walls too cool all right back to our wheel and spinner up here it's always kind of fun to see what comes up i just did that one i didn't have a choice i guess i didn't hide that choice all right do it again unless you want to hear all about it again i'm probably not no all right center tool didn't we cover that one a while ago seems to me we did yeah we did we covered center and center between two points yeah we did so go back to the first you know what show that again because i think there are some people here who weren't here previously such a great tool it is a really handy tool um so anytime you have um something you want to center something on so i want to put a door in here and i want to center it on one side of the wall or the other so if i hit this you click on the item you want to center and then you'll always see this little tool right here and you'll see the hot key for it is control g g would stand for but um control good tool so it's that tool and you just put your cursor near what you want to center it on center it on so click here and i can hear i'm centering it on that side of the wall here i'm centering on that side of the wall and that works for anything so if you put a cabinet under a window you can center that cabinet by clicking on the cabinet i just get the front of it pointing out and hit the centering tool click on the window now i've centered it under that vice versa i could center the window on the cabinet and all that kind of good stuff if you want to center something and you don't have us something to center it on then we would use the centering tool and we have another tool that will appear over here called point to point center okay so what you're going to end up doing is clicking you know you have the item item highlighted you want to center then you click on two points and then i believe you click on the item again and chief will center between those two points that you clicked on so if we click here so if i click on this point and then i click over here on this point chief will center that between those two points well but it gives you two x's so notice how you have two options yeah you could have moved it one is in plane with where the object is at the current time and then one is in plane with where you drew your center right exactly so see here i could keep it lined up with where it was and still center it up there because it's snapping to that in that line that's in playing with where it was so that's pretty cool it is pretty cool back to construction lines back to construction lines you can center things on construction lines too so if you're drawing walls and you want to move them into place you just center them on that yeah true the other thing i've i've done recently is i've programmed one of my programmable devices to be copy center as a macro so i just hit one button it copies it and then i can go put it in the wall and it centers it right away yeah chris says wheel says attic walls do you want me to talk about attic walls chris if you do just say yes and i'll talk about attic walls we won't spin the wheel um but i'll go ahead and spin the wheel until you do that maybe it'll land on attic walls we'll see no it didn't additional angles i think we talked about that too yeah we'll tell you about that one yeah yeah let's just hide that one i'm going to move on from that one i thought i'd clean this up but i guess not okay chris wants attic walls auto roof return we'll do the attic wall thing first and we're running out of time here anyway what are attic walls what are adding walls okay what does chris want to know about attic walls well i'll just explain in general i don't know people start there but but chris has a real question if you have a special question if you have a specific question let us know an attic wall is a wall that is created by chief automatically all right so let me just open a new plan real quick and um delete this and so when you draw something and you put a roof over it okay so i'm going to just click on these two walls and make them a gable and then i'm going to build the roof all right and so what chief just did when i built this roof is it filled in this space here all right i didn't draw that wall in chief did chief an attic wall when chief creates them um and you'll also notice if i go back to the floor plan that there's two floors in this plant it's got a first floor and an attic so you'll always have one more floor no matter however many floors you have in your plan you'll always have an attic because that's where chief's going to store the walls that it creates automatically all right never draw rooms in an attic chief it's only there to hold the attic walls that she creates an attic wall is a copy chief automatically makes a copy of the wall below and puts it in up here to fill in the spot between the top of where this wall would have ended in the bottom side of the roof that's an attic wall done can you um so he does have he he does have a specific question so you want to know an attic wall that sits on top of a roof going up to a higher roof yes that's a strange so um no it's pretty normal yeah in fact if we put in on top of it usually right it would be interest you know so well let's see if i go um what am i looking to do here like i don't know if i'm pronouncing this right or not but like a clear story uh wall with windows in it right but necessarily sit on another wall um so let me just do something real quick here let's go let's just draw a dormer in here i'll do this as quickly as i can so i'm going to move these dotted lines up in the next up to the attic and i'm going to draw three walls up here that are gonna i want to sit on top of the roof now if you just do a an auto dormer chief will do this just fine um but i'll show you doing it manually what it would look like so if i go in here and i'm drawing three walls yeah i know i'm drawing in the attic okay i'm doing it because i want to um so when i go look at the 3d view for this there won't be any there shouldn't have been anything there which you should want because i drew an attic they are there um you need a second story yeah well you could draw a roof and it will give you yeah over wall top yeah i can do it without adding an attic um although you should still cut those walls off below you have to open them up and say roof cuts while at bottom yeah but this shouldn't be sitting on top of the roof um this is what's puzzling here let's go do it the other way let's go because your wall the bottom of your wall was above your roof plane on the edges yeah but still should cut them off a roof will always cut walls off when the roofs come out here let's go ahead a second floor just like you said um it should have been this is a good one to be prepared for um so if i were to add a second floor build a new floor i'll just make it blank because i've already got stuff there and click okay and then i gotta lower my roof so i'm gonna open the roof and i'm gonna lower it and lock the pitch and lower it by eight feet there i've just created a story and a half all right so now when i draw walls in on the second floor and click on the right plan here i want to create a dormer there on my second floor so when i draw some walls here they will not show up because chief is cutting those walls off with the roof okay see that's what a roof will do all right to create at this these aren't attic walls these are attic walls over here so i have to be careful um that they're not marked as adequates or i won't get room definition like this and this happens a lot see i'm not getting room definition because those walls by default are marked as attic walls which would be no room definition so i could turn those off that's fine once once you have the walls you make them into whatever you want it doesn't matter yes do that and i still don't have room definition which must mean these are attic walls as well okay so i had all those attic walls there so now i have room definition room definition is extremely important to make all of this work all right now i want a roof over that so let's go draw a roof plane and get my roof plane here we'll draw that coming up and there's my roof plane sitting there and just snap that to the center of this and i'm not going to bother adding it creating that right now i'm going to copy that create the other side by reflected copy and there's my there's my dormer but i don't see the walls so now what you would do with it in this situation is you would click on the walls and you tell chief to cut the bottom walls off so under the roof tab for walls under under the roof tab for the walls you have these options all right most of the time i mean these two are controlled by the button on the toolbar or you could go here dutch cables work great high shed knee wall extend slope downward has very limited uses you'll almost never use those but this one you will use in this situation that we're talking about so roof cuts wall at bottom click okay and now you'll have those coming up these won't this won't work if there are no if there's not a roof drawn here the walls have to have a roof to extend up to for that to work okay chris i hope that helps and answers that question i'll show my screen right now yeah go for it i've got this same this is a project i was just working on for someone else just to clean there's this exact condition up so kind of the same thing i've got attic walls and one of them is set to cut wall at bottom yep and the other one is not yeah and chief will automatically form the roof that that hole is in around the walls so it accommodates those walls so this that roof plane where that door is is under the wall the roof plane that's going all the way to the floor is on the outside of the wall so once you play with a little bit it'll make it yeah and a lot of times you can even get this to auto draw if you set these walls to be knee walls yeah yeah you need the knee wall setting yeah um i always mark those little empty rooms behind those as addicts that always helps a lot oh and yeah there you go good trick room name attic will will do wonders for those little spaces like that yeah all right let's go back here and get out of this chris i hope that was what you're looking for let me know hopefully it's not yeah yep he says that's great yeah it's a good job yeah cool all right we're in auto roof return huh you got one minute to spin the wheel i just i did already we had auto roof returns on there um oh that's right so let me do that real quick um auto roof returns are pretty simple so when you have um a plan and you have a roof over it and you want it [Laughter] there i am um and you want to have returns here that's a function of the walls it doesn't matter at what point you're in in the roof you could be done with the roofs it doesn't have to be automatically turned on but at any time you can click on a wall and under the roof option for that wall you will have an auto roof roof return function this works really well in chief architect they've done a great job with this little tool right here and what you do is you put on put in here i'm going to create some returns i'm going to make them 42 inches long i want the fascia of my return to extend out three inches beyond the fascia of this gable so i'm going to put a three in here you could make it you could leave it zero if you want to i'm going to make them a hip return if i wanted full that would go all the way across it's going to be sloping include shadow board so the pitch of this is going to be whatever the pitch is defined for that wall i wonder can i change that let me try that here real quick so there's your return that i've just created see how it sticks out three inches past and it's a little hip return those work chief does it did a great job putting this tool and this works really well let me try something i've never tried before i don't think this will change it so if i change that to a four in the wall no it the the pitch of the roof comes from the pitch that this return is joining right so so you can't change that if you need a different picture you'll have to draw them on manually yeah and you can you can't select them and you can't change them at all it's just what you can you can change them in the wall dialogue in the dialog yes but you can't click on them and change them at all nope they're locked and dragged yep exactly but for what it does it does a great job and many times it might do just what you need it to do and then you can really upgrading them i'm not getting a masterpiece here man look at our outside all right one more step you make that you can make that three turn wait wait wait wait you can make that return so it goes all the way across too yeah you can you can and then chris has another question okay i don't have a great solution for that one is there a way that wall rene is showing to show siding on the exterior of the roof and just framing below the roof yes there is let's do what now yes there is you have a way to do that john i do i do the showing so i assume he's talking about the wall that's touching the floor oh yeah and just framing below the roof you don't have to have a different wall type for your wall below the roof you don't want to slide the wall you don't want your sliding all the way up so so click on the other roof on the other wall i just drew a partition no room definition no locate wall i'm not sure that's what he's talking about i think he's talking about that cancel that menu so i think what he's talking about is the other wall right the other wall that you have there where the roof is budding into it full height wall the full height wall not that one that one would work too that one would work that one so open the dialog for that and go to the roof tab and under the roof tab at the bottom you got the um save let's see lower wall type of split by budding roof yeah which i gotta go set a set of wall type that's framing only exactly right or sheetrock on one side and frame you know no framing on the other side so you'd have to create a wall type of siding on the exterior above the roof that won't change and that won't change until you say okay and then come back into it and and show it again i think it'll show it what it would be did you change no he's talking about the one i have here he's talking about this one then you would have to you would have to have that so the roof is butting into it you wouldn't cut it off uh well right no the condition he's talking about is framing below at the angle of the roof line which there's no way to do that with one wall you have to have two walls so you have to have one set to be a partition wall and then frame that wall which is what i'm showing here why would you have framing below it because it's just a a wall with an angled bottom yeah yeah the one but it's the one that's cut off by the roof line which is what i'm showing right so i can go against i'm not seeing the application i don't understand why it's just it's a cr it's a framed wall is basically all he's doing so what you could do is just draw a full wall frame it and then change the wall to whatever you want the framing won't change unless you reframe that wall once framing is in place you can change a wall any way you want to but the framing won't change until you reframe that wall so that's another option if they're um ballisters or something like that yeah this is that's a tricky condition yeah in the area i don't know what happened to my room my walls got cut off so it lost room definition yeah you did i think when you pulled that back something happened all right all right chris we're going to spin the wheel one more time yeah um you can reach out to one of us with that question yeah and we'd be happy to help you with an answer so okay and so there we go here we go last spin of the day um better be a good one a simple one oh i like that one that's a nice simple one we can cover that in just a minute all right so that is the disconnect align tool all right so you've ever had a cad box that you've been drawing and you you modified some things so you want to you want to get rid of a line in that cad box or you want to do something different this is good for doing molding polylines and things like that too this tool right here allows you to disconnect the selected edge of a line of a box of a polyline shape so whatever edge you have selected when you click that i can now pull that line off and now it's not hooked up anymore that's what that tool does it's a really handy tool when you're in situations where uh you know maybe you're trying to draw a line at an angle here but you didn't really mean to hook it up but it did anyway so now you could un undo that and get rid of that line independent of the other cad lines so that happens a lot so i have a question yeah is there a way to let's say this this line polyline that you have going where you took that line off of there make that so it's a whole bunch of separate lines like you know how it when you get a when you get a dwg file from an auto yeah or whatever they're all separate lines yeah they're all separate lines is there a way to select all those lines and join them all at once not that i know well there is there is well no there isn't um all i do when i get those kind of files is i go click on each corner and it puts them together and join it right so we need a tool that will join those back together really fast that would be nice because a lot of autocad lines and arc will come in as a bunch of little lines hooked together right pain in the patude i tell you when i get those kind of dwgs i go no don't do that yeah and you don't want to and it's you don't want her to trace over it and put chief lines in than it is to try to convert those is what i've found or just put a single line and build an arc to follow it exactly yeah but i've never put those cad files on a separate layer lock that layer and then trace over it and that works pretty well yeah i've never tried this before but there is the option when you're importing it to have it make a polyline for all the all the point lines that share the shared point so maybe that would be something to look at i don't know i've always wait what are you trying to do you know how when you bring in a dwg you get all these cad layers that are all together right yeah um i always use the option that i i don't want to create a polyline with lines that are shared points because i don't want to have a mess you know but if i check that box maybe maybe i'm maybe i'm overthinking it maybe we're talking about that i always check it yeah i always check you guys check it okay and then you don't have that issue where you have a bunch of separate lines no yeah but you can usually use the um extend tool when you select a couple of different line segments right that's and that's what we're talking about if you don't check that polyline box you have to go do that with every line that you want to paint create a polyline [Music] um guys i did show that condition for chris if we want to show it oh yeah go ahead and show it as long as you got it handy there you go so that's just a wall set to no locate i i designated as a railing i extended the railing up and then it auto cuts to that and then build framing and the wall type is just framing only in the main layer okay if that's what he's looking for that would that would do the same thing wouldn't it if you used a single wall it might not get the top plate on it but you would get yeah i don't think you have any option to do that as a single wall and have it extend past and have the lower wall be framed at an angle i think this is the only way you can do it i think possibly yeah yeah all right back to back to it dan sorry that's all right i think we're about done here so um all right everybody uh thanks for participating mike made it safe and sound good so far yeah um yeah you guys thanks for being here and again uh if you're uh interested in the uh getting some live face-to-face time with us be sure to check this out um chief experts academy.com summit waitlist and we'll be sure to let you know as soon as i have the i'm done with the information on this this is going to be cool i'm really excited about this event and the place that we're going to be at is phenomenal so all right you guys everybody thank you for being here and we'll see you in two weeks um we're gonna go off of the first and third monday or friday schedule a little bit um the calendar is such that i'm going to be out of town the first week of um first week of let's see where are we here we're in let me just turn these off yeah so we're going to be on the 30th seventh of the other time in luxembourg so i don't think i want to stream from luxembourg and then we'll pick it up again on the 14th probably so we'll go off this month we'll be off a little bit but just mark your calendars i'll let you know you guys take care we'll see you next time bye everybody

Elevate Your Chief Architect & Design Business Skills
Reserve your Spot to the 2024 Chief Experts Total Immersion Summit For Chief Architect Users
Outer Banks, NC
March 1 to 10, 2024

Mastering Kitchen, Bath, and Lighting Design BUNDLE - Only $595
Special Bundle Offer: Four Courses for Just $595!
SAVE $1,737
LIMITED TIME ONLY
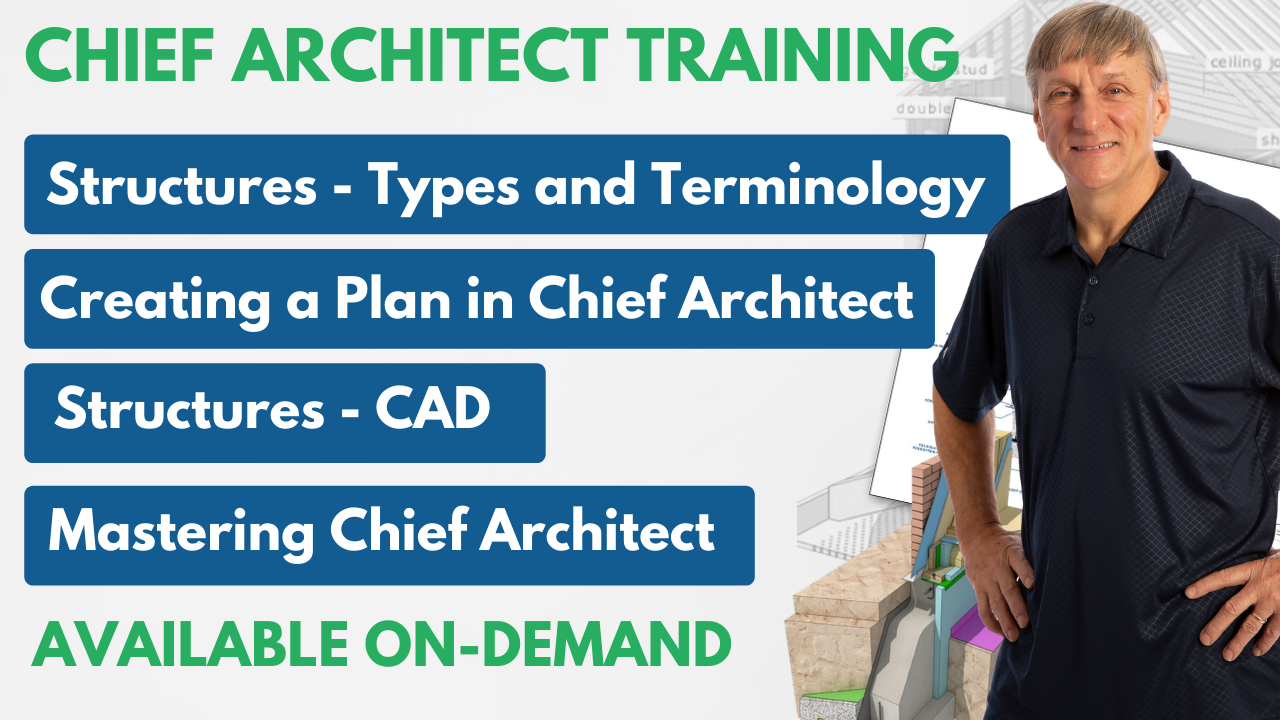
On-Demand Chief Architect Training
Don't Miss These New Courses With A Simple Goal: "Help You Become A Better Designer"
- Understand And Define The Structural Elements In Building Construction
- "Creating a Plan - Quick Start" course for Chief Architect users
- Define And Draw The Structural Elements In Your Projects
- Discover the Inner Workings of Chief Architect and What it Wants From You
Upcoming Events