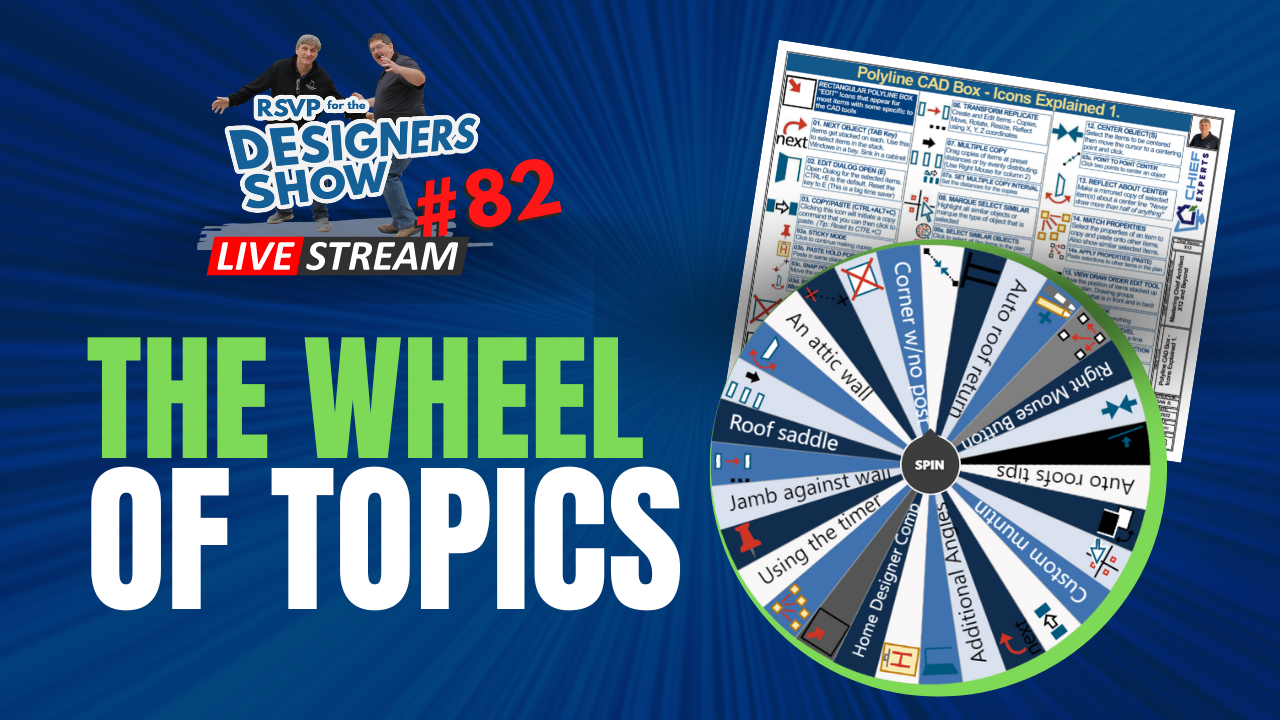
Sometimes it makes sense to learn Chief Architect a little at a time. Did you know that there are over 1,200 icons, and they all have specific functions?
In this Designers Show, we'll have some fun and spin the wheel to see what icons or short topics we'll discuss.
Chief has grown into an extensive program, and sometimes the best way to learn it is one icon at a time.
Welcome, Introduction & Sale 00:01
Chief Architect Icons:
Multiple Copy 06:40
Corner Window With No Post 11:50
Point to Point Center 14:35
Rectangular Polyline Box 17:55
Reflect About Center 22:50
Home Designer Compatibility 25:30
The Next Icon 28:10
Transform Replicate 29:42
Lock Copy 34:23
Make Parallel/Perpendicular 36:25
Custom Muntin 40:11
Select All 43:25
Q: My toolbar icons disappeared. What do I do? 46:30
Open Dialogue 47:30
Q: Is there an Offset Command? 49:21
Auto Roof Tips 50:45
Add To Library 53:48
Paste Hold Position 55:20
Auto Roof Continued 58:17
Additional Angles 59:45
Q: How do I get custom lites to work in muntins? 1:03:02
Match/Apply Properties (Paste) 1:04:45
Wrap-Up 1:07:14
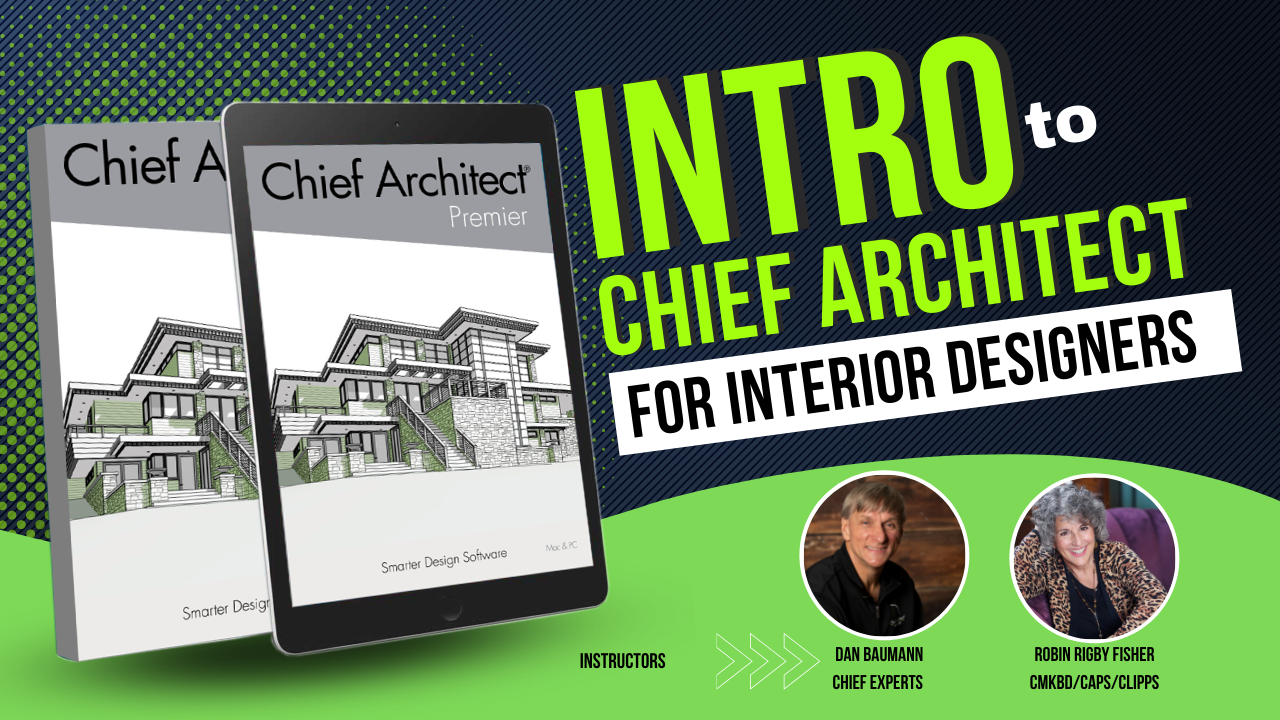
Intro to Chief Architect for Interior Designers
This course if perfect for interior designers who are new to Chief Architect.
Spend less time learning Chief Architect and Take Your Interior Design Skills to the Next Level.
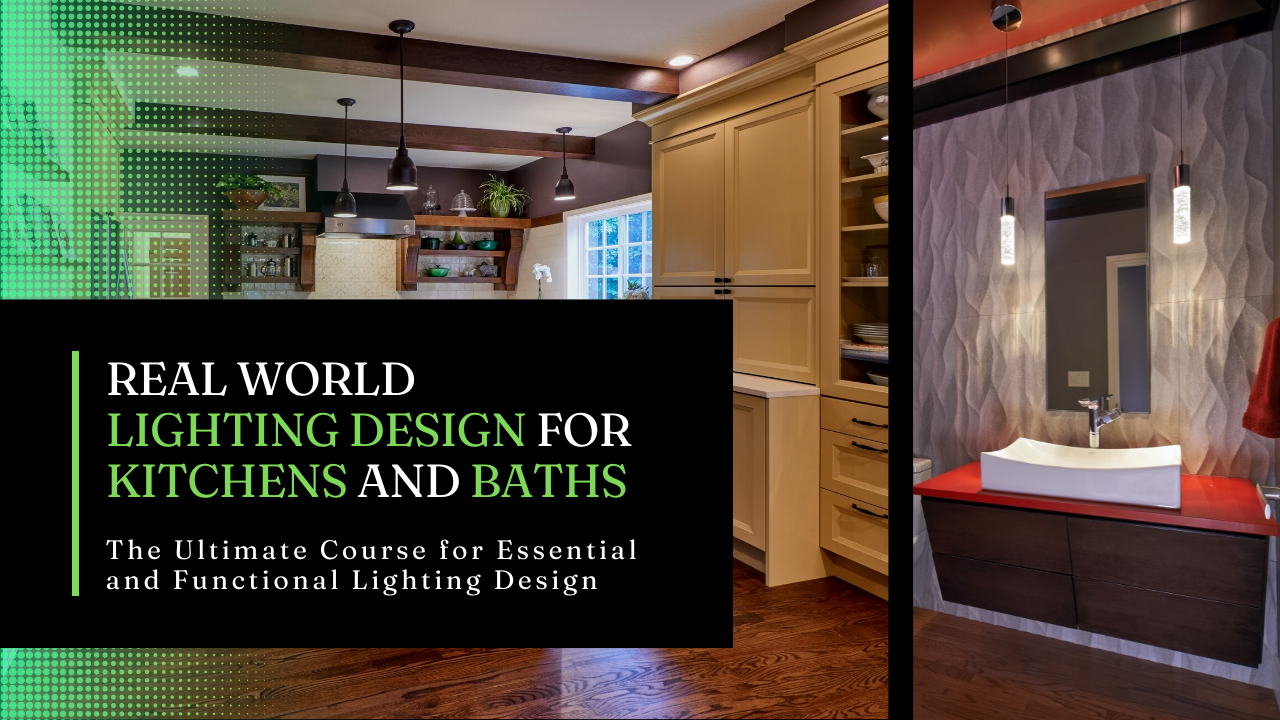
Real World Lighting Design for Kitchens and Baths
The Ultimate Course for Essential and Functional Lighting Design
Discover the best practices for determining what type of lighting is best for an amazing residential kitchens and bathrooms.
yeah yeah I stood up till two last night and I'm shot oh man hi everyone Dan here on with John Renee and Robin good morning and good Friday good afternoon or good evening wherever you are thanks for joining us today Amanda Bill 105 degrees what degree is oh yeah hey Mike how you doing uh so welcome guys and uh look forward to have a little fun here today been a three week here three weeks since we've done this because uh July happened to be one of those odd weeks that have five Fridays in it so now we're back to regular every other week here for a little bit anyway um we got Mike we got Jeff rexford's here hey Jeff looking forward to seeing you guys in Coeur d'Alene um and let me I'll I'll talk about that in a little bit I've got a we've got a one room left to share in Coeur d'Alene that if you're interested I'll bring that up later anyway uh we're gonna just have some fun today talking nikons and see if we can throw a few pointers your way um as we do these shows and there's all these topics we want to talk about it just at a point you just go what do you want to talk about now um as we all know we could go on for about a week um we'd probably never cover everything so yeah that's that's what makes this program so much fun it's just so many ways to do so many things and uh hey you know we're having fun and we're making money so uh hopefully we're making money that's a good thing so a couple of things uh before we get started I want to share with you that um do have a little bit of a sale going on right now so we've got some of our products up there that uh 40 off to August 19th so check them out so those are the things we we're gonna offer and it's really a good deal and you can save more if you bundle I mean because you'll see on the offer page in the store that we've got some of these things grouped together so check it out uh love to have you in there in fact today uh we're going to be using as part of our template here uh um oh here's the store with all the things and the different products are listed here if you there's a button there to get some more information on each one but today we're going to be using a page from one of my classes I did for the mastering it's uh session number two out of 16 mastering Chiefs 2D CAD tools which if you've been using Chief at all you know the cad function in the program is pretty powerful uh you know we'll go head-to-head with any CAD program out there in the world of architecture not going to design a car or a bridge with Chief although Renee could um and you'd render it and have people walking over it too so uh we're going to be using uh this page from my that class and we're going to spin those icons up but you'll see that and this is included in the 40 off this is a hell of a class that I'm selling for only 5.97 on regular price and I get 40 off this course I way underpriced this class okay so there's a ton of information here and if any of you on the call have taken this class you know chime in I'd love to hear your feedback but there's a ton of information here and um there's 16 other sessions in this course that we go through uh with just about as much detail as you're seeing here so it's fairly extensive course and and all the courses that we do are all time coded so that means that you'll be able to go into the course and when you search and find a topic that you want you can just go to the video and fast forward to that time code unfortunately the software doesn't allow me just to click have let you click on that number you actually have to fast forward but still works fine everybody does that um okay Bill Murray did a canvas scan and he's Blown Away awesome I'm glad that's working for you so but as with everything with uh any of that that technology verify so all right uh you guys got anything you want to add about what I just said yeah if you haven't taken the course you should um I use I go back back to these things often it's they're brilliant they're brilliant there's always um information to gain from reviewing the classes yeah and you have to watch the whole thing you can just go to little segments and watch that it's they're great yeah yeah and you come back and you learn something new every time and I'm really excited about going to Courtland here uh it's been this would be three years no since the last time we were out there and they offer these uh courses I don't know if any of you on the call are going to be going or not but they do offer courses out there um it's quarterly is a great City and it's really fun to be with everybody out there in fact uh We've rented I've rented three houses out there and looking I have one well two maybe two but for sure one spot left available if anybody's going to Coeur d'Alene and you've rented a hotel or something like that if you're looking for a place to stay um I have one spot one room left in one of the houses I've got three places rented uh two of the houses are right here and then there's one just a half mile away that we're putting some people and I got two spaces left there and it's uh 585 for four nights we're gonna be there Tuesday through Saturday we're leaving on Saturday so it's forty five eighty five for the four nights that's just the room um we'll you know you're gonna hang it out with some really fun job over there we have a great time Martin and Kevin yeah yeah good job is in there Jeff's on the call I mean these guys are yeah all of these are we're all pretty Heavy Hitters yes some really fun people Robin was going to come but now she's gonna go see your grandbaby instead grandbabies win out every time so I got a couple spaces left but we'll be hanging out over here you know you'd be sleeping over there but we'll hang out here we'll be doing a lot of things together we also have a great time when we go there and you'll learn a ton from the class and when you come back to the house and you're sitting around and we'll ask a question from us goofing around too I know that's that's where that's where the real learning happens all right let's move on um so what do we got here we've got our wheel of the the designer's wheel I'm calling I didn't know what to call this thing so I just put some icons from that page I just showed you on here plus a few topics let's spin it up and let's get started and by the way you guys we're giving Dan three minutes today I'm I'm setting a timer and everything all right three minutes every topic I don't expect we'll get through all these topics but uh and you guys please chime in in fact uh you know maybe take turns and you guys can handle some of these too so what is that I got yeah go ahead put it in the comments see you can guess it yeah so what is that icon yeah feel free to do it or we'll just go to this page and you'll see that that is the multiple copy icon and uh you use it to drag out copies in your plan and you can use the right Mouse button to get copies over and down so let's just take a look at that real quick let's go into Chief uh I use that all the time for lots of different things tile layout framing layout so let's just throw you know let's just throw a framing item in our plan um I guess I should go to the framing plan first and we'll throw a framing at him we'll lay out some joists so so there's a joist I want those spaced every 16 inches so we could go here double click on that or click once on that icon so the icons down here on the edit toolbar once you click on that you click it again and then you click it again over there to set your distance so I want to space these joists out every 16 inches and in fact in this case because it is a joist those settings are in there usually it comes up highlighted I thought didn't it so when I do that oh because I'm not set up here let's do this and yeah see how the joist sets up are automatically so if you're just doing CAD items use that but in this case we're doing that so every 16 inches just pull over and there's your joists and you can lay those out now if you want to do something like tile or you have some other things you want to do I'm going to drag out a little box hit my Tab Key let's make that a six by six box and then let's go into the multiple copy and lay out some tile so I'm going to click on that again and this time I'm going to go 6.25 and 6.25 so I'm going to put that in both of these and when I'm laying out tile in 3D on the wall do it in 2D CAD first and then convert it to K to 3D it's a lot easier to work with when you do that because you'll have the trim and extend and all that kind of stuff available to you which you don't have available in the 3D items so click ok now I'm going to drag this with my right Mouse button instead of my left this is important so when I go over to the right I can go as many times I want and when I let go of my right Mouse button and pull down now I can continue down so that's using both of those in my multiple copy right Mouse button all right so your alternate Behavior the alternate Behavior yep and that's what that's why you see this here this column you'll see that but that they should put a little thing on here that says use the right Mouse button dummy um because it won't work otherwise yeah can you can you zoom in really close and show the grout line oh yeah because I put a quarter inch in there it leaves a little line in there so that's why I did six and a quarter on the six inch box or whatever size you just um just uh you want to see the 3D for the tile well if I want to go 3D now I've got to select it all and convert it because I just drew CAD boxes or did I draw 3D no I just drew CAD boxes but trouble is you can't select them all at once that's something I don't like about this so now I could go in here and convert that make it a 3D solid set my things what I want to put on the right layer and then bring that up and I would do it a little different but again because of time I'm just doing it real quickly but one that comes up in 3D that'll be a 3D tile so the the only downside is you can't uh I can't do that whole grouping at once because it's just too many items Chief does have a limit on that but you do it two times three times so how do you take that in the 2D layer and now put it on the wall well you draw it on the wall and then you would have drawn it okay I would have drawn it on the wall and then converted it got in fact I would have used uh yeah I don't know sorry we can't Splash tool or material regions we can't use them we can't convert it to a material region can we so um you can convert it to can we convert them into a region oh yeah right now Okay cool so that's what I would convert it to and that way it'll cut around windows and doors and all that stuff automatically much much easier to work with so all right spin the wheel then the wheel John says Okay um all right who wants to take how many minutes did you was he on on that one John 3 59. oh man tighten it up turn it up the question so I gave him a little leeway okay let's spin her up I don't know if you're hearing the sound or not but I'm not corner with no post what does that mean anybody guess what I mean by that that'll be a good one all right oh I had it muted no wonder okay what does that mean um that means I want to create a window with no posting oh the Cure prepared this time look at me huh yeah I thought I sent this one ahead so so there's there's a window with no post so how do you do that it's actually quite simple you put a window in the corner uh not a big one there's just a regular window and you put another one in then you just jam it into the corner whoops I over jammed broken hey don't do it so hard just push it in there I suppose you could use your control key to make it a little easier and when you push two windows together they kind of turn into one but you see the graphical representation of the post yeah but you see the post here okay so to get rid of that post you click on one of the windows and open its dialog box go to the frame and turn off corner post and now you have a window with no corner post nicely done yeah pretty slick nice if you're if you're very clever you can turn that into a door with no Corner posts same method essentially yeah you still need to use a window though right yeah yeah well actually I want the two patio doors coming together no they won't do it so you got to kind of take it and use Windows and then put a door inside even with them even like because you see those kind of doors they come together and maybe a future release wait John can can Dan have like a few more minutes on this one so that way he can turn it into a door or let Renee can turn it get it uh it takes a little longer than that it's yeah no that's not part of the rules but that's how you do a corner window you could just take that window convert it to look like adorable slabs and stuff and you can make it work uh does that work in corner pocket doors I don't know I doubt it well because it's a door I mean we we're doing it doesn't do doors it only does Windows so keep in mind you could you could create a frame so no door a frame that cuts that is converted to a fixture and then it'll cut a corner out yeah and then you can put whatever you want there come to Coeur d'Alene and Robin will show you how to do that yeah all right it's been the wheel here we go uh spinner up foreign okay what do we got there anybody I want to cover that one well that's that centered that's copy or that's a um a point-to-point sentence you're good yes I love that tool that's part of the centering tool right here so when you've got your Center do I get a prize for that for knowing that one no you're supposed to know that one you don't get presents all right so here's the one that we just uh rang up the point to point the point to Center Point um and actually I haven't used that one a long time how do you do that one again oh you did you you did do it you do the class showing it yeah but that was a while ago so I want to Center uh let's put a cabin in here so on the center of this cabinet between this line in that that wall okay so we're gonna knock the door the door okay let's put a door in the door all right we got a door here I want to Center this cabinet between the door and the wall we're on the other side huh there was a door on the other side other side of the wood show how it works with the door on the other side centering it between that and the wall I mean the window laughs which window I just move it there and Center it between the window underneath the Ridge and the wall this window yeah in the room this way you want to center it yeah we're on that wall where it's at it's going to bring up more points okay let's just do this one okay so we've got our center right here and when we click on that we've got this thing down here okay so we click on that and then what do we do we go click on um a point and then we click on another point and then we move that you see how it moves It Centers between the two clicks I'm in and there's that thing centered between those two clicks so it's really simple it's it's highlight the item you want to Center click the centering tool right here all right and then click this one and then click on two points that you want to Center between so I want to Center in between this and the corner of that window which I can't get I can't do it that like I normally would do a point to point but I'll just you know anywhere you click done there's your Center so um it does work pretty well now there's got to be more to that and notice how it gives you several different points to center it on yeah the one you want it to do so yeah the two x's the X's that are in there so sometimes if you're centering between something that's up above and below and you want to get something centered they may have two or three X's you have to then click on that X of exactly where you want it because it'll be centered if you have two items like this and you want to Center in this space you have to click you'll have a an X up here and an X down here and one in the middle and you need to click on that middle X yeah so it's showing me an X where the item was originally sitting and then it shows me an X where I click the two points so there's your centering tool that will save you a lot of time when you're centering things up uh spin the wheel three minutes are up all right okay what is it what is that you guys don't know what that is I just used it a second I had a select object oh it's this one right here like angular polyline box oh there it is oh so in Chief since everything is nothing but CAD all right so when you draw four lines when you draw four lines together you're creating a polyline shape all right this tool right here is already a rectangular polyline shape it's just four lines hooked together okay and when you grab those lines you can move the corners wherever you want you can make the Box bigger and smaller all right and if you're a right Mouse person if you grab your right Mouse you can pull two sides out by using your right Mouse button instead of using your left Mouse button so that'll save you a little time when you're doing that so that is a rectangular polyline say that one again right Mouse button does what when you're when you're pulling CAD lines right Mouse button instead of doing this with the left Mouse button the right Mouse button does this oh yeah it pulls the whole pulls it out equally kind of like resizing almost I don't know what you call it but is that does that work with uh like a if you sent an image to a layout does that work yeah kind of um for cropping yes it does no for resizing it if you sent a picture like if you took a took an elevation and you sent it as a picture as an image to the layout well it resize it that way too or is it going to be concentric still oops let's go do it go try it let's go capture it no I think it still doesn't image no I didn't want an image on a picture I'm using the built-in capture in Chief by the way I use it a lot it's really quite handy um so I just captured a picture of what I had on the screen and when I pull the corners in here like this it does resize the picture just as if I was pulling it in with my left Mouse button so it doesn't have any effect on this what you're talking about is a viewport on the layout page so okay so we're gonna go over three minutes here I'm going to open the layout real quick I got 15 seconds okay um I'm gonna file new new layout and let's switch to uh page size let's send this to the layout there do that right there that's a that's a another image delivered is it yeah it's well it's it's a live image but if you want to crop over see when I crop over when I do a right Mouse button it just resizes but if you if you crop that in from the sides first get it cropped in then it would do it um crop it into the image size of the image you want let the sides crop the sides in with this yeah yeah then resizing it's easier but there is a way to resize this what is that button again I can never remember this how did we get that little round button at the top here [Music] um I don't remember shift click and zoom in what are you trying to get when you click on something you will get a round button here that is yeah shift click and zoom in a little bit shift click oh there it is thank you so when I now pull this button now I can resize the whole thing at once and then there you go there it is so um anyway but yeah still you still have to pull these in I don't know any way to do that without pulling in all the sides yeah holding the X key or you can do right right click on a corner yeah that's what we were talking about yeah right click on a corner shift right click I don't even believe in that just yeah I miss what you guys are trying to do I was trying to crop two sides at one wheel oh oh Colin Centric see oh you're cool hold your c key hold your c key in there well that's again I just want to do two sides I don't want to do the whole thing yeah no coin Centric we'll do two sides so if you hold your c key and then hit a left or right handle but not a corner handle not a corner handle just the left or right oh yeah but I want to do the top and bottom all right spin the wheel that's cool move on all right spin the wheel um you're almost five minutes on that last one all right all right what do we got there reflect my favorite way I gave it away is this crazy use these things every day you know think of what their names are don't think of what their names are I know isn't that funny um so that is this tool reflect about objects you reflect about object right here reflect about oh that's an r on my keyboard that's an r i don't even look at it anymore oh yeah there you go yeah that's the trouble with doing keystrokes all the time um that particular uh tool again I always say this in my classes for you that have been been with me for a while never draw more than half of anything okay what does that mean really what it means what it says never draw more than half of anything so uh so if you've just finished drawing part of a roof this image so let's say I just drew this this roof right here and I got it exactly the way I want it I'm going to do a reflect about but first I'm going to hit the copy button okay and then you're gonna see that reflect about right here so I'm going to take the copy I just created and reflect that about a center point and the center point would be the ridge now because we have a predictive uh whatever you call that we can see what it's doing so I just created the second half of that item you know same with windows and doors or anything like that so you need a door on the other side of the room copy reflect about Center and then now I've got a door that's perfectly centered on the other side of the room so nice tool use it I use that one I use that one all the time just if I getting lazy and don't feel like changing a cabinet from a left hinge to a right hinge just reflected about it oh yeah great point is that the same tool that you could you could use that same tool to flip a wall too yeah uh no no different tool well I don't know I know if that if you go to a different oh there it is down there it's different um you almost had it yeah oh I guess you can do can you no you can't do this it doesn't flip it you have to use the football tool so there's a layers thing probably yeah um the Network's in 2D in 3D I mean in elevation view too so it's again really handy tool all right let's go spin the wheel um oh so that was a good one two minutes and 30 seconds catching nice nice so if you're if you're if you find yourself drawing the thing you've just drawn but you're drawing it the other way oh what is this home designer comp call comparison video compatibility compatibility okay what that means is if you have a client that works with Chief's home designer product uh select lower price ones but for sure the 500 product that they sell it might be 600 now I don't know what it is but I have had a lot of clients a lot of homeowners that sketch out their own plans or they want to see the work that I'm doing on their home designer program because they bought it what you do is you double click on this Arrow icon right here and there's a little tick mark you have to check that makes it compatible for them to open your plan and you and look at it and do things in it they can move walls and change dimensions and all that kind of stuff so you do get some compatibility now a couple things you don't get which are super important if you're working with this uh someone else in this this is also great I know a lot of companies that you know they just they have a lot of they have sales people and the sales people don't really draw full plans but they want to do enough drawing to get the ideas across their clients so they'll go out by the 500 version and use that and then maybe turn their plan over to the people in the office that will use the uh the whole the full Bowl in Chief but with this you get zero layer sets you get zero plan views you get zero lots of things in fact when I compare the number of icons in the home designer product what the number of icons in Chiefs full product you've got 1241 icons for the chief full product not more than that it's 270 it's 1270 something like that and you've got 600 some for the home product so that'll tell you something right there wow yeah it's quite a bit but they still get layers right yeah on the set one set of layers so how do I have to send it back to them so they can see what I want them to see or they have to understand that when you do all of your stuff with your layer sets up here in your plan views whatever one you've left it in when they open it they'll see that but they won't be able to do a lot they won't be able to turn certain certain things on and off so it works it's compatible they can open it look at it walk through it make notes on it do all sorts of stuff on it send it back to you and you can still do all of your things so it's really a nice feature again I do that with a lot of clients good way to do it all right oh okay go ahead oh damn two minutes and 40 seconds you're doing great you've got a really timing the hell out of this one right uh all right oh the next button that's just you can either use that or the Tab Key here you go it says next on it um so what is the next button so when you're working in a in a on a bay window uh well you keep in mind when you put things in your plan on your screen it gets stacked up on each other okay so if you draw a line and draw another box on it and box on top of that and box on top of that all of those items are getting stacked on top of each other on your screen so sometimes you can't click on something so now you have to start hitting the next button and again when we look at the next button the tab key is the same thing so that's what you're going to use when you want to get to something or Enter key well the answer key works too yeah uh there we go cool you've learned something new today so Tab Key Enter key or the next button so I want to get to that window in the bay window you click on top of it hit your tab or enter same in 3D when you go in 3D and look at something you click hit your tab key click hit hit your tab key so that's how you get the bay unit and then the bay window and same with everything else in your plan as things are stacked up on top of each other so so that's what that does a really nice way to get some sometimes you have to click you know two you know two to ten times to get to the item that you want to get to depending on how much stuff they have in your plant so that's a nice button all right 136 on that one Dan wow cool that was an easy one that's uh copy replicate that is trans transform red okay I was half right that is a cool tool Transformer this is your favorite one they did a big overhaul in this X-14 they did they did they added a lot of new things in there we won't get into all of that extra stuff they added but transform replicate is kind of what makes Chief uh a CAD program that it is so one example might be where I did the created those floor joists before I could go to transform replicate and then if you're wise enough to just set up the hotkey number t or letter t for transform replicate then you just have to hit that to open that um so you could do all these different things with whatever you've selected you can make copies you can move things so if you just want to move something over a certain amount just highlight it and then come in here and move it you have to understand the X and Y on your computer screen X and Y so when we're looking at the screen whatever view we're in and so you've got X's to the right and left so the positive X is to the right so if I want to move something over to the right I'll just type a positive number here I don't just adjust the number you don't have to put a plus sign in front of it if I want to move something to the left I type minus whatever that number is if I want to move something up on the screen I just type in a positive number under y I want to move something down on the screen if I type in a minus number under y and then of course we've got our Z Delta which is the three back you know the floor to the top of the building in on your screen so you can raise and lower things like roofs and all sorts of things in your plant so could you conceivably do three steps at the same time could you copy something could you move it so could you copy and move something over five inches and down negative three inches and rotate it 45 degrees Yeah you could um I'm not gonna do that right now because I haven't practiced on it but yeah you could yeah well let's go let's go down here at um 15 degrees 16 15 distance 16 inches down we probably won't end up with a 16 inch spirograph um that's not what I was trying to do so I was trying to do now if you could do that on purpose that's exactly what I was trying to do yeah so if I move this item over 16 inches at a time I want to move it down no I don't want to rotate it I just want to copy it down at an angle like this okay so what I did was I rotated it um you need the Y Delta negative negative eight that one and then yeah there it is there you go and it still keeps the 16 on Center yeah thank you and it moved each one down eight inches right that's pretty actually I do that I do use that tool when I'm laying out manual you know stair treads or something like that which I've done in the past don't have to do that so much anymore because Chief stairs are better but transform replicate learn that learn that tool um get used to using it it'll save you a ton of time when you're doing things especially like you know wrote uh you want to rotate something specific like you have a plot plan and you need to rotate it a little bit you can actually type in an angle and it'll rotate it for you resizing reflecting I mean just all of that then you've got some things about Center about absolute Point current point so lots of ways to use that as well XY ever change what does that mean that's why it does change if you um are in an elevation and you've made it a cad detail if you're in elevation you want to move stuff up and down you have to use the z-axis oh yeah right you put it in a cad detail make it a cat detail then it changes the z-axis to y I think the best part there was is if you if you're going to use this you should really use your hot change your hotkey for that item so we don't have to go down to the bottom of the screen and click a button right set up the hotkey the T this one is great I love this one this is when you copy something and you want to repeat the copy and you don't want to keep going back and hit copy you select an item and then you hit the little then you hit copy down the bottom of your screen so let's say I want to make a bunch of these windows copies of these windows so I grab them saying hit the copy button down here that will lock that copy in until you hit Escape yeah okay so now you just keep push you know keep clicking and you're gonna keep getting copies of course I'm not spacing a mod or anything I'm just adding more copies then I hit escape and now I'm out of that mode so I love that that's I use that one when I'm doing my lighting plan it is the coolest thing and super fast yeah that works with a bunch of the edit tools brake tool chamfer fillet um yeah yeah exactly exactly so and that's as long as you bring that up the uh like if you're doing a countertop and you have a you know you want to fill it some of the corners but not some of the others uh so you have a shape of a countertop but you just want to fill it or chamfer some of the corners so you click on one of you know near one of the corners and you hit that tool down here and you were not even doing one that's on the spinner but because Renee brought it up so I'm going to put a radius of six there but I'm going to hit the lock you know I want to lock that in if I hit the a it'll do all of the corners so I click on that and now I could just keep going around and just do some of the corners oops I have to click around so you just click around the corners and keep clicking until you get the ones you want that's a really nice that again the push pin is really a nice feature for that foreign you're designing a really weird house very very nice won't be the first time I've done that all right we got an upside down table this one's important parallel yes more perpendicular yeah perpendicular so so if you have a line that's a little bit you know you you want to make this the same as that make it parallel so you click near the end of the line that you want to lock in place so I want to do it like this where the bottom stays locked in place so click near that edge and that locks that edge now you hit the make parallel button right here all right and you see if Ctrl B y control B I don't know it's just what it is then click on what it is you want to make it parallel to and that will do that so you could be anything in your plan it doesn't have to be another line on the other hand if you want to make it perpendicular it does have to be a little bit past 45 in order for that to work okay the other line I had I wouldn't be able to make perpendicular to that wasn't quite enough of that angle so again click near the edge that you want to lock parallel perpendicular and click on the edge you want to make it perpendicular to and it'll do that now it's pretty cool you guys know at the start and indicators are on by default out of the box templates are they now the start end indicators that you have on turned on yeah are those on by default in the Box no they're not you have to go to your preferences go to edit and turn on your start end indicators right here which is really handy for a lot of reasons that won't get into now let's say you're rotating a plot plan okay you've got a cad box that's shaped weird and you need you need to rotate the whole box to be parallel or perpendicular to something I need this Edge to be parallel to that all right but I want to change the whole box because if I just click on this and do that it only does that edge okay that's no good that's not what I want I want to do the whole box so what you have to do is double click on the make parallel tool open that option I don't know why they don't put in that you know they should do that where they you know you have the options over here so you know it's there I mean nobody knows this options there because nobody clicks on the double click I know it's there because you showed it to me yeah yeah I think I found it by accident once many years ago so I want to rotate the entire box the entire polyline object and now when I do that see how it rotates the whole thing done so you can also shift select and then just use the make perpendicular oh sure okay that makes sense too because you're when you do a shift select you're group selecting the whole object um I've just group selected it of course I do have this set to double click now um this so yeah so I can rotate a shift a group selected object which is what I've just done by holding this and now I can just do it without that or not shift select rotate doesn't work doesn't work because I'm not working that's weird I know it doesn't work so I and the wheel again spin the wheel giving you too much time yeah not in troubleshooting mode today custom what's a custom London so you have a window that you need to do custom mountains on mutton mutton whatever you call them so if you have a window and you want to do something a little bit different with the grids like that look at you Dan can you spell your name in there probably could you'd have to write it with CAD so if I put a window in here and let's just go you have to do this from an elevation View okay not too many people know this one yeah this is a good one so I just made a copy of that window so by default um let me get rid of those lines when you open a window you could do you know your grids um what do they call them here even lights thank you so you could do these four different types of things but if you want to do anything different you have to draw it in yourself so all you do is you go into God there was a day we had to push F2 to go into CAD mode in order to draw guidelines boy that was a long time ago we still were you still trying to press it no no I just just for some reason dawned on me because I remember back in the day we had the switch out of 3D mode and go into CAD mode so we could draw these things so anyway so you just draw the cad lines that you want to be your your muntin mutton your grid lights whatever you want to call it and then you group select those lines that you've just drawn so group select the window just the cad lines and what you're going to do is block those lines and you're going to group them together okay so group those lines and then after you've grouped the lines you're going to see a new icon when you click on the window not the cad block click on the window and you see this little icon I guess I should have added that icon to my list um and that will turn those CAD lines into a 3D object and now now you can go into the window and you can specify how big you want those to be so if you want really fat muttons make them fatter really skinny ones you can make them skinnier so I just had a can you uh do two different sets of muttons so you could have two different sizes like the vertical one be wider than the horizontal ones no I don't think so you'd have to use you'd have to use CAD you know if we did cat on here again and did it did it again uh no because you're not going to be able to do that I'm quite certain um but let's find out so so if I click on the window now oh look at this we got two load uh didn't do it though what did it do no it didn't it's only going to do one block okay so I'd have to make all that one block so that's all you do custom buttons wow it's a little tricky to get that right so it is yeah sometimes it's bugged in not me if you have problems with that call Nigel and tech support um that's that's a select of things that are all the same right when you just want to select all the same things yes so um that's that's a good icon which I never ever think to use uh because I'm just so used to group selecting things the way I always used to but if I want if I select a roof item and I click on this icon down here and I want to select more roof icons I think you got to hit the one that looks like a pizza and that'll select all the similar items which in this case are roof items okay hold on though I thought it was but where I've just been able to pull just select one of them allows you just to select one specific electrical item not all the electrical so like Outlets you could just get this um switches right so put some switches on there too oh yeah okay so that's where that's right that's what we're talking about so the pizza one will allow us to select all of the electrical I believe and the other one will let you just select it yeah the square pizza one the wrong Pizza one and the square pizza I know they look like pizza pepperoni pizza it works that's what I always think of when I see those icons so when I click on this and I hit the round one it gets all of the electrical okay if I highlight the outlet and I just want to get Outlets I highlight the square one and that will just get the outlets right or do I should or do I have to draw a box around the plan to get the oops right clicked here by accident um that's the one I never quite understood let's see don't you have to you have to select the box and then the round one now the round one just does it no um no okay there's sub tools you have to select one and then the other like the chamfer the square one allows you to draw a marquee over the whole plant okay so if I were to select the electrical outlet up here and I'd hold my shift key down and draw Marquee okay that just does get just the outlets that's a tool restrictive selection yeah electrical is one of the few things that does this differently and the select Marquee similar will select only the items right right like only light switches right okay so yeah so on that same note when you're working with Chief when you want to select anything in your plan just highlight the icon you want to select so if I want to select roofs I'm going to highlight the roof icon and hold my shift key down and now I can select roofs nothing else cabinets highlight your base cabinet so that's your it's your shift select function now it'll just get all the cabinets wall cabinets so that's I'm so used to doing that I don't even think of using that so since you imagine the cabinets if you select the full height cabinet you'll get all the cabinets correct yep but not the appliances foreign from anybody right here the first problem is you're on a Mac oh that's a boy Dan I don't know what that one is let's start a war oh what's the next question yeah well hopefully you're backing up your data folder to a cloud or something like that because you could restore that pretty quickly well you might have done this um you might have gone up to view and you might have hit this uh uh you might have you might have done that by accident so check that there used to be a I used to be a hotkey they took that off finally otherwise go to your data folder find the Bak extension delete the Bak extension and see if it restores it or you start your so this one if you guys have not done what I'm about to tell you if you don't do anything else from what we've talked about today make sure you do this one the icon we just saw was this one right here the open dialogue icon okay you should never ever have to click that I mean I've seen you know if you think about what you do all day long you're coming down here every time you highlight something you're coming down here you know if you could do one of these things on your screen from the day that you worked on it you can see you're getting a lot of wrist movement to open a dialogue I mean you can double click on things that works fine too but go set up a hotkey go to your go to your tools go to toolbars and hotkeys I don't know what Chief does and do this they have a hotkey called control the hotkey by default is control e if you're used to that stay with it don't worry about it let's go customize the hotkey though so I'm going to go down here and type in open um dialogue I think it's just open oh what is it called again uh sorry yes um and by default it'll say control e here let's get rid of the control just type in E down here you're going to override the arc function which is like who gives it crap about yeah um yeah it's one of those things you'd use one in ten years um if you remembered it just make it an e now every time you want to open something your fingers right there hit e and it'll open the dialogue hit e it'll open the dialogue again if anything else make that change I use Ctrl e for open symbol oh there you go for this for this uh you need a fixture first I guess I need a simple yeah I know which one you mean the little chair with the pencil on it so hey um you want to save your wrist yes morning Vincent has a question that that we didn't cover on the multiple copy tool if they're an offset command yeah you can do that with the multiple copy if you hit the um the round edit handle it'll offset so if you've got like a cad box and you want to offset it 10 inches you can do that with multiple copy uh all right explain to me what you're what you're expecting so hit your multiple copy now and then drag the circle handle all right and now you're offsetting so how did it set that offset is that the concentrate it set it from the multiple copy interval oh really yeah it's whatever's already in the interval that's already been set yeah okay yeah that's that Circle button I was talking about earlier I've been playing with that a little bit lately and uh yeah so whatever this number is set at so if it's set at 12 and I do the same thing and we grab that now it's every 12 inches so but it's a whole thing it's like a concentric jump yeah so if that's what you're looking at if you want to just move something over and offset it a little bit just start pulling it hit your tab key and type in how far you want to move it and it'll move it over that part that you can do it up and down both so that's another way to do it all right uh let's go spin the wheel how much we're getting close to 10 to I knew we wouldn't get through all of these well that was seven seven and a half minutes oh that was a nasty One auto roof tips you got three minutes Dan all right Auto roof tips um a couple things about Auto roofs there's a few icons down here when you're doing automatic roofs you're always going to start out using that tool so you're going to go up to your uh your roof tool and by default it comes set up this way in Chief but you turn Auto Rebuild roofs on okay so every time you do something to your plan Chief will put a roof over the part that you're working on okay I'm gonna set up here okay to delete what I have in there so if I go and I add another room Chief will put a roof over that automatically okay and because it's turned on I want to make that a Gable end so let's bring up a 3D View there's so many the auto roof function in Chief has gotten so much better over the years and plus when you understand what the roof tool does that'll make a huge difference for you remember the only thing the automatic roof tool does the only thing that it does nothing else and I'll repeat it one more time the only thing Chief does when it puts a roof on your plant is it looks at every outside wall in your plant which in this case any wall facing outside of the screen and chief is going to put a baseline above every one of those walls and Chief's going to then automatically build a roof plane up from that Baseline and it's going to try to automatically join them together that's it Chief does nothing else looks for the ceiling height of the room next to the wall put the Baseline there and build the roof flame out try to hook it together done so when you change ceiling Heights and things like that in your rooms while you're working on them the roof tool will react to those ceiling Heights I want to change that back to a hip I'm going to hit this icon here change it to a hip there's some other tools in the dialogue for um underneath the roof where you can do different things to the roof and those tools will help you get your roof looking a little closer you can Auto Dutch cable you can do auto double pitch hip roofs you can do shed roofs remember to use invisible walls to create rooms so that you can continue a hip across exactly if you need to so if I use the room divider tool even and I come out here and I just draw another room on here like I want a covered porch done I've got a roof over that and they're invisible walls right now so and then when you're done using automatic tool you can get rid of the invisible walls and the roof will stay there so that's you know something to keep in mind yeah continue slope downwards if you select a wall and in its roof panel you can continue a slope downwards so that the roof is cutting into that wall um so the roof Tools in Chief are really fun I really like those at the library your library add to your library okay so when you're in Chief and you've created something really cool like that window that you want to save and use over and over again you can add that to your library by clicking in the little book icon here okay that will put it into your library that you can now um I got my library I had my library on my other screen which is where I keep it and you click the smaller I've run with two different screen resolutions kind of a pain that works um so that window's in there now so anytime I want to use that again I can use it so I could rename the window I could put it in any number of catalogs that I want to um and you can keep your libraries going all the time so here's a here's a hint if you ever add anything to your library immediately name it and immediately categorize it yeah don't don't wait till later because otherwise you're going to end up with this a whole lot of things that mean nothing and you won't know what they are take the time to organize right away the blocks must be turned off um you could even put CAD blocks in there anything that you want to yeah okay I was just I I put this in the comments section but back on the roofs a little bit we also have roof groups and people don't know that one either you can basically distinguish one set of roofs from another with a roof group that's in your general panel of your room designation next time pistol position this is one of my favorite buttons okay this one will save you a boatload of time and work on your plans um if you're not using it you need to start using it let me get out of there paste hole position so at any time um maybe I want to copy something from one place to another and keep it in the same position stairwells are a good example for that so if I go put in a second floor which I do have here and let's say I want to put some walls up on the second floor so I'll go copy a bunch of my walls in fact let's just I light a bunch of walls here and I'm going to copy those up to the second floor okay I want them to be in the same exact place so I just highlighted the wall icon held my shift key down and group selected a bunch of walls I'm going to go up to the second floor and I'll paste and hold those and I'll say yeah okay that's fine um which is what did that say unable to paste window Windows must be placed oh you can't do bay windows yet I thought we could copy and paste bay windows what are they talking about is that what it was talking about can you explode it and then do it maybe well then it's just walls and windows right at that point but I thought they had a copy button for big Windows now maybe you can only do it if you paste it into another wall but here you go I use the pace hole position to put everything in one place okay of course my roof got rebuilt because I created a second floor now I should have turned my auto roof off first but that's fine that's what I wanted it to do so copy paste whole position so if I put a window here in this wall and then I want to well actually let's try that big window let's see if that if I can copy and paste that oh you can say what's the dollar sign um it's a switch uh so I want to uh place a window bay window come on and you can do this uh bay window and we'll make this a little bigger and I want to paste that up on the second floor and see the auto roof is still turned out so it's still doing that as soon as I try to modify something she's going to say oh you want to turn that off and I'll say yes no it won't do auto roofs anymore okay so I do have a copy button for bay window which is new and x14 paste and hold so I could do that okay so that worked fine all right it just didn't like it when I was trying to do the walls so in fact it didn't get all the windows in there kind of hey Dan credit to you it's so difficult to do this stuff while I'm streaming live it is fun isn't it though oh yeah it's always a challenge um that's your separate picture supporting walls yep you know there's so many things you can do on on roofs as and can you show us all right we've got a couple a couple more huh Auto Rooks again can you show us this one set your set your pitch different by the supporting wall for the room sorry I had my library covering up the screen I got you to backtrack again sorry that's your separate pitch from the supporting wall roof panel in this dialogue so open up your wall and go to so if I if I go into let's go up I'm on my second floor here and I've I turned Auto roofs off now so it's not going to put the roofs on automatically um so let me go back in here and double click on the roof icon and turn the Auto Rebuild roof back on and I'll say okay okay so if you want to have a different pitch on something click on the wall where you want the different pitch to be and open its dialog hit the e key to open its dialog and you can change the pitch of that roof above that wall so if I want that to be a 10 I can do that and then hit OK and now you see that Chief will oh I didn't turn my auto roofs back on today okay now we'll change so I'll change the pitch of just that one that's really handy too when you're working on this kind of stuff um you do you should set your keep the fascia height the same in some cases all right back to our wheel we got a couple more left a couple quickies um this is kind of a fun way to come up with lots of topics but you know you're not going to get through them all additional angles additional angles I like additional angles sometimes you need to um do some things say you're drawing a cross section of a plan and you need to draw some lines at a specific pitch you'll see in Chief that it it snaps every so many degrees it's set up to snap every 15 degrees by default all right so what you can do is you can double click on this little arrow icon right here all right and that will open up this menu where you can have additional angles so I want to you know you could set it to seven and a half degrees see how you could do that but I want to just add I'm going to I want to draw some lines at 8 and 12. okay so I'm going to type 80 in 12. I'm going to type minus you just blew my mind I didn't know you could do that the 8 and 12 type in 8 and 12. that's all we learn from each other oh man that's cool you can type in any of these formats in any box at any time 8 in 12. you type that out that's that's why yeah and um required click OK and now I can actually draw a box and you'll see that it's going to be a little bit of a different snap see with that little smaller snap there one of those is the 8 and 12. so if I click on that line I just drew an openness dialog box it doesn't show what pitch it doesn't show the pitch there so now I'm going to click the number style button down here and tell Chief to display pitch in that box and now I could do that and now it will display that number in the Box and now it says yep that's the 8 and 12 line so that's how you do additional angles really handy I I find I use it quite a bit when I'm trying to do things certain types of drawings I've had buildings I've had to measure that had weird shaped rooms where you know the room might have been you know kind of odd like this and and I knew that I knew the lengths coming out here thought I would draw would be I would draw the line at that additional angle I'll just hold my control key down snap at a weird angle but now I need to draw some walls at that angle so I would open the dialog for that line I'd copy that angle and I'd put that in my additional angles and I always do plus and minus just because then you can draw both ways and it doesn't matter I don't know if that's changed over the years now I can draw walls at that angle and you're done so that makes it really easy so your additional angles if you ever find yourself using more than what's on that list don't because now you've got every time you draw something you're going to have those little snaps see how you got that little bitty snap right in there they're going to get really confusing trying to line things up so anyway I rarely do you need more than a few of them in that box in any plan that I've ever done all right let's go back here this one well that's not the right one hang on just played with the custom muttons and I could not get my custom lights to work on the left sliding it only appears on one panel and you drew the same thing on each panel um is there a button like there is with double hung to do the do one or the other well double hung you can do the top or bottom pane right um sliding I don't know if doors uh allow you to turn them off yeah you have to get the chart on each panel you have to chart on each side you have to draw it on each panel yeah okay so and you have to be careful um I think one of the lines has to touch an edge of the wood of the frame of the window or it won't work the sash if you get it close to the sash it'll do it yeah this is probably a topic for another time but all right last one this you would do this differently the answer to this question draw the perimeter of a site with yeah yeah I've done that um I'm not trained in that so it's always confusing for me when I do that but I always manage to get it to work and you can change it to a quadrant bearing bearing style and if you've got like a parcel map from your municipality just type it in to the um to your CAD lines selected angle and do it that way I know I'd rather draw them separate lines because I have surveyors don't follow any kind of I've covered that in many of my training classes where I would study like hell to get it figured out to show it in the class and then as soon as I'm done with it I forget what I was doing it's kind of like studying for a test in school um but I I yes it does work I've done it many times and uh it's cool all right the last icon I just clicked on which was this little bugger right here apply properties okay but we to get to that we need to use match properties too all right so what is match properties if you've got a plan that you've got here's a good use for it here's where I I don't use match properties a ton I use it enough to get what I need I find it's sometimes harder to figure out which item on that big long list of crap to match properties to to paste it on something else and it's just to go fix it on the other thing um or copy and paste it but anyway what I'm going to do here I'm going to just go lower the floor here in this one room a little bit so the height of that room's a little bit off so when I click unmatched properties that's this little icon right here okay I'm gonna say you've got a big plan and you've got lots of rooms with ups and downs and ceiling Heights and floor Heights are different so click on Match properties and what what will happen is when you pick on one I'm going to go in here I'm going to go floor I'm going to type the word floor up here and I'm gonna I want my floor elevation what is my floor elevation um I'm on the second floor okay so what is my finished floor elevation and I click ok and it's going to show me all the rooms that have the same floor elevation I thought I'd change this room but I didn't floor below I changed so let me change this one to you know 120. okay so if I do that again if I go here and I type floor I want to check all my floor Heights in my plan to see if they're all the same so I'll go floor elevation which should be that number and I click OK and you see that oh one of the rooms isn't the same but I want it to be the same so now you'll notice that this little icon down here is available to you it's kind of like this kind of like the paste button okay the first one think it was kind of like a copy button or the you know figure you know selection button but I want to paste that setting I just chose into the other rooms and when I do that now I can see all the foreheads are the same so I do use that function a fair amount on larger projects just to check the floor height ceiling Heights four thicknesses any of the things on this list which is you know that list has gotten substantial over the years I mean it's a lot of things going on in that room so that's really something to keep in mind all right that was our last wheel we are over time um but I do want to again just uh you guys first of all thanks for being here thanks for spending a little time with us but where did the screen go also again if you're interested in staying with us Coeur d'Alene one room left 585 for four nights which I don't think and it shows that there's two rooms left in house three there's six this is kind of spoken for by a guy okay but it's but it's still available if he decides not to take it um so yeah so I do have two on there but just let me know drop me an email I'd be happy to talk to you about it um it'd be fun time uh we got our sale going on so by all means check out 40 off everything right now and as you just saw the icons that we were covering are from my cad class that I teach and this is where I Do cover all of the icons similar to what we're talking about today but I go through a lot quicker and a lot with a lot more details so it's it's really amazing when you start looking at all these things and all the tools they've added to this program and what they can do is just like geez that's where I'm so glad I was able to grow up with the program because I've gotten them to learn these things a little at a time and that's I love that you do this that you break down every single tool and that's really great so thank you so much you bet you can see you see Carl's comment no pin that one you're not a little space for me in the camper request I'm not sure about that was done take care everybody bye
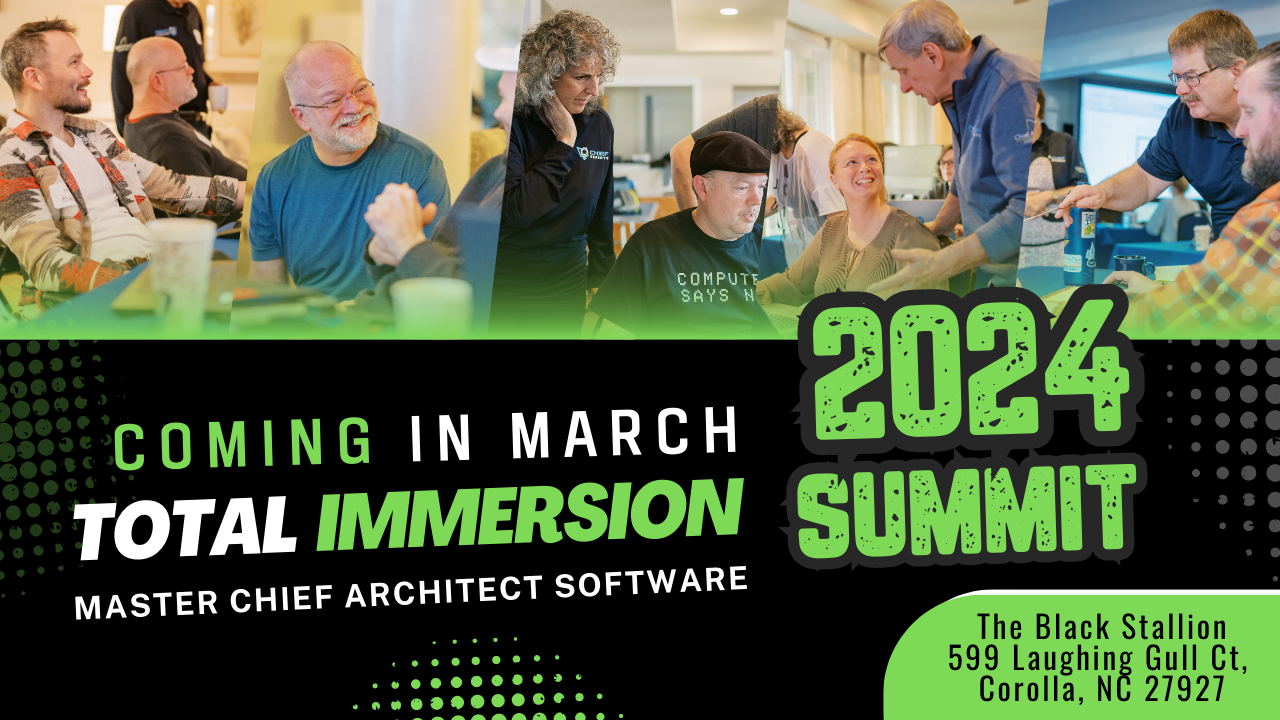
Elevate Your Chief Architect & Design Business Skills
Reserve your Spot to the 2024 Chief Experts Total Immersion Summit For Chief Architect Users
Outer Banks, NC
March 1 to 10, 2024

Mastering Kitchen, Bath, and Lighting Design BUNDLE - Only $595
Special Bundle Offer: Four Courses for Just $595!
SAVE $1,737
LIMITED TIME ONLY
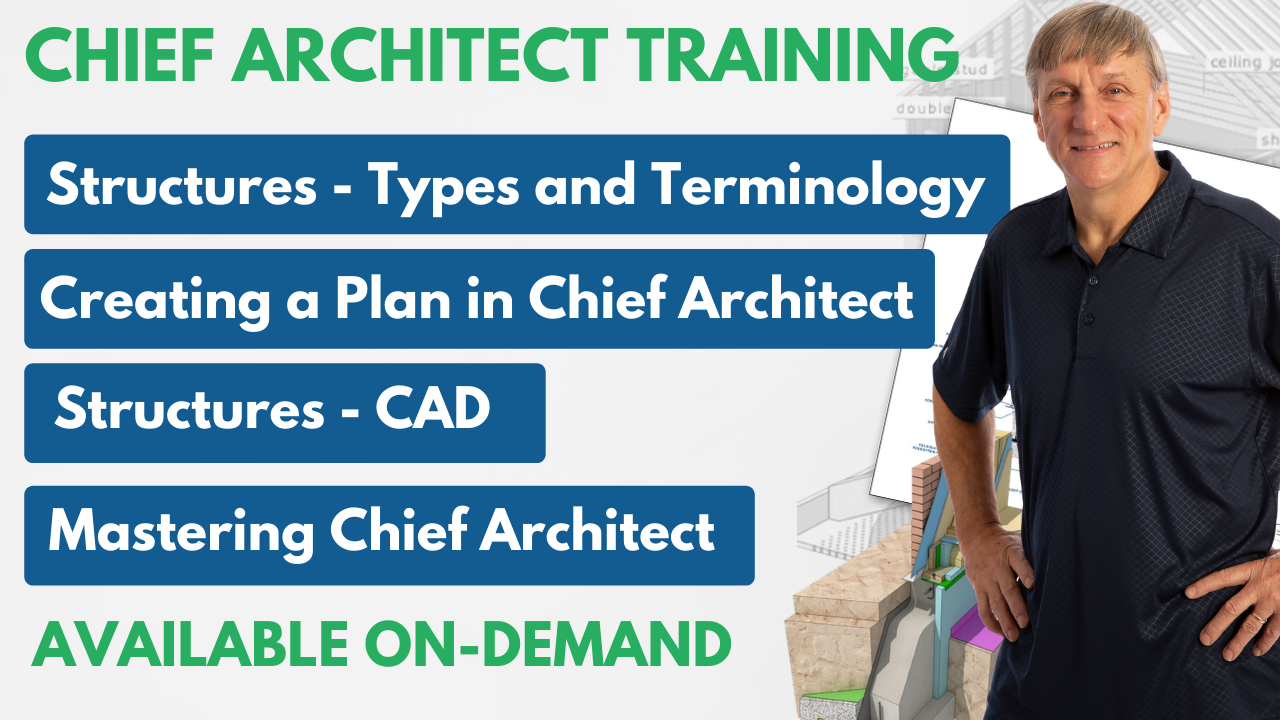
On-Demand Chief Architect Training
Don't Miss These New Courses With A Simple Goal: "Help You Become A Better Designer"
- Understand And Define The Structural Elements In Building Construction
- "Creating a Plan - Quick Start" course for Chief Architect users
- Define And Draw The Structural Elements In Your Projects
- Discover the Inner Workings of Chief Architect and What it Wants From You
Upcoming Events